APPROPRIATE TECHNOLOGIES FOR DEVELOPMENT
Peace Corps
INFORMATION COLLECTION & EXCHANGE
REPRINT NO. R-39
Peace Corps' Information Collection & Exchange (ICE) was established so that the strategies and technologies developed by Peace Corps Volunteers, their co-workers, and their counterparts could be made available to the wide range of development organizations and individual workers who might find them useful. Training guides, curricula, lesson plans, project reports, manuals and other Peace Corps-generated materials developed in the field are collected and reviewed. Some are reprinted "as is"; others provide a source of field based information for the production of manuals or for research in particular program areas. Materials that you submit to the Information Collection & Exchange thus become part of the Peace Corps' larger contribution to development.
Information about ICE publications and services is available through:
|
The Peace Corps Internet Web Site address: http://www.peacecorps.gov Please note the new Peace Corps Mailing Address from July 1998 on is: ICE/ Peace Corps 1111 20th Street N.W. Washington, DC 20526 USA |
Add your experience to the ICE Resource Center. Send materials that you've prepared so that we can share them with others working in the development field. Your technical insights serve as the basis for the generation of ICE manuals, reprints and resource packets, and also ensure that ICE is providing the most updated, innovative problem-solving techniques and information available to you and your fellow development workers.
Peace Corps
HOMEMAKING HANDBOOK
EXTENSION SERVICE
U.S. DEPARTMENT OF AGRICULTURE
IN COOPERATION WITH AGENCY FOR INTERNATIONAL DEVELOPMENT
PEACE CORPS
INFORMATION COLLECTION AND EXCHANGE
REPRINT R39
MARCH 1981
SEPTEMBER 1981
This handbook is a guide for the village level worker. It can also serve as a teaching aid and text to teachers of village level workers.
It is intended for use by personnel in home economics extension, community development, home economics classroom teaching, health education, and other programs involving home and family life.
The material in this handbook was obtained from many countries around the world, and many people contributed to it from their personal knowledge and experience.
We especially acknowledge the assistance of Sue Taylor Murry in compiling the contributions of authorities in several fields. Particular appreciation is due Jeannette Dean, Assistant State Home Economics Leader, Illinois Extension Service; and Margaret Power, Nutritionist.
Appreciation is also expressed to staff members of the Food and Agriculture Organization of the United Nations; the U.S. Department of Health, Education, and Welfare; the Agricultural Research Service and the Extension Service of the U.S. Department of Agriculture; the Agency for International Development; and other expert consultants.
Material was also adapted from the published works of the following authorities: Dr. Mary E. Keister, Research Associate in the Institute of Child and Family Development of the University of North Carolina at Greensboro, formerly Home Economics Officer, Food and Agriculture Organization of the United Nations, Rome; Elsa Haglund, formerly Home Economist with the Food and Agriculture Organization of the United Nations; Dr. Derrick B. Jelliffe, Director, Caribbean Food and Nutrition Institute, University of the West Indies, Jamaica; and Dr. Michael Latham, Professor of International Nutrition, Cornell University, Ithaca, New York, formerly Medical officer 1/c, Nutrition Unit, Ministry of Health, Dar-es-Salaam, Tanzania.
The Homemaking Handbook is a companion volume to Homemaking Around the World, which has been neither revised nor replaced. The principal purpose for printing Homemaking Around the World in 1958 was to help start home economics extension programs. It has been reprinted and is still available. However, the village level worker needs a publication such as this Homemaking Handbook for additional information on both home economics subject matter and methods of working with rural families.
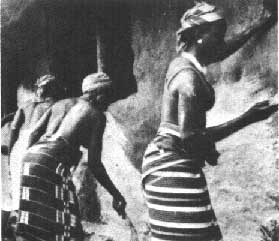
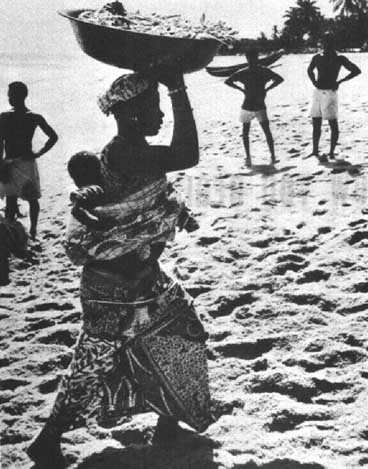
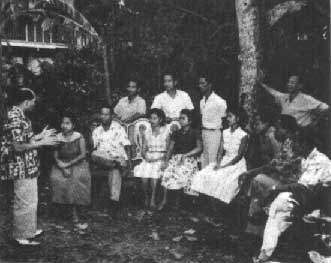
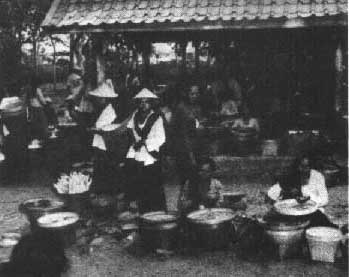
This Handbook was produced by the Extension Service in cooperation with the Office of Agriculture and Fisheries, Technical Assistance Bureau, Agency for International Development. Most of the photographs were taken in the field by AID, FAO, and UNICEF staff.
Helen A. Strow
Extension Specialist, International
Extension Service
U.S. Department of Agriculture
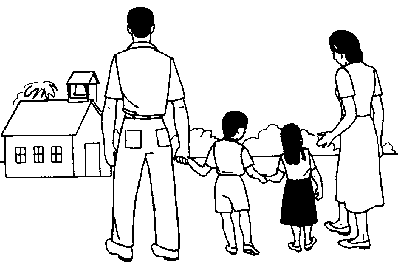
"If you educate a man, you educate an individual; if you educate a woman, you educate a family." This old proverb is still true today. A woman may not always attend a village meeting with her husband, but her influence goes with him. This influence can change a village.
Never before have social and economic changes affecting the home and family been so strong both in the smallest rural villages and in large cities. To prepare families to meet these changes, home economics programs are becoming an integral part of development plans in most countries. These include home economics teaching in schools and informal extension and community development programs.
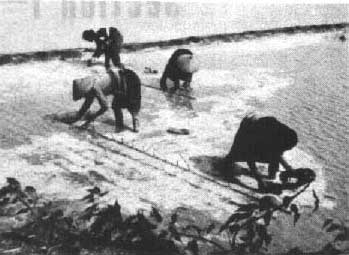
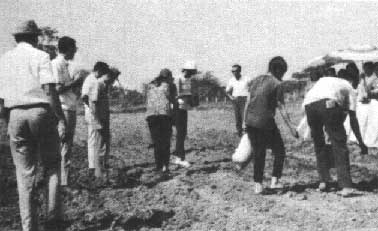
The homemaker's role in national development is often overlooked. Improved agricultural production is basic to both economic and social development and here the wives of farmers have great influence. In many countries, women do much work on the farm. In some countries, the all-important food crops are almost entirely the women's responsibility. Gardens, livestock, and chickens are usually under their care.
Women often market the farm crops and are the traders in the family. It is often the woman who is first willing to try improved farming methods. Her interest and attitude, plus her labor, help to determine what the production will be on a farm.
In the past, a housewife learned her homemaking skills from her mother. Each generation lived much like the preceding one. Now her job is bigger. Changing times make improved living conditions possible, and she wants better living for her family. She thinks of plenty of good food, improved housing, and better health for her family, better care and education for her children.
As families move from subsistence farming to a cash economy, they increasingly become consumers. As consumer goods become more plentiful and varied, women must manage money and make choices. They thus influence the growth and expansion of industries dealing with food, clothing, housing, furnishings, household equipment, and other products used in the home. With continued education, women increasingly demand more and better consumer goods.
Health, too, is an important factor in economic development. The woman is responsible for the health and well-being of her family. She determines whether or not the family lives in a clean house and practices sanitation. Whether her babies live or die depends upon the care she gives them. She plans and cooks the food to help her children grow strong. And she sees that they are taught to be honest and respect other people.
Governments are beginning to recognize that helping the family and the home helps the nation. They recognize that good homes, happy families, and educated children are basic to a great nation. They are becoming aware that village women are helping to build a firmer base for their country's progress.
The material in this handbook is drawn from many countries around the world. It applies to all countries that are developing programs to improve the homes, health, and family life of rural people.

Much of every nation's strength is in its rural citizens. Yet in many countries, rural people are still the greatest underdeveloped resource. Villages and the families who live in them make up a large and important part of your country too.
You are an important person. You work with village people. You bring ideas, knowledge, and encouragement. You help them learn how to make their lives better. You are their teacher and friend. In your hands lies much of their future.
You are creating an image of home economics that takes it beyond simple homemaking skills. You are helping to develop your country's most valuable resource-people.
You have been chosen for this important job because:
� You are dedicated to your work.
� You like, understand, and get along with village people.
� You make friends easily.
� You have a pleasing personality.
� You keep your promises.
� You are punctual.
� You are willing to work hard.
You will not be working alone. You are part of a team. The other members are those men and women, top officials and other workers like yourself, concerned with agriculture, health, education, and better living for the rural people of their country. All must work together. They must be dedicated to helping rural people.
The village people are on this team also. Without their cooperation and friendship, nothing can be accomplished. Change must take place in the minds and hearts of the village people themselves before it can be effective and lasting.
Things happen because somebody has an idea. Maybe a village leader has the idea. Or it may be a woman who finds a way to save time. Sometimes it will be an idea that you have "planted" in the minds of the people. Later they may think it was their idea. This is what you want them to think.
Your job is highly rewarding and carries great responsibility and challenge. Your feet may be weary at the end of each day, but you see the results of your work in healthier, happier children, better houses, green gardens along the roadside, sanitary wells, and village women who become leaders. You come back to your own house with gladness in you: heart. The smile on your face shows the inner joy you feel in helping other women.
"How is a home economics program started ? How do I begin my work and where?" Everyone who starts a new program asks these questions. This is natural.
Home economics programs have been successfully started in remote villages as well as in highly developed urban centers all over the world. The rule of first learning to know the people applies to starting a program in a village or in a larger area. The people include your co-workers and leaders as well as the people of the village or area.
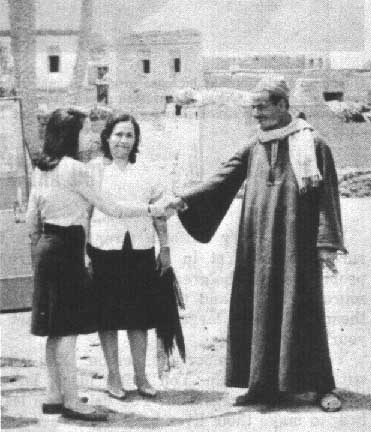
When you have completed your training and are ready for your first visit to the village where you are to work, you will already have some information and general ideas about the village. Your supervisor or a co-worker will most likely go with you and introduce you to the village chief and other village leaders. Others you will wish to meet are extension coworkers, community development workers, health personnel, religious leaders, school teachers, and shopkeepers, etc. Explain your work so these leaders will understand what a homemaking program is, why their village needs one, and how it can help solve some basic problems. Ask them about the village, its people, and their problems. In time you will gradually get answers to such questions as:
� How big is the village?
� How many families live there and how much distance does the village cover ?
� What is the average size of families ?
� How many children attend the village school?
� How much education do the adults have ?
What crops and livestock are grown ? Are they sold or raised for home use? What is the average family income ? What part do the women play in agriculture? For example, how much work do they do in the fields and with the animals ? Do they help market the crops and livestock? Are there small rural industries and crafts in the area through which the village people can add to their income ? What are they? How much time do women spend on difent chores such as getting water and fuel, planting crops, etc. ?
What are the road conditions leading in and out of the village? How do the village people get to town ? How do they get their farm products to market? Where do the people get their water? What are major health problems? What is the infant death rate?
What clubs or organizations are there in the village? What social and educational programs are being conducted by the government or by private agencies ? How much do the women take part? What is the illiteracy rate among women in your particular village? Most of the world's illiterates are women. In some countries, 80 to 90 percent of all women cannot read. What is the women's overall influence on matters of general concern to the village ? What problems do the leaders see as the most pressing and urgent for the village?
Showing keen interest in the people of the village and expressing your desire to work with them and their leaders can help you to be accepted in the village. You will learn much about the people as you begin to know and work with their leaders.
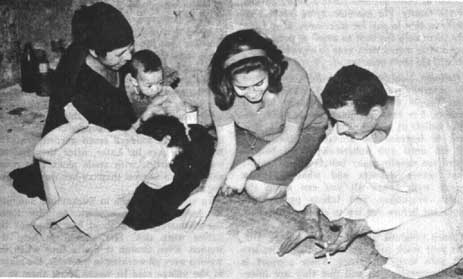
Generally, one of the official leaders will introduce you to village women and, if you are going to live in the village, help you find a place to live. Learn all you can about the people and the village before you start visiting the families themselves. Then you will be able to understand and appreciate their way of life.
"Before I go to a new village," says a young woman from Turkey, "I get some general ideas from the agricultural agent. For example, he will tell me much about the people, the crops they raise, and how interested they are in new ideas.
"The first thing I do when I visit the village is call on the village president. He takes me to call on his wife or arranges for me to visit her. I call on the teachers if there is a school and on the nurse if they have one. I tell them who I am, what my job is, and why I have come to the village. Then I ask them many questions. I ask the teacher about the children and their parents and I ask the nurse about the health of the people.
"I tell the president of the village that I want to visit some families because I want them to know me before I teach them. So then I visit families and I meet them as friends. They must love me and believe in me if I am to teach them. If there are 100 families in the village, I try to visit at least 15. I try to select homes that are different. I talk with the women about their own family needs and problems and I observe, too. I try to learn, for example:
� How many rooms are in most houses
� How many are used for sleeping
� How many people are in the family
� Where the kitchens are located
� How the cooking is done
� What kind of fuel is used
� If there is a toilet
� Where it is located
� What kind of furniture the family has
� If they have chickens or animals
� What foods they grow for their own use
� What methods they use to preserve food
� What their basic diet is
� How often they eat
� Where the family gets water
� If the house has electricity
� What they think are their chief health problems
� How many of their children have died and at what age
It is important that I learn which of the women in the village are leaders. Each night when I go back to my office, I record what I have observed."
A Greek village worker says that on her visit to get acquainted, "After I have talked to the mayor of the village, I walk to the village well. I always find women there drawing water and can chat with them while I help them draw the water. This way I find out what is happening in the village before I start on my round of individual visits."
A new worker in a village in Laos stopped by a woman weaving a beautiful piece of silk on a crude loom. She asked the woman to show her how she developed the pattern. Soon the woman went inside her house and brought out all her pieces of woven silk. As the village worker expressed sincere admiration for the woman's handiwork, a bond of mutual respect was developing. As women come to know and trust you, they will begin to talk about their problems and the things they feel they need.
It takes time to get to know people. Remember, you are a stranger. They must get to know you well. If you do not live in the village, you may have to visit it many times before the villagers learn to trust you.
In some countries, the central government may be in fairly close touch with its citizens and effective in teaching new ideas and starting social change. In others, people view government as nothing but a policeman or tax-collecting agency that gives little in return. As a result, they may be suspicious of government programs, including the homemaking program. Through your own dedication and faithful work, you can help build confidence in government programs where such confidence is lacking.
In some villages, the people are not used to having strangers, particularly women, coming to work. They may not trust you. You will have to answer many questions about yourself such as, "Are you married? How many children do you have ?", etc. Be sure to answer questions so they know you are the kind of person they want to have working in their village with them.
To work effectively with the people, you will need to know how they think. You may find customs and practices in the village where you work very strange and different from those where you grew up. There are many things you will need to study and understand.
Learning how to interpret what you hear and see is important. Many mistakes are made by judging a situation too quickly. This is a good time to be looking for good practices that you can later use as examples.
Beginning with your first visits to a village, use some kind of form to record your observations. Select a few things to observe at a time. Do not try to learn everything at once.
Suppose you want to learn about the foods people grow for themselves. Do they have a garden? What vegetables are in it? What food crops do they grow in the field? Make a simple chart on which you can write down what you learn at each home. A garden observation form might be like the one at the end of this chapter.
After you visit the family, see their garden, and talk with them about their foods, fill in your form. Do not fill it in while you are with the family. Wait until you have left the village. Filling in a form or writing things down can make the family suspicious and more reluctant to give you information.
As you learn about the people and the village, you begin to see what changes the people should make to have a better living. But what changes do they wish to make? What are their greatest problems ? What problems do they recognize ?
You may see children who do not have enough food to eat, babies who are sick, houses that are not clean, flies and mosquitoes everywhere, women carrying water from the river because the village has no well, and many other problems and things that need to be done. You want to help the people solve such problems as these. But they may not even recognize some of these as problems because they have always lived with them.
Part of your job as a village worker is to help people recognize these bad conditions as problems and create a desire to change. Often when people seem not to care or want to improve, it is not because they are lazy or shiftless, but rather because of poor health, little or no income, lack of hope, or lack of knowledge.
Your work is education outside of school. Education is a change in attitudes, knowledge, and skills. Children go to school because their parents send them or because laws require children to attend school. Out-of-school or informal education is voluntary. People come to meetings only when they want to come. They learn only when they have a reason to learn. They change only when they desire to change The way you work with people is very important in making them want to change.
Often it is more important to change the way people think about what they do than to change what they do. They must know why certain things are problems. For example, they should know that polluted water causes illness.
They need to know how to change the bad conditions. For example, they will need to know how to get a safe water supply for the village, how to dig a well, how to install a pump, etc. As they learn, their skills will improve.
Here are some principles of working with people to help them bring about change:
1. Find out why village people do things the way they do and work within the culture of the village.
It is important to observe and try to learn why people do things the way they do before suggesting changes. There may be good reasons behind them, or there may be superstitions or traditions that make people resist changes. You are better able to help people change if you know why they don't want to.
The members of every society have certain practices and beliefs which they consider the most important and valuable things in life. These values have been safeguarded and carried through generations. They cannot be ignored.
The values in one village may differ greatly from those of another. For example, what other people do or think is so very important in some villages that a woman will hesitate to make a change unless it is accepted by all. She may say, "I like what you say, but the people in the village are against this change and I cannot go against the village." In other villages, individual initiative is important and a person feels free to act on his own judgment.
The customs village people have followed for many generations often direct what is done at the time of marriage, birth, death, sickness, and many other times. Find out what these are so you will not offend the villagers accidentally by doing the wrong thing.
Some of these customs make a heavy burden for the family. For example, some families go deeply in debt to pay for marriages. If you can help them keep the debt as small as possible or save a little money each year to be ready for it, you will aid them greatly.
Religion, local beliefs, prejudices, and taboos are generally very strong and greatly affect what people do and their attitudes toward changes. For example, many people have religious beliefs or taboos about eating meat. It is hard to increase the amount of meat people eat until you understand these beliefs. There are usually many beliefs about health: what causes sickness and what makes a person well. Learn all you can about the beliefs, prejudices, and taboos people hold important before you try to change their habits.
Learn religious customs in the village. Discuss your work with the local religious leaders and gain their confidence. Their support is very important. You will find they are interested in more than the spiritual needs of the village. They would like to see people have better homes and better health. They will understand your job.
2. Respect village people and treat them as equals.
Gain their confidence. Remember, natural intelligence is as plentiful among rural people as among any other group. Education or lack of it is no measure of ability.
Village people have as much practical good sense and good judgment as other people. They have many skills. They have practical experience. They have moral strength. They have much to teach you as well as to learn from you. Listen to them. Be interested in what they want to show you.
People will ask you many questions. You cannot possibly know all the answers. Learn to say, "I don't know, but I will find out and let you know." Then be sure to do it. Village people do not respect or trust a person who pretends to know, but they are willing to wait for you to get the answer. When you make a promise, you must keep it. The people must trust you to like you.
3. Start where the people are with problems they recognize.
In certain isolated areas of Puerto Rico, it has long been the custom to scatter a few vegetable seeds about the area near the house. A wise home economist trying to help these people improve their diets did not start by suggesting a well-fenced garden with neat rows of vegetables. She showed them how to plant one whole row of a yellow vegetable they liked so they would have a good supply of this vegetable. She then made a small garden near the house she lives in. Later, after they had all seen her garden with seeds planted in rows, she began to suggest they try her way of growing vegetables.
In visiting a village in Turkey one summer, the home economics extension worker found the villagers talking about how many of the babies were sick. She offered to help the women. Even though it was a time when the women were all working in the fields, the mayor of the village said he would bring them in to attend a meeting if the worker would teach the women how to keep the babies from getting sick.
In another village the women wanted to learn to read and write, and the village worker agreed to teach them. However, she also saw the great need for improving diets and sanitation. So, as she taught them to read and write, she made sure that the first sentences they learned were on cleanliness and nutritious foods.
Women may ask you to teach them to knit or embroider. You may think they should first learn how to feed the family better, or be interested in getting a well for the village. However, while they learn to knit, you can talk about the things all women talk about when they are together-what to cook for the evening meal, why the baby cries so much, the price of rice in the market, the husband who cannot do very much work because he tires easily, the little boy who wants to go to school but can't because there is no money to buy clothes for him. You can also demonstrate improved practices they need to learn, for example, how to make a simple clothes closet. By teaching them both what they want to learn and what they need to learn, you can help them see larger problems.
Learn all you can about each problem. Talk to the people, visit in their homes, and discuss things with their leaders to collect information about the village and its problems. Some of the things needed will take more money, materials, and know-how than the people now have. Get as much information and as many facts as you can so you will be ready to help the people when you and they start planning what to do.
Plan WITH the people and not FOR them. Remember, the village belongs to the people and they must help decide what to do. Do not talk about what you think are their most pressing problems. Let them tell you what they need and want. Begin with these.
Only when the people themselves help to plan and carry out a program will they feel it is theirs. Work with them so that whatever is planned or done becomes a part of their thinking. As the ideas you plant in their minds grow, people begin to think of them as their own and want to do something about them.
People who study their own problems and help to work out solutions are much more likely to help carry out the program. Even in the least developed communities, letting the people share in planning and doing helps them build confidence in themselves and be proud of their own accomplishments. It helps to develop leadership. When the people help at each step, a program has a much better chance to succeed.
4. Help people see the need to change.
Village people have lived the way they do for hundreds of years. They may not even recognize some of their problems as problems because they have always lived with them. They often continue this way because no one has shown them a better way.
Part of your job is to help them recognize their problems and get them to want to solve them.
For example, they may have always lived in houses without windows, and they feel no need for them. It may take time to persuade them that they would be healthier if the sun could enter their houses each day and the air circulate at night as they sleep. It may take time to get them to want windows enough to get them. A well-planned group discussion is one of the best ways to start people thinking about their larger and more important problems.
5. Help people help themselves.
It is often easier to say "I'll do it for you", but this does not help people gain confidence in themselves. When the women in an Indian village wanted their village worker to buy cloth for them, she said, "Which one of you can go to the bazaar with me ? I will be glad to go along and help you, but you must make the selection." This took longer but it helped the women learn and grow. Only by participating can people practice their own skills and abilities so they are able to make responsible decisions.
In another village, the women had seen the smokeless stove the village worker had in her house and began to want one like it. She told them what they would need to make it and where to get the materials. Then she said, "I will show you how to build the stove and help you build the first one. Everyone can help build it and then you will all know how to build your own stoves."
People working together turn an idea into action and achievement. The village leaders know that they need a well, and you know it. You know that a well costs a lot of money. The people in the village must want a well so much that they will work together to get it.
6. Find leaders in the village and help them to be teachers too.
By finding and training leaders to teach their neighbors what they have learned, you will give many people a chance to learn in a short time. Developing people is your main objective. Discovering the people who will accept responsibility and serve as leaders in the village program is one of the best ways to help them prepare for larger leadership roles. When you, the people, and their leaders all decide exactly what is needed or wanted, it becomes a goal to work for. Be sure it is something they can actually carry out so they will not be disappointed.
7. Work with the whole family.
Often parents can be reached through the children. Both boys and girls in the family need to learn many of the same things their mothers are taught. The husband is interested in better living for his family. His understanding and cooperation in the homemaking program can mean much toward its success.
Families differ greatly in different societies. In some villages, families are patriarchal. The man is head of the household and makes the decisions. Women may have little or no status there. This may affect the respect for your opinions and your work. In other societies, families may be strongly matriarchal with the mother or grandmother having more influence than the men. The status of the family or individuals within the family may be based on wealth, ownership of land, education, age, or some other standard.
How do families live ? This includes their diets, housing, work, habits, family relationships, and economic situation. Find out if any special studies or surveys of family living conditions have been made which you might add to your own observations.
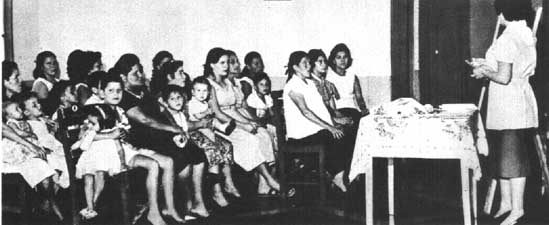
8. Use many different methods of teaching and reaching people.
Research has shown that using nine or ten different methods in carrying out a project brings better results than using only one or two methods.
One good way to inspire and teach is by example. Many people will watch you and the way you live. They will see and respect your simple dress, your pride in your work, and your willingness to help others. Your house is the same type as theirs, but it is clean and attractive. It teaches more than any words you can say. If you store your food on shelves and in containers, the women will be quick to see and do the same thing. They will watch to see what you eat and how you cook it.
Modern methods of communication now reach even remote villages in many countries. You may find people listening to radios. Some agency may be using mobile units with loudspeakers to get information to the people.
Besides these, however, every society has another system of communication. Women talk together as they work in the field, do their washing, or come to the well for water. Men talk as they gather in coffee houses or market places. Information is passed from person to person at funerals, fairs, and religious festivals. News may be posted on bulletin boards or a village writer or storyteller may pass it along. Learn how news and information is best communicated in each village where you work. Know the customs and purposes of social gatherings, how much families visit each other's homes, and what the social groupings are in the village.
|
Name of Family ____ |
Date Visited_____ |
|
|
Do they have a garden? |
YES__ |
NO__ |
|
If so, where is it located?____ |
||
|
About what size?____ |
||
|
How is it watered? ____ |
||
|
Is compost used? |
YES __ |
NO__ |
|
Is commercial fertilizer used? |
YES__ |
NO__ |
|
Is garden well cultivated? |
YES__ |
NO__ |
|
Vegetables growing: |
Beans __ |
Carrots__ |
|
Tomatoes__ |
Okra__ |
|
|
Spinach__ |
Cabbage__ |
|
|
Lettuce__ |
Corn__ |
|
|
Others__ |
||
|
Food crops for family use growing in field: |
Cereal Grains__ |
Root crops__ |
|
Rice__ |
Yams__ |
|
|
Wheat__ |
Cassava__ |
|
|
Corn__ |
Others__ |
|
|
Others__ |
||
How many times have you said, "I need your help. I need your support!" No matter what we do or where we are, we need the help and support of those around us.
A homemaking program needs the support of many different people. As a village worker, what you are trying to do must be understood both by those who provide the funds and by every family with whom you work. It must also be understood by religious, educational, and business leaders.
You must constantly explain the need for a home economics program if it is to succeed in improving the living conditions of the people. Even where homemaking or home economics programs have existed a long time, many people still do not understand the scope of a program dealing with the home and the family. Some think homemaking, mothercraft, or home economics programs involve only simple skills in cooking, sewing, laundry, and housecleaning. Others think of them in terms of frills and fancy work. You are the one who must make the true meaning clear.
The home economics program needs to show results people can see. Because many people do not understand what home economics is or how it helps families, try to get village women interested in projects that show results. These include growing a garden, improving the poultry flock, making a smokeless stove, or carrying out a "healthy baby" campaign. Progress like this catches attention and helps to convince people of the value of your work. When people can see and hear about actual changes and improvement families are making, they will recognize the special kind of assistance home economics offers for bettering home living and village life.
You need the enthusiastic and active support of influential people. This means more than just approval. Top government officials must see the need for educating girls and women to become better mothers and homemakers. They must know about the program, be willing to talk about it, and provide money for this purpose.
When a national official takes part in a special homemaking program out in a small village, he not only does something for the people in the village, but the experience does something for him! After participating, he is more likely to give the program the kind of active and enthusiastic support you need.
Korea Reports
An Achievement Day held in a village near Seoul was a most successful effort in winning national support for home economics work in Korea.
Specialists from the national extension staff had helped the local village worker teach several families how to improve their kitchens. This included building new stoves, getting a safe water supply, adding dish storage, and whitewashing walls. The recognition event was well publicized. The Minister of Agriculture and several members of the National Assembly were invited and came. The Extension Director and several home agents from each province also attended so they could duplicate the event in their own provinces the following year.
The program began with a showing of men's and women's improved work clothes and children's play clothes. After the usual courtesy speeches, the officials toured homes where the kitchen improvements had been made. The small children of the village demonstrated the games they had learned in their community play school sponsored by the village home improvement club.
This was a most successful event. The National Assembly voted to double the number of home agents and provide two demonstration villages in each district.
From Kenya
After the Deputy Director of Agriculture visited another country and observed their Department of Agriculture's program for farm women, he enthusiastically requested a home economics adviser to help start and develop a home economics program in Kenya.
In Kenya, the farm woman is also a farmer. Women extension workers were accepted at once because they were trained in agriculture as well as home economics. They came into the Ministry of Agriculture as dual-purpose field workers. The addition of women was gradual and they were readily accepted at the national, provincial, and village levels.
An interesting and encouraging reaction is the keen interest taken by the men. In 1965, 578 out of 3,000 home economics demonstrations and classes conducted at the 12 farmer training centers were for men.
Provincial administrators and leaders are closer to the people than leaders at the national level. Therefore, they often feel keener interest in them and greater pride in their accomplishments. They may not control the money, but the kind and amount of support you get at the provincial level can mean the difference between success and failure. Help these leaders and officials know and understand your program. Get them into the village to see for themselves the results of your work. Have them participate at meetings and homemaking events in your area.
The village program needs to fit into the government's goals for the country and for agriculture. For example. if the national government is trying to get all farm families to produce enough food to feed themselves, you can help village people see this need and interest them in producing food for their own use.
The people you work with must believe in you and think of you as their friend. They must feel you need them to help plan and carry out a program for their benefit. You do. Without their support you cannot carry out a program.
The headman or chief of a village must have confidence in you. He must fully understand what you do. In many places, the headman feels great responsibility for the welfare of his village. Convince him you are working with him to reach his goals for the people.
There are other people of influence in the village - the religious leader, the teacher, and the natural leaders that others go to for help or advice. It is important to win support from all these people. They can and will help you in many ways if they like you, believe in you, and feel that you really want to help them. Give them a chance!
One of the best ways to get support from any person is to ask him or her to take some responsibility or do something, even if it is only a small deed. Involve leaders in collecting facts and studying problems. Women in high positions will often help analyze basic problems concerning the family and suggest possible solutions. At every level, you need people who are willing to give their time and work to help further the program.
Many influential people in towns and cities are willing to support a rural homemaking program. They can often bring such national problems as rural sanitation, rural housing, infant mortality, etc., to the attention of national and provincial officials. They need to know what is being done about such problems and what they can do to interest government ministries in them. Business men and women such as bankers, merchants, and heads of organizations can help tremendously if you get them interested.
Your Co-Workers
At whatever level you work, you need the support of those who work with you. The mutual support, mutual respect, and mutual assistance that agricultural and home economics extension workers give each other is one reason for their success. Your co-workers can be your strongest allies. Cultivate them!
Other Agencies and Organizations
Every country has government and private agencies and organizations concerned with rural welfare. The problems and opportunities in rural areas are interwoven and inseparable. Programs concerned with them often overlap.
If the groups trying to solve these problems work together, sharing help and resources, avoiding duplication, and lessening competition, the program of each can develop. The support you win from other agencies and organizations strengthens your program. There is more than enough for all to do.
Programs dealing with the home and family differ from country to country in the way they are organized and operate. They are even given different names such as home economics, home science, homemaking, home craft, mothercraft, etc. But they all are trying to improve home and family life and develop people.
In many countries, the Ministry or Department of Agriculture conducts a home economics program as a part of the Agricultural Extension Service. The Ministry of Education generally includes home economics in its school program and may also provide home economics education for adults. In some countries, the Ministry of Social Affairs conducts community development programs. Part of this is work with the family and home. Many home economics programs are also supported and carried out by business organizations and other private groups. Other agencies such as Public Health, Literacy, Social Welfare, etc., are concerned with certain phases of family welfare.
No matter which agency you may be working in, you should know about all such programs that are operating in your area and work with them. Such cooperation can be of mutual advantage. They can help you and you can show them the special kind of assistance home economics offers in helping families improve their living conditions and develop into more useful citizens.
Agricultural development is concerned not only with increasing and improving the production of crops and livestock, but also with developing rural families and improving rural living conditions. Agriculture and rural home economics are a joint program in many areas. The problems of rural living are so closely tied to agriculture that these two fields of education are natural "partners." Often local men and women extension workers have their offices together or near each other and work successfully as a team.
A constant exchange of knowledge, information, and ideas between agricultural and home economics workers can bring swifter progress in both fields. The Ministry of Agriculture is concerned with many phases of home living. For instance, specialists in horticulture, poultry, dairying, etc., can render valuable assistance to a home food program. Some ministries have agricultural schools which are important resources in home economics work.
In most countries, very few improved agricultural measures are completely within either the husband or wife's sphere of work. Most improvements recommended by both agricultural and home economics workers require the full acceptance of both husband and wife before they can be adopted.
The homemaker's influence operates in many of the agricultural programs introduced to villages For example, land consolidation might, at first, seem strictly to concern the men of the village. They settle all the arrangements and what is done would seem to rest solely with them. But experience has proven otherwise. Often farmers are opposed to consolidation. But if the women are convinced of its benefits to their families, they may very well get their husbands to make this change.
One big need of many village families is fair and reasonable credit. Many families are never free of debt because interest rates are so high they cannot hope to pay back the amount they borrow. In some areas, many rural families are almost the slaves of money lenders. You can help them find the agencies that will lend money to buy land, implements, animals, fertilizer, and seed at fair interest rates. In some places, these credit agencies also lend money for home improvements. In an agricultural credit program, the homemaker must understand the use of credit so she will cooperate in repaying the loan.
In some villages, the people will be very much interested in cooperatives of various kinds. Women are often active members of cooperatives that sell homemade products such as craft articles, fresh vegetables, flowers, and home-baked or preserved foods. They may also set up their own cooperatives. Agricultural cooperatives in many places supply seed and fertilizer. They might also provide the seeds needed for a garden project or the supplies needed in a home improvement program.
Learn about the cooperatives in your area and how they function so that you can better inform families and help them make the best use of the advantages cooperatives offer.
Most villages need more and better schools. In some countries boys are sent to school, but girls must stay home and work. Both need education. Many families now are anxious to have schools in their villages so all children can attend. Work with parents and village officials for better schools.
You should also work with village school teachers. They know the children, their parents, and the village leaders. The teacher can help you with many projects by having the children take part in them. The success of the youth work part of your homemaking program will depend in large measure upon the cooperation you get from schools. School garden projects, for example, offer a fine basis of cooperative effort.
Classroom teachers often seek your help in teaching home economics subjects such as nutrition, child care, clothing, etc. Close working relationships will benefit both of you. There are many opportunities for such cooperation. It is specially important to work with any home economics teachers in schools in your area. You should have a common understanding of families' needs and the best ways to meet them.
Working with universities and other educational institutions offering home economics is equally important. You can tell these teachers and trainers about family needs and problems, and keep them aware of the type of training needed by the young women who will be going into extension and other homemaking programs in rural areas. You may help them set up inservice training program where you and other working home economists can go for refresher training.
Here's a good example. Officials of agriculture and education in the Western Province of Kenya cooperatively planned a week's training in home economics extension for school teachers at the Bukura farmer training center. The course was planned and conducted by the two home extension workers. It was intended to help teachers strengthen their teaching of nutrition, cookery, child care, and the production of food for home use. Special emphasis was placed on nutrition and vegetable planting in connection with the school garden program. In addition, these four training sessions served to strengthen the cooperative ties between the agricultural and educational programs in the province.
The need for home economics research is gaining recognition as homemaking programs develop. Countries are recognizing that, without research, it is difficult to have a sound homemaking program based on facts.
In some countries, surveys have been undertaken on family living problems. Some countries have nutrition institutes carrying out important research. In others, agricultural institutes study certain problems affecting family living. Some college and university home economics departments have begun research activities. Much basic research is helpful to any country regardless of where it is done-such as information on pasteurization, food preservation methods, simple health practices, housing, dietary patterns, etc.
In addition to using research information in your work, you may also be able to tell researchers about practical problems in your area that need answers. Rural home economists are in a position to know the most pressing needs of rural families and how practical research can help meet these needs.
A major part of rural homemaking work has health implications. The activities of public health doctors, nurses, sanitarians, and other health workers all touch home and family life. Extension and community development workers, homemaking teachers, and public health workers are finding new ways to work together.
Often, you may begin your work in a village by visiting the nurse to talk over family health problems, or by attending health clinics to talk with the mothers there. Nurses receive much help by attending special training given to home economics workers, particularly in the field of nutrition. You benefit by attending health classes in baby care, first aid, or home care of the sick.
In some areas, the rural sanitarian promotes the building of approved latrines or water supplies and the home economist provides much of the educational follow-up needed to make the program successful. Close coordination with all public health work in rural areas is of great importance in your homemaking programs.
Many countries have an institute of nutrition. Because poor nutrition is often one of a country's major problems, governments provide these special facilities with well-trained personnel to conduct nutrition research, give training, and develop educational materials for nutritionists, dietitians, home economists, and others whose program includes nutrition. If there is a nutrition institute in your country, you should know about its work and find out how you can use its resources to do a better job in your own nutrition work with families.
In some countries, community development projects are administered by the Ministry of Social Affairs or Public Welfare, and homemaking education is carried on through this ministry. Even if homemaking programs are not a direct part of this ministry, it still has many resources that can help you. Generally these ministries have specialists in community or group organization, case work techniques, and other fields who can help train local home economics workers.
Often home economists and social workers deal with the same families. They need to work very closely together for the good of the people and their programs.
Literacy classes provide a good opportunity for you to know the people better and influence their progress toward improved living. As adults learn to read, they can also learn to be better farmers and better homemakers. If their reading material deals with everyday problems and contains information on simple improved practices for the farm and home, adults are likely to be more interested. This can help them learn faster and understand better. You may have the chance to help prepare reading material on homemaking and to teach the class on occasion.
Many important international agencies have programs closely related to the home and the family. You will want to know about these agencies and learn the services they offer in your particular area. They have much material and helpful information because they operate in many different countries and have broad experience to draw upon.
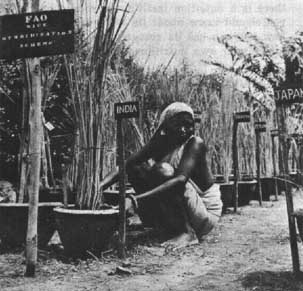
The Food and Agriculture Organization of the United. Nations has very active and excellent nutrition and home economics programs, as well as agricultural programs.
UNICEF is largely concerned with work with children and mothers. It carries on educational work and provides medicines, foods, and other important things.
The World Health Organization is concerned with national and regional problems of health. Trained staff in many countries help governments conduct research and carry out effective health measures.
Foundations such as the Ford Foundation and the Rockefeller Foundation, conduct health programs. In some countries, foundations support home economics programs in colleges and schools and, in addition, employ home economists to lead adult homemaking programs.
Find out which of these have programs in your area. They are excellent resources for certain kinds of help you may need in your work. Agencies and organizations concerned with the family can contribute greatly to improving village life. If you and these workers know each other well and work together, the people you serve will benefit. In this way, you can help the people in the village make the best use of all resources available to them.
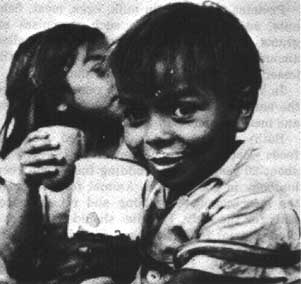
No one likes to be hungry. Food not only keeps us from being hungry, it helps us to grow, feel well, and be happy. But many people are hungry, unhappy, and sick because they do not have enough or the right kinds of food. Often they do not know this.
Ask yourself what connection there is between the health problems of the village people, the food they eat, and their food habits and customs. On page 31 are several health problems which may have something to do with food and nutrition. You can use them to start discussion about problems in your area.
Before you attempt to improve the nutrition of the village people, you must be able to recognize food and nutrition problems in your area.
Here are additional questions to help you learn more about food problems and eating practices:
� What foods do the people mostly live on? What is their basic diet? Could it be better ?
� What vegetables, grains, and root crops do they grow for home use ?
� Do they produce any meat, milk, or eggs for the family to eat? If so, how much? Can they produce enough for their family needs ? What do they need to produce more ?
� What foods do they buy?
� How do agricultural practices in the area affect their diets?
� What are some of the foods that people believe are harmful, unclean, or sacred ?
� What symptoms of poor nutrition have you observed among children in the village ? Among adults ?
� How long do mothers nurse their babies?
� At what age are weaning foods given to the baby?
� What foods besides breast milk are given to the infant when he is 8 months old?
� How many young children, when they are no longer breast fed, die each year?
� Do the people know that some of their health problems may come from not having enough of the right kinds of food?
One of your most important jobs is to help people understand that what they eat affects their health. You will also teach them what they can do to have better food, better health, and therefore, a better life.
|
If |
Talk About |
|
1. An infant is sickly and cries a lot because he is hungry, and the mother thinks she does not have enough breast milk. |
� What mothers eat during their pregnancy and also while they are breast feeding the baby. � What foods besides breast milk he was given before he was weaned. |
|
2. After weaning, the child loses weight, has diarrhea, and gets a "pot belly". |
� What foods he is fed now. � How foods are prepared for babies and young children. � What sanitation practices are used. |
|
It is important for you to teach mothers that by the time a child is 8 months old he needs solid foods as well as milk. The solid foods that are given to the child should include eggs, |
meat, cereals, vegetables, and fruits. These are the foods that will help the child grow strong and happy. It is important for the nursing mother to eat these foods too. |
|
3. After a child starts to school, he does poorly in his studies and does not want to play because he is always tired. |
� Whether the child is fed in the morning before he starts off to school. � Whether he has a midday meal or must wait to eat until he gets home after school. � Whether he is perhaps too tired to make the effort. |
|
Children need to eat often. They need three good meals every day. In between these three meals they may want extra food. At these |
times a mother should give them fruits or vegetables to eat instead of sweets. |
|
4. People lack the energy to work hard and they tire easily. They are often cross and irritable. You often see people with rough, dull skin and sores that heal slowly. |
� The kinds of staple foods the people eat. Are they starchy plants only or do they also use cereal grains ? � How much meat, fish, eggs, milk, cheese, and pulses they eat. � How often are vegetables and fruits eaten. � How much water is used in cooking, then thrown away. � Whether foods are stored a long time and in such a way that they do not keep well. � Do they have variety in their diet ? |
|
5. People run out of their own home-produced food before the next harvest. |
� What foods they grow for their own family use. � Whether they plan to grow their food needs for the entire year. � How they store their food. � How much is destroyed by rats and insects and by rotting. � Whether they grow and store enough to last if they didn't lose any of it. |
Samuel and Mary lived in a village many miles from the city. They had 8 acres of ground. Two of these were not cleared. The land was quite fertile. They grew maize, cassava, and a few beans. During the rainy season, they collected greens. They had a banana tree and a coconut tree. They kept a few chickens which scratched the earth around the house for their food. Mary sometimes fed them bits of leftover food and the coconut leavings.
Life was easy. The crops grew and they usually had enough food. Sometimes, near the very beginning of a growing season, they would run out of maize. Then Samuel would sell the beans so they could buy maize to last until the harvest. They always had cassava because it was so easy to grow and store.
Samuel and Mary had two children. Peter was 8 years old. Rosa was 3. Peter went to a school 2 miles away. He walked both ways every day. Sometimes he was sick. Then he stayed home.
One day the teacher asked Samuel and Mary to come to a meeting at the school so they could talk about the health of their children and how they were getting along in school. She also asked Miss Ramero, the village Extension worker, to come and help with the meeting. The day of the meeting, Samuel and Mary walked to the school with Rosa and Peter. They found other parents there, too. Many of them were neighbors and friends.
The teacher talked about how the children were doing in school. She said many of them seemed too tired to do good work. It was hard for them to learn because they sometimes fell asleep and they did not seem to want to think about their school work. Many were often absent because they were sick and got behind in their work.
Miss Ramero then explained that children need not be sick so often. They should be lively and interested in all that goes on about them. They should not tire so easily, and fall asleep. Miss Ramero thought many of these children were not healthy. They were not growing and learning as much as they would if they were healthy. This could be because they were not getting the kind of food they needed for good health. This was a surprise to Samuel and Mary. They thought some children, like Peter, were naturally sleepy much of the time and often sick. They thought he would grow out of it.
The parents talked about their younger children too. Rosa was irritable and cried a lot. She often had stomach upsets and sores on her legs which took a long time to heal. Was she as healthy as she should be? Then they talked about how many babies in the village died each year and how many had stomachs that were too big. Mary said she herself felt tired much of the time and that she had lost two babies. She asked what could be done. She wanted her children to grow well and be healthy and strong. Samuel said he did not like to spend money on school fees if his son was not learning. He suggested having another meeting.
Peter's teacher said she would arrange for the local health officer and the village Extension worker to come to another parents' meeting the following Saturday to talk more about the children's health.
This story shows how parents were helped to become aware of some of the food and health problems of their children. There are probably similar problems in the area in which you work. These problems could be directly related to the food that is produced and used there.
Your government, like many others around the world. has plans for national growth and development. Governments are greatly concerned about food and nutrition because they know that underfed people cannot do the work necessary to develop a country. Poorly fed people are often sick. Then they require government help, instead of supporting themselves and adding to the country's economic growth.
Good food does not cure or prevent all diseases, but all of us need good food for good health, both physical and mental.
A serious food situation exists in the world today. Many countries already have more people than they can feed, and populations are growing. In some countries, distribution is a problem. By the year 2000 A.D., there will be twice as many people in the world as there are now. Unless more food is grown, distributed, and wisely used there will be more and more hunger and even starvation.
The problem is not only a lack of food but a lack of knowledge about nutrition. This means food in the amount and of the kind needed to develop a strong healthy body, keep it well, and provide energy for work and play. Your responsibility is to bring food and nutrition knowledge to village people so they can improve their own situation. The problem will be solved in the home and on the farm. In today's world, probably no field of knowledge has more to contribute to the betterment of life than food and nutrition.
A village food and nutrition program should teach:
� what foods the body needs and why
� the special food needs of various family members
� home production, preservation, and storage of a year-round supply of good food
� how to buy what cannot be produced
� how to prepare foods so the quality is not wasted.
This chapter includes basic principles of good nutrition and how to teach them. It will deal mostly with what every mother should know about feeding her children.
Find out what your country is doing about its food and nutrition situation. By knowing what various agencies and ministries are trying to accomplish, you can apply their specific recommendations to the information in this chapter.
Ask the Agriculture Department or Ministry:
1. What the long range plans for agricultural development are in your country.
2. What plans the ministry has to improve the food and nutrition resources of your country.
3. What food crops are recommended in your area, what cash crops.
4. What animals and poultry could be grown for home use.
5. If the ministry has a list of publications you could get to help you learn about food production, including gardens, crops, and livestock.
Ask the Ministry of Health, the Nutrition Institute, or University Department of Home Economics:
1. If nutritional surveys are being carried out in your country. If so, have any been completed ?
2. What recommendations they can give you on improving the nutritional health of people in your area.
3 If they have health education material which would help you teach about nutrition.
Your local agricultural or health worker may also be able to answer some questions. You will find many sources to help you work on food and nutrition. You will also want to learn about the many organizations that help countries improve their food and nutrition situation. These include United Nations organizations such as the Food and Agriculture Organization (FAO), the World Health Organization (WHO), and the United Nations Children's Fund (UNICEF), Freedom from Hunger, Food for Peace, and the Agency for International Development (AID).

Nutrition is the food you eat and how your body uses it. Good food practices lead to good nutrition. When people do not have enough food, they are called undernourished. When they do not have the right kind of food, they are called malnourished.
Food is the material out of which our bodies are built. We eat food to live, to grow, to stay healthy, and to get energy for work and play. Food gives us a sense of security. Even our attitude toward life is influenced by the food we eat.
For good nutrition the body needs more than a full stomach. It needs different kinds of food for building and full growth and repair, for protection against disease, and for energy. Without a good variety of foods, the body will not work properly. A person will become tired and sick. He may even die.
The food you eat goes to the stomach, then to the small intestine. Digestion of some food begins in the mouth, so it is important to chew food well. Digestion means food is broken down to a form the body can take into the blood through the walls of the small intestine. The blood then takes it to all parts of the body. There it is used in three ways:
1. To build and repair the body.
2. To keep the body functioning properly and help it resist disease.
3. To provide warmth, energy, and strength for work and play.
The part of the food the body cannot use is passed off as waste.
To help teach the difference between good nutrition and poor nutrition, continue with the story of Samuel and Mary. You will recall Peter's teacher asked the village health officer and Extension worker to come to another parents' meeting.
When the parents were all together, the teacher said, "Last week, we talked about the problem some of the children have in school because they are tired and often sick. They are not growing or learning as much as they should. They do not seem healthy. Today, Mr. Omoko, the local health officer, is here to explain how a healthy child should look and act. Perhaps if we know what we could expect of our children, we will know more about our problem."
Mr. Omoko talked for some time about the way a child grows from birth to adulthood. Much of what he said is in the section on child care in this book.
Then he said, "I understand that your children are not learning as well as the teacher feels they could. You are wondering if this could be because of poor health.
"Children of school age should keep growing. Their bones should be straight and strong. They should have a good record of attending school. They should not often be absent due to sickness. Healthy children are bright-eyed, alert, and interested in learning. They should not tire easily, either from games or from studying. Their hair should be shiny, their skin clear and smooth, their muscles firm. They should have a glowing, handsome appearance. If they get cut or burned, these wounds should heal quickly and smoothly."
Samuel thought about the broken leg Peter had last year, about how long it took to heal. Even now, Peter's left leg did not seem as strong as his right leg. He said, "But why aren't our children as healthy as they should be?"
Mr. Omoko replied that a healthy body needed proper materials to grow right and stay healthy. These materials are the food we eat. He continued, "It is not possible to build a strong healthy body without enough of the right kinds of food any more than it is possible to build a strong house without good materials."
Look at these two houses:
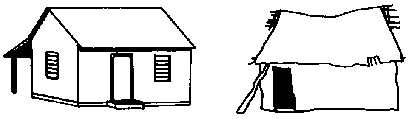
One house is made of good materials. It has a strong frame to support it. It has a tight roof to protect it against rain. It has a good heating system with fuel to keep it warm and cook meals.
The other house is made of poor materials. The frame is weak and in poor condition. The roof leaks. There is no way to heat it. It has not been kept in good repair. The floor has holes in it.
It is the same with animals. Look at these chickens:
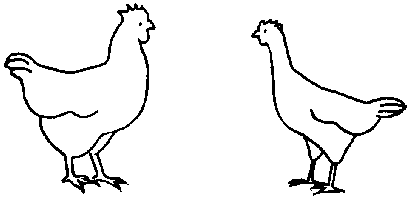
A healthy animal needs proper food to build it strong, protect it against disease, and give energy for its activities.
The thin chicken is from the same brood as the healthy one, but it did not have a good diet. It has not grown. Its feathers are poor. It is sick and has no energy.
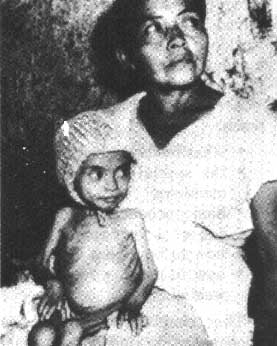
So it is with people.
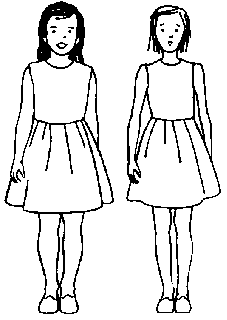
A healthy child needs proper food to build a strong body and keep it running well. He needs food to provide energy for work and play.
One child has not had proper food to build a healthy body. She is unhappy and does poor work in school. (Add other symptoms you notice among your villagers.)
A healthy adult needs proper food to keep his body in good repair. He needs food to help protect him against disease. He needs food to provide energy for work. (Add other signs of good nutrition.)
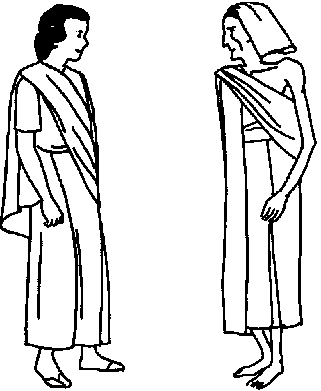
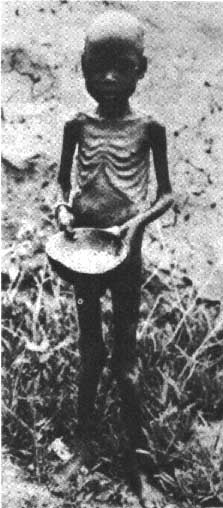
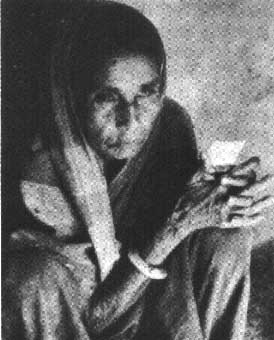
One of these women has not had proper food. She is thin and looks older than she should. She is sick, tired, and irritable. (Add other symptoms of poor nutrition common in your area.)
"Long before a person shows severe signs of poor nutrition, he may feel tired or depressed. His skin may be dry and rough. His hair may be dull and lifeless. Children may have frequent colds or a constant runny nose, or be seriously sick with common childhood diseases. A person may feel cross and nervous and lose interest in things around him. He may bruise easily or break bones often. His cuts may take a long time to heal. These are all signs that he may not be getting all the good food he needs to be healthy and vigorous."
"But what do you mean? We usually have enough to keep us from being hungry and it is good food," protested another father.
Miss Ramero, the village Extension worker, said, "You are quite right. It is good food. It tastes good; we enjoy it. But is it good enough to build strong bodies and help us feel well? Perhaps something is missing. Perhaps we need to talk about what is meant by 'good food'. Then we can learn if your children are getting what they need to build and keep healthy bodies."
Miss Ramero offered to meet with the parents to talk more about what is good food and their children's need for it. The parents were eager to learn if this could be the reason their children were sick and not doing well in school. They agreed to meet each Saturday until they found out.
Miss Ramero asked who would find a meeting room and have it ready for each meeting. Samuel volunteered to do this. She also asked who would go around the village and get more parents to come. Mary offered to go.
What the parents learned in these meetings is given in this chapter.
They learned much about "good food" and how important it is. They spent many weeks talking with the health officer, the village Extension worker, and the teacher about these things.
Our bodies need many materials which are called nutrients for full growth and health. Each has a specific use in the body and all are in the food we eat.
Most foods contain more than one nutrient. But no single food contains all the nutrients in the amounts we need. That takes many kinds and combinations of foods.
Some kinds of food help build and repair the body. Some keen the parts of the body working well and help it resist disease. Some foods furnish more energy than others. Because of these differences, we can group foods together according to what they do. This makes it easier to learn about them.
The names and functions of the nutrients are technical. They may confuse village people. You do not have to talk about nutrients or use technical terms in your work with families. However, the brief outline given here will help you to better understand the principles of food and nutrition.
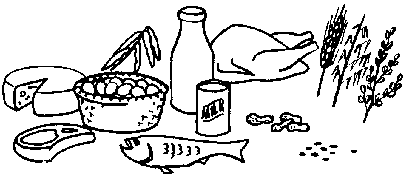
The body cannot build firm flesh, good red blood, and strong muscles unless it gets enough good building foods. These are called proteins.
Proteins are found in milk, eggs, meat, fish, nuts, seeds, and legumes such as pulses or grams. They are also present in smaller amounts in whole grain cereals and to a still lesser degree in some vegetables and fruits.
In your work with families, remember to use the names of the foods. Talk about milk, eggs, and meat without calling them "proteins".
Both children and adults need building foods. Even after a person stops growing at about 20 years of age, building foods help keep his body in good repair. Animal foods furnish the most complete building and repair materials for the body. Families should try to have some animal food each day. This is especially important for children and pregnant or nursing mothers.
The shortage of protein foods is one of the greatest problems in many countries. Children may have serious diseases if they do not get enough protein and also enough food. Two of these diseases are called kwashiorkor and marasmus. If children do not get enough of the right kinds of protein they may not be able to learn well as they should.
In some areas where there is a protein shortage, high protein foods such as CSM (cornsoya-milk) and Incaparina are being developed to improve the diet for children. These are generally meal or flour made from fish, legumes, cereals, and other protein sources. Such foods will greatly improve diets low in protein and are particularly valuable as weaning foods for the young child. Multi-purpose food is another high protein product made from soybeans. Find out from. your ministry if such products are available in your country and how they can be obtained and used.
Milk and milk products are important foods for everybody at every age, but especially for growing children. Cows and goats supply most of the milk in the world, but milk from other animals is used in some countries. In some areas milk is not a customary food. And in many countries where it is acceptable, it is not easily available. If this is the case in your area, find out if milk production is possible. If so, try very hard to promote the production, care, and use of milk.
Bring raw milk from any animal just to boiling, then take it off the heat at once. This makes it safe for drinking. Cool it as soon as possible, and keep it cold. Do not add water to milk. This only makes the milk weaker and does not add more building value. Also, if the water is not safe, it makes the milk unsafe.
Many people buy milk when they cannot produce it. Milk is sold in many forms. Milk direct from the animal is raw, whole milk. When the cream is taken off, what is left is called skimmed milk. Pasteurized milk has been heated and does not need to be boiled at home if it is kept covered in the dairy container. It is safe to drink. Dried whole milk powder is suitable for babies and children if it is properly prepared with safe water or cooked with other foods. Dried skimmed milk powder is inexpensive and is a good source of protein, but the whole milk powder is better, especially for babies and children.
Evaporated milk has about half of the water removed and is suitable for babies and children. It contains fat as well as milk solids. Condensed milk has some water taken out and sugar added. It is not a good food for infants. When you add the water to the condensed milk so that the baby will drink it, the mixture does not give the baby the building foods he needs. The baby may get full and fat, but he will not grow as strong as he should. Cheese should be made from whole or skimmed milk. It may be soft or hard. Curds are a soft cheese. Cheese is a good building food.
It is difficult to plan a good diet for children and adults without using some form of milk. In areas where there is not enough milk, try to get people to use more of other building foods such as fish, meat, pulses, cereals and dark green leafy vegetables. It is a good idea to add powdered milk to many foods when preparing them. It can be added to eggs, vegetables, rice, cereals, sauces, and bread dough.
Meat can come from any animal, bird, or fish normally eaten. These include cattle, goats, sheep, camels, pigs, rabbits, chickens, ducks, geese, turkeys, wild game, fish, and shell fish. Reptiles, rodents or insects such as locusts, bees, and grasshoppers are used for food in some areas.
The lean part of meat is the building food, not the fat or bone. All parts of the animal normally eaten contain protein. This includes the kidneys, liver, heart, brains, stomach, lungs, and also animal blood, which is used for food in some areas.
Because meat doesn't keep well in warm climates without refrigeration and because it is expensive to buy, many people eat meat only occasionally. For this reason, you should try to get families to produce and use such animal foods as milk, poultry, eggs, fish, and rabbits. Then there will not be as much of a problem storing and keeping the food as there is when a large animal is slaughtered.
Eggs have the same building value as meat. Chickens are our most common source of eggs, but eggs from birds other than chickens, such as turkeys, ducks, geese, and guineas, as well as from fish and reptiles are all good building foods. All these eggs should be well cooked.
Legumes, nuts, and seeds are plant foods which contain proteins. Legumes may also be called pulses or grams. They include many kinds of dried beans such as soybeans, black beans, kidney beans, and broad beans; dried peas such as cowpeas, pigeon peas, and chickpeas, and lentils. Learn the kinds of dried beans and peas used in your area. The soybean is especially good because it contains up to 40 percent protein. In many areas, the government strongly encourages people to grow and eat soybeans to improve their diets. Groundnuts or peanuts are also important legumes.
All edible nuts contain some protein. Know those available in your area.
Seeds include: lotus seeds, ginkgo seeds, pumpkin seeds, sesame seeds, sunflower seeds, squash seeds, cashew seeds, and calabash tree seeds as well as many others. Seeds are often used for their oil. "Press cakes", the part of the seed left after the oil is pressed out, contain protein. These "press cakes" are good food for animals.
The coconut is not included in this list. While the meat contains a little building material, it is used mainly for the oil it contains. The coconut "milk" is refreshing and tastes good, but it is not a protein food and doesn't help the body grow strong.
Teach people to cook legumes and seeds with rice, wheat, corn, millet, or other cereal grains. If they use these every day with even a small amount of dry milk powder, fresh milk, or other animal foods added, they can greatly improve their diets.
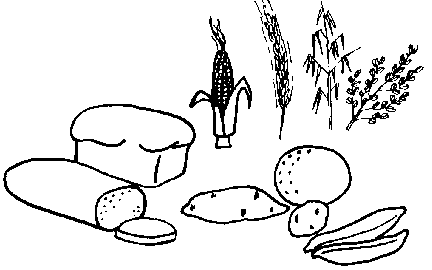
Foods that provide lots of energy are called fats and carbohydrates. If people do not get enough of these, other foods more valuable for building and repair will be used for the energy the body needs and their building value will be wasted. When people eat too much of these foods they become fat.
Carbohydrates are sugar and starch. These are mainly found in cereals, starchy plants, sugar, molasses, honey, etc. Many other foods also contain some carbohydrate. In many countries, cereals and starchy plants make up the greater part of the people's diet. They are often referred to as "the staples in the diets of the masses."
Cereals are grains such as maize, wheat, rice, barley, oats, sorghum, and millet. They are easy to grow and not expensive to buy.
The bran and germ of these grains also have some building and protective values. The bran covers the kernel, and the germ is the part that sprouts and grows when planted. When the bran and germ are left in, the cereal is a better food. Yellow maize is more nutritious than white maize. Rice has a hard outer crust over the bran layer. This crust must be removed.
In some countries, wheat flour, bread, maize meal, and rice are enriched before they are sold. This means that protective values have been added. Ask your Ministry of Agriculture or Nutrition Institute about enriching in your country.
Whole grain rice and wheat are sometimes steamed or boiled and then sundried. This makes them easier to pound or grind. Prepared in this way, rice is called parboiled and wheat is called bulgur. Bulgur wheat keeps better than plain wheat flour. Parboiled rice is a much better food than the white polished rice.
Many families prepare their own cereal grains at home by pounding, grinding, or cracking. They often wash or sift away the bran and germ, leaving only the white starchy part of the grain which has much less building and protective value. Where any bran or germ is left in, the flour or meal is darker in color. Some people do not like it as well. Try to teach people to like and use the darker flour and meal made from the whole grain. It is much better for them. Try to get them not to wash the grains or sift out the bran. Millet, barley, rye, sorghum, and other grains are generally used without removing the bran and germ, so the problem of white or dark flour does not arise.
Starchy roots, tubers and fruits include such foods as plantains, breadfruit, cassava (manioc), taro, white yam, yellow yam, sweetpotato, and white potato. Most of these have very little protein. When used as the main part of the diet, these foods do not have enough protein and may cause the diseases of poor diet. Oftentimes, young children weaned from the breast and fed mainly on cassava, taro or plantain, develop kwashiorkor.
Starchy fruits and vegetables are easy to grow and are generally found in abundance. They are not expensive to buy and they are filling, but other building and protective foods should always be a part of each person's daily food. This is very important. Otherwise malnutrition results.
Sugars have only energy value. Too many sweets can spoil a person's appetite for foods with more food value. Sugar is digested quickly. That is why a sweet drink, such as sugary tea or coffee in the morning, seems to "pick you up" and give you more energy. But sugar is also used up quickly. You may soon feel tired and hungry again. Too much sugar or other sweets can help to bring about tooth decay.
Fats come from animals, plants, and seeds. They are more expensive and often less available than cereals or starchy plants. Fats are important in the diet. They not only provide energy but also help the body use the protective value of some foods, especially dark leafy greens and deep yellow vegetables. They also contain fatty acids the body needs.
Some fats like red palm oil, other plant oils, butter, ghee, cream, and fish liver oil contain protective value too. Other fats, like meat drippings, fat meat, and lard have no protective or building value in them. In some countries, margarine made from vegetable oils may have protective values added. It is then called fortified margarine. Many people do not eat enough fats because they are expensive. It is a good idea to include some fats, especially those with protective qualities, in each meal.
Protective nutrients called minerals and vitamins are important for growth, resistance against disease, and proper body functioning. There are many minerals and vitamins. Each has a specific name and a specific job in the body. Some are found in so many foods they are not a nutritional problem. All fruits and vegetables have minerals and vitamins. Some contain more than others and therefore add more to a balanced diet. A varied diet will likely provide all that are needed, but the foods must be prepared so that the vitamins are not wasted. The following vitamins and minerals need special attention to be sure foods with them are included in the diet.
Iron is needed along with protein to build blood. Lack of enough iron is a leading cause of ill health in many parts of the world. Iron-rich foods include eggs, green leafy vegetables, many whole grain cereals, legumes, and meat. The internal organs of animals such as liver, heart, and kidneys are especially rich sources of iron.
Calcium is necessary for building bones and teeth. It is especially needed during growth. Milk is one of the best sources of calcium. Certain green leafy vegetables and pulses are also good sources of calcium. Calcium in the diet can be increased by using limewater to prepare food or using fish with edible bones. Red millet, sesame seeds, and molasses also contain some calcium.
Iodine in food is needed for the thyroid gland in the front of the throat. When the person does not get enough iodine, this gland grows big and is called a goiter. In certain areas where goiter is common, iodine is added to salt. Fish from the sea and most vegetables grown near the sea are sources of iodine. Iodine is present in the soil. The amount found in vegetables and fruits depends on how much is in the soil where they are grown. Where there is enough iodine in the soil, there is generally no problem of goiter. If a person has swelling in the front of the lower throat, he should go to a doctor.
Vitamin A is needed for growth, normal eyesight, and healthy skin and body surfaces. It is found in some fats. Butter and cream are especially rich sources. This is one reason that safe, whole milk rather than skim milk is recommended for growing children. Other fats and oils may have vitamin A added to them.
A substance called carotene changes to vitamin A in the body. Carotene is found in the dark green leafy vegetables and deep yellow fruits and vegetables. Sometimes these are grouped together and called the "Yellows and Greens". Red palm oil is also a good source of vitamin A.
Dark green leaves are better than light green or white. Some of the more commonly grown greens are: spinach, chard, kale, collards, broccoli, mustard, amaranth, cassava leaves, sweetpotato leaves, and beet and turnip tops. It takes little ground and not much work to keep a patch of greens growing around the house. In most areas, they can be grown year round Many greens, good for eating, grow wild. They have just as much food value as the greens from the garden, and they vary the diet. Trees and bushes with edible leaves such as the drumstick tree are found in some areas. All greens are best when freshly picked.
Some deep yellow fruits and vegetables are mango, papaya, cantaloupe, carrots, yellow yams, and winter squash. Find out which ones grow in your area. Red palm oil is also a good source of carotene.
It is important to use foods rich in vitamin A or carotene at least once a day.
Vitamin C is needed for healthy gums, skin, and body tissues. It is found in many fruits and some vegetables. Citrus fruits such as oranges, tangerines, lemons, limes, and grapefruit are very good sources of vitamin C. Other good sources of vitamin C are guavas, strawberries, rambutan, tomatoes, papaya, mangoes, pawpaw, cabbage, other leafy greens, and white potatoes. A person who eats some of these fruits and vegetables every day can be reasonably sure of getting enough vitamin C. Find out which ones grow or could be grown in your area. Include the ones that grow wild. Teach your people to include a good variety of them in their diets.
The juice of any fruit has the same protective values as the fruit it comes from. The same is true of vegetable juices. Teach your people to use fresh fruit and fresh fruit juices.
Vitamin D is needed for the body to use calcium. It is very important in the growth of teeth and the bones of the body. Too little vitamin D causes rickets.
Vitamin D is found in some foods like cod liver or other fish liver oils. This is why they are often given to children. This is a good thing to do. People who get lots of sunlight all year long are not likely to lack vitamin D. Sunlight changes a substance in a person's skin into vitamin D.
Thiamine, riboflavin, and niacin are members of the vitamin B family. They help with steady nerves, normal appetite, good digestion, a good attitude (morale), and a healthy skin. Most foods do not furnish very large amounts of these vitamins. But using a variety of foods each day will help assure getting enough of them.
Other vitamins and minerals needed in lesser amounts for proper functioning of the body are also found in fruits and vegetables as well as other foods. A balanced and varied diet will likely provide all that are needed.
All people need the same nutrients, but in varying amounts throughout life. The amounts are influenced by age, activity, size, sex, health, and climate.
Age-For their size, children need more food than adults. This is because they need extra food to grow and develop, and also because healthy children are so active. From weaning to 6 years old, children grow very rapidly. They are not getting breast milk and are too young to get food for themselves. They need extra special care to see that they get large amounts of building foods. During the many years when boys and girls are growing into men and women, many things are happening to their bodies. Some boys and girls grow very fast. They need extra food. As people get older, they stop growing and become less active. They need less food.
Activity-The harder and longer a person works or plays, the more energy food he needs. A person who works in the field all day needs more food than one who sits and talks.
Size-The larger a person, the more food he needs unless he is too fat, or too thin. Then his food needs are based on what he should weigh.
Sex-Because men are often bigger than women, and because they often do heavier work, they generally require a little more food than women, especially energy foods. But a small man who does very little physical work will not need as much food as a larger woman who works in the fields all day. Both men and women need the same kinds of food.
Pregnant women and nursing mothers need extra building and protective foods. Women generally need more iron than men.
Climate-People in hot tropical countries need somewhat less food than people in colder climates. This is because the body needs more energy food to keep warm in cold climates. People are also less active in hot climates. Therefore, they need less food than more active people in cool climates.
State of Health-Sick people need food to rebuild their bodies. In the acute (severe) state of their illness, they may not be able to eat much but water or sugar water. As soon as possible though, give them a good diet to rebuild their bodies and help them get well.
All adults need building, protective, and energy foods. Your country may have a general food plan that would be suitable for you to use. Or you may need to get help in developing one that fits the food habits and resources of the people you work with.
The foods in the chart below, taken every day, would be a satisfactory diet for the average adult man of the Kenya coast.
In this plan, energy value comes largely from the rice, coconut, and oil; building value mainly from fish and beans plus some from amaranth; and protective value from amaranth and mango.
Regular use of milk, cheese, and curds is encouraged in some food plans because these foods help build and keep bones strong. In some places, these foods are not easily available.
If the basic food is bananas, cassava, potatoes, or other starchy food, then larger amounts of legumes, pulses, grams, meat, fish, eggs, or milk are needed than when cereals are the basic food.
|
Food group |
Food |
Amount per day |
|
Whole grain or lightly milled cereals, starchy foods including roots |
Rice, lightly milled and parboiled |
18 ounces |
|
Legumes (pulses, grams) |
Beans |
4 ounces |
|
Meat, fish, eggs |
Fish |
4 ounces |
|
Dark green leafy vegetables |
Amaranth |
4 ounces |
|
Other vegetables and fruit, especially those for vitamin C |
Mango |
4 ounces |
|
Fats, oils, fatty foods |
Coconut |
2 ounces |
|
Oil |
� ounce |
A good diet for the mother helps her have a healthy infant and stay healthy herself. If she is poorly fed, she will be weak and have a weak baby. Some of these babies may die be fore they are born or soon afterwards. Eating properly means better health for the mother and her children.
A pregnant or nursing woman needs extra building materials to build a strong baby. If the baby cannot get these from the food his mother eats, then he will get them from his mother's tissues and bones, In this way, her body may become weakened.
Of great importance during this period are milk, eggs, meat, fish, and legumes (pulses, grams). Extra amounts of dark green leafy vegetables and vegetables and fruits for vitamins A and C are needed for their protective value. Cereals, fats, and oils may also need to be increased, particularly during breast feeding.
The mother may fear that the baby will grow too big and she will get fat if she eats well during pregnancy. Neither she nor the baby will get too big if she eats the right amounts of the right kinds of food. It is when she eats too much starchy food, fats, and sugars that she or the baby may get too big. One good way of knowing if she is getting too big, too fast, is by going to a prenatal clinic where her weight will be checked regularly. The doctor will talk to her about her diet and weight gain.
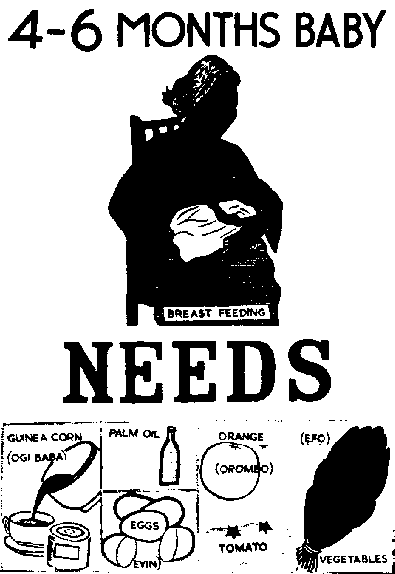
Mother's milk is one of the best foods for the baby. Talk to mothers about nursing the baby for at least one year. In some areas where there is not enough of the right kind of food, it is a good idea for the mother to nurse her baby for 2 years if it is possible. Breast-fed babies usually grow well if the mother is eating well. They are not sick as often as babies who cannot be breast fed.
A good way to protect infants from severe malnutrition that may leave life-long effects is to give them breast milk. The mother who breast feeds her baby until he is old enough to be weaned gives him a good start in life.
Breast milk alone, if there is enough, will supply a baby's food needs for the first 5 or 6 months of his life. Sometimes in hot weather, a baby needs more water than he gets in breast feeding. Be sure the water is boiled at least 10 minutes. It can be put in a clean covered container to cool and be fed to the baby with a spoon once or twice during the day. Babies who do not get enough sunshine may also need some fish liver oil to help make their bones strong. Your health department can tell you how mothers can get this oil and how they should give it to their babies.
Breast milk is safe because there is no danger from germs as there may be if the baby is fed from a bottle.
Breast milk contains a substance which protects the baby against infectious diseases during his early months.
Breast feeding is valuable because the baby is cuddled and feels warm and secure when he is held. He feels loved and happy when he is fed this way. It is the perfect beginning for a happy, contented life.
If for some reason the mother does not have enough milk for the baby during his first 6 months, she may have to give him milk in another way. In many countries, feeding cups are available. These are easier to keep clean than bottles and nipples. Therefore, they are safer to use. If a mother must use a bottle, she must be given proper instructions from a hospital or health clinic on mixing the milk and caring for the bottles. It is very important to keep all cups and bottles very clean or the baby may get sick.
By the time a baby is 6 months old, he needs more food than his mother's milk can give him. About this time, he should be given other soft foods such as grain cereals, eggs, vegetables and fruits to add to the mother's milk.
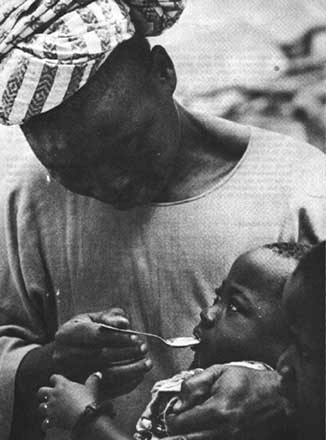
These foods should be fed with a little spoon. This is more sanitary and much better to use than the mother's fingers. The time for starting to give the baby the new foods depends on how well the baby is growing and if the mother has enough milk to satisfy him. If the mother takes her baby to a doctor or clinic to be checked, she will usually be-told when to start other foods. The baby should continue to get his regular breast feedings as well as these other foods.
Eating should be a happy time for the baby; do not force a baby to eat. A baby will generally let his mother know when he gets hungry.
It takes time to teach a baby to take other foods, and he has to be fed slowly. Give the baby one new food at a time to let him get used to the flavor and feel of the food. At first, just give him a taste on the end of the spoon. Do not be surprised if he spits it out or turns his head away. It is a normal thing for babies to do. He will soon learn, after a few tries, that he likes most of the foods that you offer him. If he continues to spit out a food after several tastes, discontinue it for a while and try a different food.
It is important that he likes his food and is happy when he eats. The first year it is better to feed him before or after the rest of the family has eaten. Then the mother can give him all her attention and he will not be distracted by the noise and movement when the family is eating.
The following examples of daily feeding plans may help you teach mothers how to add different foods one at a time to their babies' diets. Note that at least one building food, one protective food, and one energy food is given at every meal.
|
At about 6 months |
||
|
Upon waking |
Breast feed |
|
|
Morning |
Porridge made with milk. (When baby becomes used to porridge, start feeding papaya, orange or other fruit juice.) Breast feed |
|
|
Afternoon |
Mashed banana with boiled milk Breast feed |
|
|
Early evening |
Porridge made with milk Breast feed |
|
|
Between 7 and 8 months |
||
|
Upon waking |
Breast feed |
|
|
Morning |
Porridge made with milk and mashed hardboiled egg Mashed papaya or fruit juice such as mango, orange, pawpaw Breast feed |
|
|
Afternoon |
White or sweetpotato mashed with boiled milk Ripe banana mashed with boiled milk Breast feed |
|
|
Early evening |
Porridge made with milk Mashed vegetable Breast feed |
|
|
Between 8 and 9 months |
||
|
Plan I |
Plan II |
|
|
Upon waking |
Breast feed |
Breast feed |
|
Morning |
Porridge with milk Mashed papaya Boiled milk from a cup Breast feed |
Porridge made with milk Orange juice or other fruit juice Boiled milk from a cup Breast feed |
|
Afternoon |
Porridge made with milk Mashed banana with milk Boiled milk from a cup Breast feed |
Mashed sweetpotato Mashed vegetable Mashed and scraped cooked fish Boiled milk from a cup Breast feed |
|
Early evening |
Mashed potato with boiled egg Mashed vegetable Boiled milk from a cup Breast feed |
Porridge with milk and mashed pulses Mashed papaya Boiled milk from a cup Breast feed |
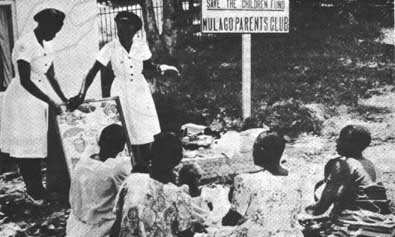
You may wish to use a flannelgraph or display real foods to teach mothers what their babies should be eating in addition to breast milk at (1) about 6 months old, (2) about 7 or 8 months, and (3) 1 year old.
As the baby gets older, he can start to eat other building and protective foods. These include well-cooked and mashed pulses without skins; hardboiled eggs; well-cooked and mashed liver or chicken; mashed vegetables from the cooking pot; green leafy vegetables cut very fine, cooked, and mashed; soup; and fruits such as mango, guava, and pawpaw, peeled and mashed fine with no seeds or hard pieces. At about 1 year of age, the baby can eat some foods from family meals. He can eat cereal, for example, as it is cooked for his older brothers and sisters. His food will still need to be mashed or chopped very fine until he has more teeth and can chew well.
Foods given to the baby must be very clean. The baby's dishes should be boiled and kept separate from other dishes. It is very easy for a baby to get diarrhea or stomach upset from dirty food or dishes.
When a mother first starts to give her baby other foods, she should sit him on her lap and feed him from a sanitary spoon. The baby will soon learn to eat from a spoon and drink from a cup. Let the baby try to feed himself from a small spoon or cup as soon as he seems to want to. Most small children eat better when they take at least part of their food by themselves.
The foods given to babies must be soft and easily digested, so they will not cause the baby stomach trouble. Animal milk, eggs, meat, fish, pulses, and cereals are important foods for a baby. They help him grow and develop. Remember, always boil raw animal milk.
A soft porridge or gruel made from a whole grain cereal and milk is a good soft food to start the baby on. A mother may feel that the whiter the porridge, gruel, or pap she prepares, the better food she is making for her baby and the better mother her husband and neighbors think she is. Explain that a darker porridge has more food value than the white pap or gruel. Show her how to prepare cereals for porridge without washing the whole grains after pounding them. This way she will not pour off all the good building materials in the water.
Think of suitable foods for babies that are available in your area. Treat each family and each infant individually, but always base the diet on the many things you have learned about the many kinds of food that children and adults need to grow or to keep strong. Foods cooked for the family may be given to the baby if a small portion is taken out for him before the strong spices are added. This food could then be strained, mashed, or cut into small pieces to make it easy for the baby to eat. It is much easier for the mother to give the baby the food from the family pot and it is much better for the baby because he will eat many different kinds of foods. When the baby eats many kinds of foods, he will get the many things that help him grow.
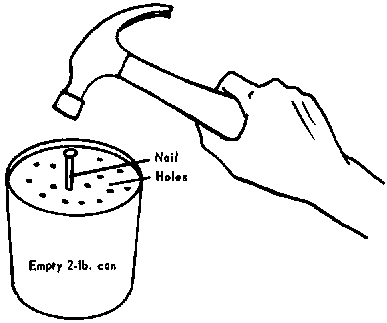
Homemade Sieve-Running food through a sieve removes any lumps or hard pieces, and makes it fine and soft. This is good for an infant or sick child. Most families have a sieve. If not, they can make one easily.
Use a 2-lb. tin can or one that is an easy size to handle. Be sure the rim is smooth with no sharp edges. Clean and wash the can thoroughly. Punch 20 to 30 holes in the bottom with a medium size nail.
Weaning means (1) getting the baby accustomed to foods besides breast milk, and (2) stopping breast feeding. Weaning extends from the time the baby is solely breast fed until he is eating a good mixed diet which entirely replaces breast milk.
The length of time the mother continues to breast feed her baby varies considerably. Many doctors recommend breast feeding for one year and even for 2 years if it is possible and needed. This insures that the baby will get vital building materials he needs. However, after the first 5 or 6 months breast milk alone will not provide the child with all it needs for growth. Where no other milk is available, prolonged breast feeding is necessary for the baby's growth and quite often for his survival. However, the mother must eat a good diet with enough building foods if she is to make milk for 2 years.
You can prepare a baby for weaning by starting with small amounts of boiled animal milk from a cup. Animal milk is the best substitute for breast milk. Gradually increase the amount until the baby is taking it at every meal. Taking the baby off the breast completely must be done gradually. This usually takes several weeks.
Normally, the baby should never be weaned from the breast to a bottle. It is not necessary and bottles and rubber teats are hard to clean. Germs which can make the baby ill are found in unclean bottles and rubber teats.
A wise procedure is to stop the midday breast feeding first. After 2 or 3 weeks, stop the second one during the morning, then later the evening breast feeding. After 2 or 3 more weeks, stop the early morning breast feeding. Weaning gradually this way is not only good for the baby, it is also much more comfortable for the mother because her breasts do not get so full and the amount of milk she makes is gradually reduced.
Some mothers put a bitter powder on their nipples or send the baby away to his grandparents when they want to stop nursing the baby. This is very bad for the baby. He is unhappy and cries and feels unwanted. He may even stop eating altogether and become ill. It is much better to keep the baby with his mother and let him gradually get used to milk from a cup and continue to get the other foods he has been taking. Then both the baby and the mother are happier.
If the mother has been following a good feeding plan, the baby will already be getting other building foods when she begins to stop breast feedings. He will be used to them. If he continues to get them, his growth will not slow down when he is weaned.
In some countries, special "weaning" foods are available. Ask your health department if any such food is available and recommended in your country. If so, encourage mothers to use it. It is made especially for the needs of babies, Use the weaning foods as recommended by your health department.
A child of this age is often called a toddler or preschool child. A child this age often becomes the most poorly nourished member of the family. He often is not given the attention he got as a baby, and he is still too young to care for himself.
The importance of animal foods for everyone has been mentioned several times. The toddler often does not get his fair share of milk, meat, eggs, fish, and pulses. This may be because they are not plentiful or because parents do not understand that the child needs these foods for growth and health. They may think that milk causes diarrhea. Help them understand that it is the improper care of milk which causes germs to grow in the milk. These germs cause the diarrhea, not the milk itself.
Building foods (proteins) are very important to a child of this age because he is no longer getting his mother's milk. The quality of building food for a toddler (or anyone else) can be improved by a combination of foods at the same meal. If a family has both maize and beans, for example, it is far better to eat some maize and some beans at each meal rather than to eat maize for several days and then beans for several days. Combinations of foods should have both filling foods and protein foods; for example, cereals or tubers with milk, eggs, meat, fish, pulses or cheese. Here are some examples of mixtures:
1. Maize with pigeon peas
2. Banana cooked with beans and served with wheat bread
3. Baked sweetpotato served with lentils and a dark green vegetable
4. Porridge made from two different cereals and served with sauce made of cowpeas and tomatoes
5. Groundnut soup with potatoes.
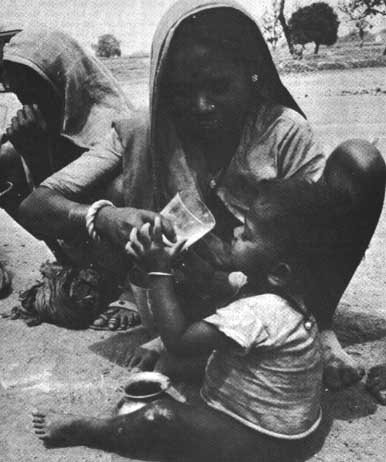
If the mother has powdered milk, she can stir it into the food.
When a young child is not given enough milk, meat, fish, eggs, pulses, and cereals, he does not grow normally. He is more likely to get colds, coughs, and stomach upsets, as well as to get very ill from any childhood diseases he catches. He may be cross and lose interest in playing. He may get weak and become sick. Kwashiorkor and marasmus may show up in children of this age who do not eat enough protein.
Remind mothers that from weaning to 6 years old is one of the most important times in a child's life and can be one of the most dangerous from the standpoint of health.
The young child is growing rapidly and needs more building foods for his size than adults. The building foods are eggs, milk, cheese, meat, fish, pulses, and groundnuts. The young child cannot eat much food at one time and so he needs more frequent meals than adults.
In families that use roots and tubers as the main food, it is very important that the child have one or more foods from the building group at each meal. He should have dark green leafy vegetables and a deep yellow fruit or vegetable, and fruits such as orange, mango, papaya, etc. Whole grain cereals are better than starchy plants in the child's diet.
The young child has few teeth so he requires soft food. He can begin to eat some adult foods, but they need to be cut into very small pieces.
Properly feeding a toddler requires time, but he needs the love and personal attention of his mother for both his spirit and body. He requires clean food and clean utensils to prevent infection and protect him from hookworm, diarrhea, and other diseases.
These foods are not suitable for babies and young children.
� Strong seasonings and spices such as hot peppers and curry powder. Take the baby's food out of the cooking pot before spices and seasonings are added or cook it separately.
� Foods with skins such as pulses and maize, unless they are cooked very well and put through a sieve.
� Fish with bones, except small fish whose bones can be cooked soft and mashed very fine.
� Candy, which is bad for teeth and spoils the baby's appetite for the other foods which his body needs.
� Beer and other alcoholic drinks which can make the baby feel dizzy.
After a child starts to school, it may be harder for him to get the food he needs to grow, develop, and learn well in school. He often has to leave home before breakfast is ready in the morning and walk a considerable distance to reach school. If he gets no meal at school and returns late in the afternoon for his first and only meal of the day, it is almost impossible for him to get enough of the right foods. It is of great importance that he have some food before going to school and some food while he is at school. If no hot breakfast is available, the child can eat some fruit, bread, cold cooked potatoes, or even leftover porridge so that he will not tire so easily and will feel more like doing his school work.
School lunch programs are increasing in many countries. The ideal is a school that serves a good midday meal to the children. In some places children get milk at school, either free or at a small cost. A program such as this makes sure that all school children will have this valuable building food.
Some countries may provide other foods as well to improve the diets of growing children. In some areas where the government does not provide lunches, mothers may want to organize a lunch for the children at school. The families of the students could pay for this either in cash or by contributing food. Mothers could take turns cooking the food or they could hire someone to do the cooking. Providing such a meal is a good way to make sure that all the children in your area have good food at midday.
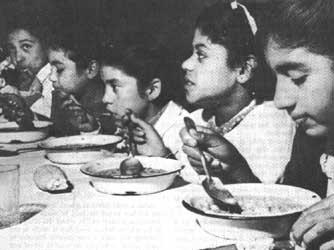
If a child must carry his lunch to school, it should be as nutritious as possible. The kind of food he can take will depend on what is locally available. It should be wrapped and packed to keep it clean and make it easy to carry.
Meat or foods that spoil quickly in warm weather should not be included unless they can be kept cool at school.
Many different kinds of food can be carried to school: maize with beans or peas; pilaf with a sauce of chickpeas and powdered milk; tortilla spread with sauce of pulses with powdered milk; sweetpotato roasted in its skin; hardboiled eggs; cold well-cooked dried or smoked fish or meat; oranges, papaya, bananas, or other fruit; tomatoes; roasted groundnuts; sour milk carried in a gourd; and bread. It is a good idea to take more than one kind of food. Cooked food could be wrapped in a banana leaf. A little basket lined with a clean leaf could serve as a lunch basket.
No doubt you can think of many other foods children can carry to school. Be sure they contain both building and energy values.
If children are given money to buy lunch from shops or venders, teach them to buy foods that will keep them healthy. What foods can these children choose from if they buy? Which foods will help them follow the rules of good eating ?
Giving a school child a good diet every day is one way parents can help their children learn and do well in school. Teachers can do very little with children who are tired, dull, and listless from not getting enough of the right kinds of foods. How well a child learns in school is the responsibility of his parents as well as his teacher.
Adolescence is from the time of puberty until 20 years of age. It is a period of rapid growth and development for both boys and girls. It is, therefore, a time when they need large amounts of food.
Boys and girls who are active in play or do heavy work may need much more energy food than adults. Because they are still growing, they need more building foods. Their need for protective foods is about the same or even higher than for adults.
When a sick person is being cared for at home, he should be given good food in an easy-to-digest form as soon as he can take it. Both sickness and injury weaken the body and use up some of the materials in it. It takes extra building, protective, and energy foods to repair the damage, and make the body strong again.
In the case of a fever or diarrhea, boiled water with perhaps a little sugar added may be all the sick person can take the first day. By the next day, a well-cooked gruel of finely pounded cereal, boiled milk, and sugar can be tried three times a day. Also give orange or fruit juices with a little sugar added. Boiled water should be continued. As the ill person gets better, add other soft foods in addition to the gruel, boiled water and juices. These could be soft-cooked eggs, soft fish without hard bones, tender chicken or other meat, soup with some mashed vegetables and pulses, papaya, rice, and other soft, well-cooked cereal foods.
Frequent small meals are better than large meals. The body will make better use of the food. Eating six times a day is not too often. Remember, a well-fed person will recover faster from any sickness or injury.
All people have their likes, dislikes, and beliefs about food. Individuals are influenced by what their friends and those around them eat. In some areas, it is the custom to eat certain protein-rich foods such as insects, snakes, and dogs. These are all beneficial. Many old customs such as drinking animal blood, feeding red millet to new mothers, soaking grain in limewater, drinking sour milk instead of fresh, using wild fruits and vegetables, and sprouting legumes before cooking them make for good diets.
On the other hand, certain beliefs and customs about food are very bad. You need to try to change beliefs such as that women will not be able to have children if they eat eggs, or that a child who drinks goat's milk will grow to look like a goat.
We all enjoy eating foods we ate as we were growing up-foods that our mothers and grandmothers used to prepare. They make us feel happy and safe. Familiar foods, familiar seasonings, and foods cooked in familiar ways give pleasure to eating.
Improving nutrition does not mean changing all the food customs and habits of people. But they need to be taught how to improve their eating patterns so they will have the kind of daily diet they need for good health and to enjoy their food, too.
Many countries have developed food guides, based on the habits of their people, to help them establish good eating patterns. These guides generally group together foods that add the same things to the diet. They emphasize foods that are often not used enough. Find out if your country has a food guide and, if so, how you can use it in your work. Some guides suggest the amounts to use daily from each group. All food guides encourage the use of many foods. The more different kinds of food people eat, the better chance they have to get all the nutrients they need.
Let us look at Puerto Rico as an example.
Puerto Rico has a nutrition committee representing various agencies and groups concerned with food and nutrition. This committee worked out a guide called A Basic Food Pattern for Puerto Rico. The committee agreed that almost all Puerto Ricans eat rice and beans, starchy fruits such as plantain and green bananas, codfish, lard, sugar, and coffee. Most families have something more, but those foods are the only ones the committee could be sure almost everybody had every day. These form the basic diet. Although it is good as far as it goes, other foods are needed to meet the body's need for good health. The food guide was developed to emphasize the foods that are generally not eaten often enough. Puerto Rico used the term "Yellows and Greens" because they wanted to emphasize the deep yellow fruits such as papaya and mango along with the dark green leafy vegetables. A chart was made as shown:
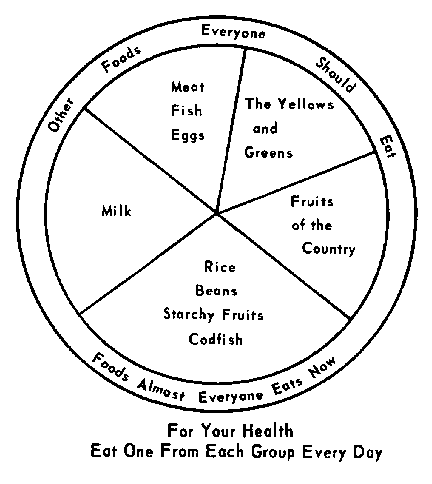
A flannelgraph has been made from the chart. The circle is cut into five pieces. Each piece can be used as a separate lesson. This food guide flannelgraph is used to teach nutrition throughout Puerto Rico.
You will need to learn their food habits and customs before you can help people develop good food patterns. Review with them what they have learned about the kinds of food the body needs. To help them see what kind of eating patterns they have, ask the following questions:
� What is the main food you eat?
� Do you use whole grain cereals and flours? How often? More than one kind?
� Do you use cereal foods more often than starchy plants ?
� What building foods do you eat regularly with the staple foods? Do you use building foods three times each day?
� Do you use pulses, seeds, or nuts? Which ones ? How often ?
� Do you use meat, fish, eggs, poultry? How often ? How much ?
� Do you use milk of any kind? How often? How much ?
� What fruits and vegetables do you use? How often? How much?
� Do you use leafy greens regularly? Yellow vegetables ?
� Do you use oranges, papaya, mango, and other deep yellow fruits every day?
Their answers to these questions will tell you whether or not they are eating a good variety of food Show the people what they can do to improve their basic diet. They should regularly eat:
� More than one kind of cereal grain.
� More than one kind of legume (pulses, grams) .
� Whole grain or undermilled cereal foods rather than the refined, white grain products.
� Staple foods in combination with building and protective foods. For example, they should cook cereal foods with dry skim milk or add some meat, fish, pulses, or vegetables to rice, cassava, or other staple.
� More leafy greens or small whole fish if milk is not available.
� The "Yellows and Greens" (both vegetables and fruits).
The way food is handled influences the nutrients it has, its safety, appearance, and taste. Handling means everything that happens to food while it is being grown, processed, stored, and prepared for eating. In some areas, at least one-third of all the food produced is lost by poor harvesting, and loss from insects, rats and spoilage or faulty handling in the home.
Good farming increases the amount and the quality of the food produced. For example, good soil and the right kind of fertilizer can improve the amount and flavor of crops. If insecticides are needed and are used, the farmer must learn how to use them in the right way so that the food will be safe to eat. Many insecticides are poisonous.
The way food is processed influences its body building value. Highly milled cereals contain smaller amounts of some nutrients than whole grain undermilled cereals. Enriching highly milled foods by adding vitamins, iron, and possibly calcium during processing increases their nutritive value. Dried skimmed milk has the fat removed in processing; it does not have vitamins A and D. Dried whole milk powder does have the fat and vitamins A and D. The water is removed from both types of powdered milk. However, some factories may add vitamins A and D to dried skimmed milk to improve its nutritive value.
The nutrients may be partially lost in food stored for long periods, especially when it has not been properly stored. Milk or other perishable foods such as leftovers, kept for even a short time, can easily become contaminated with bacteria and cause illness unless they are properly stored.
The way food is cooked greatly influences its taste and appearance as well as its food value.
Certain foods cause illness. There are poisonous plants such as some toadstools and berries. Some kinds of cassava also have a toxic skin and juice which should not be eaten.
But the foods we have talked about do not in themselves cause illness. Quite the opposite: the foods we have talked about are needed to build strong, healthy bodies. It is when foods become spoiled or contaminated with bacteria or parasites that they cause illness. Proper handling, preparation, and storage of food will prevent illness from contaminated food.
Following these rules in handling and preparing food will help keep it safe, make it taste better, and preserve the food values it contains.
|
MILK: |
Keep milk in a clean container with a tight cover. Store in a cold place. Always boil raw milk before using it. Use boiled water to mix milk powder |
|
MEAT: |
Cook all meat, poultry, and fish thoroughly to make sure any germs they contain are destroyed. |
|
EGGS: |
Cook eggs slowly over low heat. Do not eat raw eggs as they may contain germs. Cooking them well will destroy these germs. |
|
PULSES: |
Wash pulses quickly once. Cover them with water and let them soak for several hours or overnight. Cook them until they are tender in the same water in which they were soaked. Add salt, if you wish, after the pulses are cooked. Do not throw away the water in which the pulses were soaked or cooked. It contains useful food values. |
|
GREENS: |
Tender green leaves should be prepared immediately after they are picked. Look them over carefully to remove any bugs or insects that may be on them. Wash them quickly twice in clean water. Cook them gently in a very small amount of water with a little oil, fat or milk added. Keep a cover on the pan and stir or shake the greens occasionally to keep them from burning. Tear leaves that are not so tender into small pieces before cooking them. Cook them only until they are tender, not until they are soggy. Any water that is left in the pot contains part of the protective value of the greens. Use this water for soups, stews, sauces or for drinking. Never throw it away. Do not use soda in cooking greens. It de stroys some of the protective value. |
|
OTHER VEGETABLES: |
suggested above. Teach mothers not to throw away the water they cook their peas, beans, and other vegetables in. By adding it to soup, curries, etc., they can improve the nutrition of their children. Some vegetables turnips, and tomatoes may be enjoyed most when they are eaten raw. They should be washed well in safe water such as carrots, |
|
FRUITS: |
Some fruits are best eaten raw. Some protective value is destroyed in cooking, but of course cooked fruits are nice for variety. Fruit jams and preserves are cooked so long that much of their protective value is destroyed. |
|
FAT: |
Do not burn fat. Burning makes it harder to digest. |
|
RICE OR MILLET: |
Wash the grain quickly just one time in a small amount of water to remove any dirt. Every time the rice is washed, it loses some of its food value. Pick out small stones and other dirt. When cooking, use only as much water as the rice or millet will absorb when it is done. Add salt as desired. |
|
HOME POUNDED CEREALS: |
Wash cereal grains(maize, wheat, etc.) before pounding them. After the grains are pounded, use only the amount of water needed for soaking or cooking. The water in which they are soaked or cooked has food value in it. Use it in soup or to cook other foods. Cook cereals thoroughly to make them easy to digest. Maize can be soaked over night and cooked whole without pounding. It must be pounded or well mashed if it is fed to young children. |
|
STARCHY PLANTS: |
Wash potatoes well and cook them with their skins on. Eat the skins or peel the potatoes after cooking. If the skins of starchy plants must be removed before cooking, peel them as thinly as possible. The skin of the potato and right under the skin contain more of the vitamins and minerals. All starchy plants and roots need to be cooked well done. |
|
CASSAVA: |
Peel before cooking. Some kinds may need to be cooked done. |
You will have to use many different methods and approaches to teach good nutrition to village people. As you begin your teaching. remember to start with the basic diet of the people and gradually show them how they can improve this diet. It is easier to improve existing food habits than to change their customs completely.
Talk to the people. Learn how they think about their problems. A home visit is always a good way to learn about an individual family and its particular problems. Group meetings give you a chance to discuss general village problems and develop awareness of those that are common but unrecognized. In group discussions, use posters and exhibits of different kinds of foods to create interest. Method and result demonstrations will make your teaching more interesting and helpful.
One of the best ways is to tell people a story about a family very much like their own, such as the example on Samuel and Mary given in this chapter. You may want to adapt this story to your own local situation or use one of your own in a group meeting. You can adapt it to role playing or to a puppet show. Use familiar names and change the situation so it suits your area.
You might also use some of these suggested demonstrations to teach your village women.
Mothers are more likely to feed their babies and young children some of the recommended foods if they have been shown how to prepare them and have tasted them. You might prepare enough food for the mothers to taste. Some mothers will probably bring their babies and young children with them. You can show how to feed them, using some of the food prepared. Such demonstrations will let you show how to wash, boil, and care for the baby's and child's dishes. Let the mothers help throughout the demonstration.
You can also show how to prepare a good school lunch. Show not only the kinds of food and how to fix them, but also how to pack them for a child to carry to school.
Have each member of the group bring a lunch suitable for a child to carry to school. Discuss the lunches. Do they contain building and protective foods ? What staple do they have? Are they packed to keen clean?
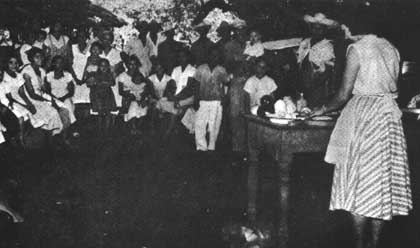
Suggested Demonstrations on Suitable Foods for Infants, Toddlers, and Young Children
|
How to Prepare |
Key Points to Explain |
|
1. Boiled Milk Bring a small amount of whole milk to the boiling point. Stir it so that it does not burn. Remove it from the fire. Put a clean cover over it and let it cool. |
All raw milk must be boiled before it is given to the baby. Start feeding the baby boiled milk from a clean spoon until the baby is used to the taste. Then start using a cup. |
|
2. Porridge With Milk Mix � cup of whole cereal flour and 1 cup whole milk. If powdered milk is used, add one measure of milk powder to 4 measures of water. Mix so there are no lumps. Boil or simmer the mixture gently for 20 minutes, stirring to keep it from burning. |
Any cereal grain can be used. Using whole cereal flour with milk gives both building and energy foods. Never use white flour and water to make a baby's porridge. Cereal helps to satisfy the baby's appetite. Start with just a taste of porridge and gradually increase the amount until he is able to take 1/2 cup at a feeding. Be sure the porridge is not lumpy. Babies do not like lumpy foods. Adding an egg, fruit or vegetables gives the porridge more of the food values babies and young children need. |
|
3. Fruit Mush Wash fruit well in safe water. Peel and mash it to a fine pulp with a clean fork. If fruits like apples, peaches, apricots, and pears are grown in the area and used, they may be softer and more easily mashed if they are cooked first. |
Fruit must be well ripened. All are protective foods and have energy value. Add a little boiled milk or milk powder to banana or papaya. You can add orange juice to an avocado. Start with only one or two teaspoons and gradually increase the amount to 1/3 cup at each feeding. Be sure there are no stringy parts or seeds in the fruit. Remember, fruits shipped in from other countries will cost more and likely will not have the food value of fruits grown right at home or in the area. |
|
4. Fruit Juice Wash any ripe fruit in safe water. Cut it with a clean knife. Squeeze out the juice or crush the fruit through a sieve. Remove seeds and any hard parts that may have gotten into the juice. |
Start with one teaspoon of juice at a feeding and gradually increase the amount until the baby takes the juice of an entire fruit. Any fruit juice has protective value. Lemon and lime juice are good' but they are very sour and may be mixed with a little boiled, cooled water and sugar before they are given to the baby. |
|
5. Eggs Hard cook or soft cook eggs. Then mash them in a clean dish. Add a spoonful or two to porridge, mashed banana, or green vegetables. |
Eggs are easily digested and an excellent building food. Start with one or two teaspoons and increase until the child eats a whole egg. A fresh egg beaten into porridge is an excellent food for the toddler. Start with egg yolk first for the young child. |
|
6. Meat-Fish-Chicken Scrape a piece of lean, raw beef with a spoon or knife. Scrape off only the tender, red meat. Gently boil it for 5 minutes in a small amount of safe water. Cook fish in a little water until it is thoroughly tender. Be sure there are no bones. Mash the fish until it is very fine and soft. Choose the tender part of chicken to prepare for the baby. Cook it in water until it is very tender and then mash it very fine or rub it through a sieve. Mix it with chicken broth to feed to the baby. |
These are excellent building foods and good for the baby if they are prepared properly. All meat must be thoroughly cooked to kill any parasites which are present. Be sure all meat is free of bones and fine enough so the baby will not choke. Meats can be cooked with a few vegetables and mashed together. Small fish like sardines or sprats can be cooked and mashed or sieved with the bones left in because the bones are very soft. Sieved meat, fish, and chicken can be added to porridge or gruel. Do not throw away the water in which the meat, fish or chicken is cooked. It contains many things that are good for children and adults too. Be sure to use this cooking water in the next meal or it may spoil. |
|
7. Liver Boil a small piece of beef, sheep, or chicken liver for 10 minutes in just enough clean water to cover. Chop the liver and rub it through a sieve, or mash it to a pulp in the water it was cooked in. |
Liver is an excellent building food and good for babies. It is easily prepared. It should be thoroughly cooked to kill all parasites, but not so long that it becomes tough. |
|
8. Pulses Wash pulses once in clean water. Soak them for several hours in enough clean water to cover. Boil them in the same water until they are very soft. Remove the skins. Use only pulses from which the skins can be removed. Mash or sieve pulses and add a little boiled milk or milk powder and pot liquid. |
Pulses are an inexpensive building food. They are especially good when mixed with even a small amount of milk or milk powder. Mixed with porridge, they make an excellent meal. |
|
9. Green Vegetables and Starchy Plants Carrots, tender greens, green beans, green peas, white potatoes, sweetpotatoes, etc., should be washed in clean water. Cut them into fine pieces and boil them in just enough water to cover them until they are very tender. Mash them to a fine pulp or sieve them in the cooking water. Each of these may be cooked separately. Two or more can also be cooked, mashed, and fed together. |
These foods may be brought to the demonstration by mothers. The greens must be very tender. They will mash better if they are finely chopped with a knife first. A cooked egg makes an excellent combination with greens. Potatoes or cooking banana may be used at the evening meal in place of porridge. Vegetables should be served with both noon and evening meals. Dark green leafy and yellow vegetables are especially important. |
|
10. Soup Cook clean vegetables, cereal grains, starchy plants, pulses, or meat until they are very tender in safe water or in broth made by boiling bones. Mash them well and mix them with the broth. |
Soup made from these foods makes an excellent meal for a growing child. Broth made by boiling bones in water is not a building food. It is a nice-tasting water that is good to cook these foods in. Any meat scraped from the bones and added to the soup has building value. |
By planning and actually preparing the meals for one day with your people, you can teach them the principles of meal planning and food preparation much better than if you just talk about it. Plan together a whole day's menu. Use a variety of the local foods available.
Prepare the meals at three different times. Select the place and see that all materials and utensils you will need are ready to use. Outline the steps you will use in preparing the meal. Emphasize sanitation in food preparation, such as washing hands, using safe water to wash vegetables and fruits, clean cooking utensils and dishes, and clean working surfaces. When the meal is cooked, serve it to a make-believe family. Include a father, nursing mother, infant of 8 months, a 4-year-old child, and a teenage boy. Some of the group can pretend they are members of the family.
Let the women help with each step in preparing and serving the meals. You will find this outline helpful after you and your women have decided on the foods to prepare for each meal. Work out the key points to emphasize in each step. It is very important to plan the meals you demonstrate with the women themselves, using foods available in your area. The following may serve as useful guides:
The Morning Menu
Porridge prepared with whole maize meal, millet flour, and milk powder
Papaya with lemon juice
Milk and tea
Steps in Preparing the Meal:
1. Wash your hands with soap and rinse away all the soap with safe water.
2. Mix together maize meal, millet flour, and dry milk powder. Add enough cool, clean water to make a smooth paste. Stir this into boiling water. Cook and stir the porridge for 20 minutes. Be sure it is not lumpy. Add lemon and sugar to taste.
3. Wash and cut papaya into pieces for each member of the family. Add lemon if it is desired Mash a piece of papaya for the baby. 4. Pour the milk for drinking into a clean pot. Bring it to the boiling point, and allow it to cool in the same container with a cover on it.
5. Brew the tea.
6. Emphasize sanitation practices and food values in each step of the meal.
Key Points to Emphasize:
1. The menu follows a good eating pattern with building, protective, and energy foods.
2. Foods selected taste good together-papaya and porridge.
3. Use whole maize meal. It is less expensive and adds more food value than white maize meal.
4. Millet flour adds food value to a maize porridge.
5. Milk powder in the porridge makes the porridge a better building food.
6. Milk included for children to drink; milk or else tea or coffee with a lot of milk in it for the nursing mother (Tea or coffee alone is not a food.) Sugar and milk in tea and coffee add food value.
7. A ripe papaya with deep yellow color has more protective value than an unripe one.
Midday Menu
Rice-home pounded
Lean meat or fish with onions and tomatoes
Greens (kind available in area)
Boiled milk for children and nursing mother
Tea or coffee
Evening Menu
Stiff porridge
- prepared with powdered milk and any whole grain cereal.
Pigeon peas
- (or other legume) with onion, potato, and tomato added. Also other vegetables if desired.
Mixed ripe fruits-papaya, pineapple, banana.
Select those who will pretend to be the members of the family from the group. Serve the meal as is customary in your area. Sitting around a table is a convenient way to eat. It is above the floor and a table is easy to clean. If you do not use a table, spread a clean cloth on the floor or choose a clean, grassy place outside. In cultures where the whole family eats together, let your demonstration show the father's place, nursing mother's place, a place for a child of four, for an infant, and for a teenage boy.
It might look like this so the father could share in serving the children, and the mother could be near the cooking area.
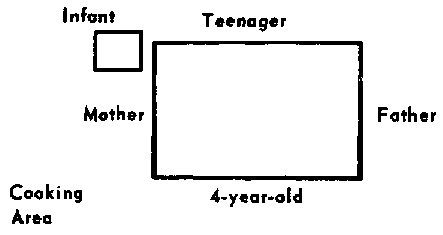
Key Points to Emphasize in Serving
1. It is good for children to have special places to sit at a meal and to know they can expect good meals there regularly. It gives a child a safe feeling.
2. Give special attention to how to feed a baby, a toddler, and other children unable to feed themselves.
1. Send simple printed sheets with information on food and nutrition home to mothers with schoolchildren.
2. Visit good home gardens, especially those growing dark green leafy and deep yellow vegetables. Discuss the value of such gardens in improving diets.
3. Use puppets and filmstrips to instruct women about good diets and local foods which would enrich diets. You might tell a part of the story of Samuel and Mary each time you visit a village.
4. Make wide use of flannelgraph method demonstrations.
5. Arrange attractive displays of foods which should be included each day in the diet of:
(1) Pregnant and nursing mothers.
(2) Children of different ages.
6. Whenever possible, use real foods as teaching aids.
7. Work with mothers who have children in the hospital. Many children who go to the hospital for malnutrition are cured and discharged without their mothers ever being shown how to feed them properly to avoid malnutrition in the future.
8. Help to carry out a program of food and nutrition education: (1) in the schools, (2) in literacy classes, (3) in farmers' training centers, (4) in village council meetings, and (5) in other organized groups.
The best way for rural people to have good diets is to grow their own food. As you teach people the place each kind of food has in their diet, also teach them how to produce more of it for their own use. In most areas, families can grow enough foods from each group we have discussed to have a good diet. As you help families grow their own food, consider the following questions: Is the best possible kind of seed being used in planting? Is the land being prepared, fertilized, cultivated, and watered as well as it could be to grow the best food possible? Are several different kinds of pulses, cereals, vegetables, and fruits grown to give variety and a year-round supply? Can storage facilities keep a year-round supply safe from weevils, insects, rats, and mice, etc. ?
Could the production of milk and meat be increased by better management, better feed, preventing disease, or upgrading the stock ? Animals that are not productive might be used as food for the family and replaced by younger animals of improved stock. It is a waste of feed and pasture to keep a nonproductive animal.
Could poultry and egg production be increased in your village by vaccinating birds to prevent disease, improving housing of birds, or culling unproductive birds?
Could fish eating be increased in your village by using, or importing into your area, fish flour and dried fish ? These are relatively inexpensive sources of good quality building food. Could villagers establish fish ponds or stock local rivers and lakes with fish to produce a fresh supply ?
We come back to the story of Samuel and Mary to show how much a family can do to supply its own food needs by planning ahead and improving farming and storage methods.
From all that had been said in the meetings, Samuel through that perhaps he could make better use of his land and grow more food for his family. He decided to ask the agricultural officer to help him.
Samuel had 8 acres of land, you remember. The soil was quite good. The agricultural officer said it was "better than some but not as fertile as the best." He said Samuel could do much to improve it.
Samuel listed in his mind the foods he had learned his family needed. They would need about seven bags of cereal grain. That would be enough for the family, plus some for guests plus a little extra in case of spoilage.
Samuel knew how much land it took to grow six bags of maize and one bag of millet. If it had been measured, it would have come to about 1 acre for the maize and 1/2 acre for the millet.
Samuel planned to put the pulses in the same field as the maize, so he allowed a bit more space for the combined maize-pulse crop. He planned on one bag of pulses. He planted three different kinds: beans, pigeon peas, and some groundnuts.
Samuel planned a space not quite as big for a cow and his few goats. It would have measured about 1-2/3 acres. Samuel planned another space, about the same size as the millet field, for root vegetables. He fenced off a section by the stream so Mary could grow green vegetables and tomatoes the year round.
These food crops, the house, and the space for the chickens took up about half the farm.
The agricultural officer said that part of the land should be left to rest (fallow). Next year it could be used and another section left to "rest". It was good for the soil to rest. Samuel planted a soil-building crop on this section. He planned to plow the crop under later to enrich the soil.
But Samuel knew he needed to grow something to sell. Then he would have cash for school fees, for fertilizer for next year, for clothes, and for the food he was not able to produce. Perhaps he would need to buy other foods too if the season was too dry. Therefore, he planned to plant some pyrethrum, a cash crop which does well in his country.
Samuel planted the crops as he had planned. The growing season was good that year. Samuel took the agricultural officer's advice and used fertilizer. He and Mary weeded the fields so the crops had plenty of nourishment from the soil. Samuel helped Mary with the vegetable garden. They learned from the agricultural officer and the village worker what fertilizer to use and how to plant vegetables. They had fresh tomatoes, leafy greens, carrots, beans, cabbage, and other vegetables most of the year. Mary said growing these vegetables herself helped her use more and prepare better meals for her family.
At harvest, Samuel got four extra bags of maize and half a bag of millet and pulses more than he had planned. You see, he had not counted on the results of fertilizer and proper weeding.
He was pleased indeed! He sold all the pyrethrum and four bags of maize. He put money in the local bank and kept out enough cash to buy a new fruit tree, some cloth so Mary could make new dresses for herself and Rosa, and new shirts and pants for himself and Peter. Best of all, he bought a new, shiny roof for his house. He had money in the bank for meat, perhaps some fruits and vegetables if needed, fat, and extra food items. He had a cow for milk and pulses and cereals in the store. He also had money put away for school fees and fertilizer.
Life seemed very good indeed. Because of what they had learned, they were eating better than ever before. Peter was doing good work in school and he was ever so much livlier. Rosa was so active and so bright now that Mary had to keep an eye on her almost every minute. Samuel and Mary both felt better. They did not tire so easily. Samuel started planning to clear more land to enlarge his farm.
They got along fine until the dry season was nearly over. Mary realized the maize and beans were nearly gone and would not last until the next crop. She found that rats were eating the maize and weevils were destroying the beans. Samuel had to use some of the money he had put in the bank to buy maize and beans.
This angered Samuel and he asked himself, "Why should I work hard and follow good farming methods to feed the rats and weevils?"
With the help of the local Extension agriculturist, Samuel rebuilt his grain store. He put it up high on legs and put strong metal shields around the legs so the rats could not climb there. To make it even safer from rats, he put wire around the outside of the store. He learned how to use a safe insecticide to control weevils in his beans. Samuel and Mary learned how useless it is to work hard to produce good food for themselves and their children and then let the rats and weevils destroy it. It is just as useless to grow other foods if they spoil or rot before they can be used.
But Samuel and Mary learned. Because they planned ahead, improved their farming and storage met hods, and improved their eating practices, the whole family feels better and is happier.
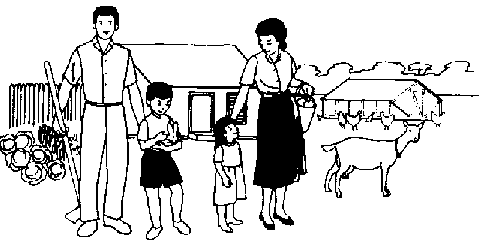
Other families can learn also. Families in your area can increase and improve the food they grow and improve their diets by learning more about the foods they need and how to prepare them.
You can use this part of the story of Samuel and Mary to show how much a family can do to supply their own food needs. You can also use the story to show why families need to plan for cash to buy foods they cannot produce, as well as other things like school fees, fertilizer, clothes, etc.
Village workers like yourself will face widely different situations in helping to bring about livestock and poultry improvement. You will need much information to make recommendations to families. The local agriculturists, extension agents, or vocational agriculture teachers in your area can help you. There are specialists in the Ministry of Agriculture or in your agricultural college to whom you can also turn for information.
GROWING FOOD AT HOME
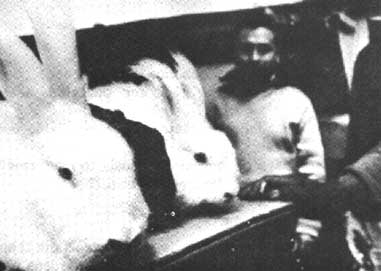
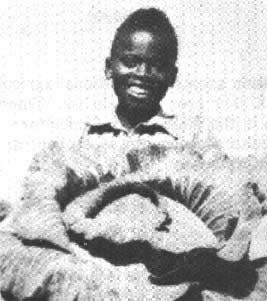
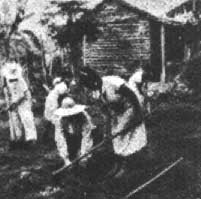

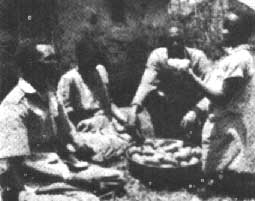
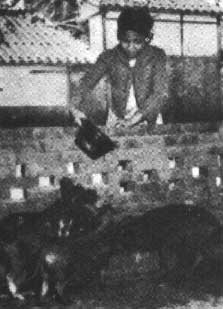
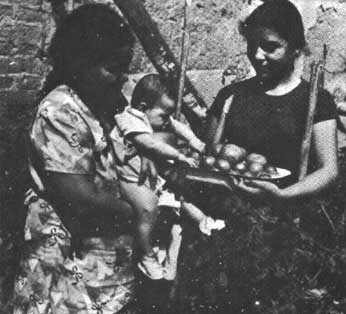
Every family interested in raising livestock or poultry should make its own decisions about growing them. Discuss the following questions with them as you start a livestock or poultry improvement program:
� What will the family's aim be: to have more meat, milk, and eggs for themselves to eat, to sell some for extra cash income, or a combination of these ?
� Can they grow enough feed or must they buy some?
� What experience have they had with livestock and poultry ? What kinds and how many of each do they now have ? What size herd or flock can they care for?
� Is the climate good for the kinds they want to raise ?
� What building materials are available for housing ?
� What are the chief hazards to overcome?
� What is the best way to begin ?
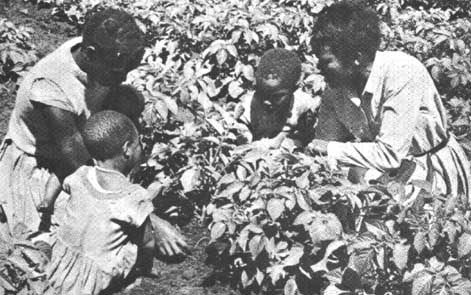
None of your work is more important than encouraging families to grow good gardens for as long as the weather permits. You will find much help within your country for doing this. People in most areas already know how to grow vegetables and small fruits suitable to the climate and soil. Collect the literature already available in your country and use it in your teaching.
Help your people want to grow better gardens. As you work with village leaders and families, relate the growing of vegetables and small fruits to their program for better living. A good vegetable supply, for example, is a part of any work with foods and nutrition. These vegetables can come from good home gardens.
Help them understand how growing fruits and vegetables for the family not only will help them eat better and improve their health, but also will save money. Farm families often value the extra cash they get from selling food they produce more than they value the food for themselves. Try to get them to see this is a big mistake. When families grow gardens, they need less money to buy food. Fruits and vegetables used fresh from the garden generally taste better than those you buy. They are also more nutritious.
Families everywhere generally try to grow some vegetables if they have even a small piece of land. However, many of them only scatter a few seeds here and there. The few vegetables this method produces add little to the family's food supply.
Try to get families to save some land around the house or in the field to grow food for themselves. Help them make gardening a family affair. Garden projects are very popular with club boys and girls throughout the world.
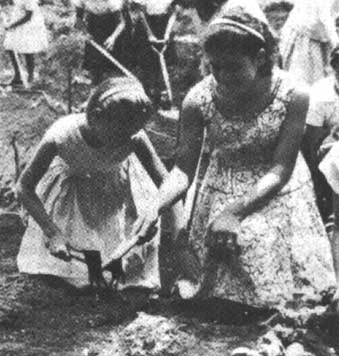
Deciding on the kind of garden you want, where you will put it, what you will grow, and getting everything ready before the actual work should be started is important to having a good garden. Here are some suggestions:
Decide where to put the garden.
The garden will be a valuable piece of land. It deserves the best location possible. Some families may not have a choice. They must make the best of whatever land is available. When there is some choice of location, consider these things in deciding where to put the garden:
1. Nearness to water
This is an important consideration. Gardens must have water. When there is not enough rain, they must be irrigated or watered by hand. Therefore, they should be located near a permanent water supply such as stream, well, dam, or other source, especially in areas that have dry seasons.
2. Nearness to the house or compound
Gardens need some care almost every day. When they are near the house, it is easier to give them this constant care and easier to protect them from thieves. When they are located far from the house, they are often neglected. Then the family is disappointed because they do not get the amount of vegetables they expect.
3. In the sum
Growing vegetables need sun. Do not locate the garden too near trees that will shade it. Tree roots also take food and water from the soil around them.
4. In good soil
A deep, rich loam, a mixture of sand, humus, and clay soils, is often the most fertile. This is the best kind of soil for vegetables. Remember, it takes good soil to grow good vegetables.
5. Lay of the land
A steep slope does not make a good garden location. The seeds and plants along with the soil and fertilizer may wash away. The land at the bottom of such a slope may become too damp or wet for best growth. Gentle slopes with good drainage are best. If only a steep slope is available, plant across the slope, rather than up and down.
Plan the size of the garden.
The size will depend on the:
1. amount of space available
2. number of people to be fed
3. number of people to work in the garden
4. ability of the workers
5. kind of soil available this affects the distance between rows and between plants.
6. kinds of vegetables to be grown.
If people have never made a garden before, it is best for them to begin with a small garden and enlarge it year by year. Some people make the mistake of having a larger plot than they will take care of. A small plot, well looked after and managed, is better than a large plot which is neglected.
Decide on the kinds and amounts of vegetables needed.
Consider the number of people in the family and the vegetables they like. For good nutrition, remember the special need for leafy greens and for dark green and deep yellow vegetables. Most families like a lot of tomatoes and need to plan for them. In many countries, families have plenty of starchy plants such as potatoes and yams. Where this is the case, the space in the garden would be better used for vegetables needed to improve the diet.
Families should decide which vegetables they will plant several crops of during a growing season and also which ones they want to grow enough of to dry and store. Lowland areas may be more favorable for warm season crops and higher altitudes for cool season crops. Encourage families to try a few new vegetables each year.
They should choose vegetables from each of these groups:
a. The leafy vegetables-beet tops, cabbage, collards, mustard, chard, spinach, and turnip tops. Local wild greens of high food value, such as amaranth, may be worth a place in the garden.
b. The root vegetables-beets, carrots, turnips, potatoes, sweet potatoes, and yams.
c. The fruit vegetables-tomatoes, eggplant, okra, peppers, squash, sweet corn, garden peas, chickpeas, table varieties of cowpeas, and beans. Beans may be grown for green snap beans or shelled beans. Lima and kidney beans are especially good for shelling. They may be used fresh or dried.
Fruits should be grown if there is enough space. Some of the smaller fruits, such as grapes, may be grown in a large garden. If the garden is small, fruits may be grown nearby, perhaps in the yard around the house. The fruits may grow on vines, bushes grown singly or as a hedge, or trees.
Here are a few examples:
a. Vines-grapes, chayote, granadilla
b. Bushes-many kinds of berries
c. Trees-apple, peach, pear, avocado, guava, mango, papaya, sapote, orange, grapefruit, lemon.
There will be many others that grow in your area.
Choose the seeds.
Buy the best seeds available. If possible, get a new improved, disease-resistant variety that grows in the area. They usually produce better. Consider the need for both early and late varieties. Be sure families have enough seed for the number of crops they plan of each vegetable. Get seed well before planting time.
Plan when to plant.
Knowing the best planting date for each kind and variety of vegetable is important. Study the rainy and dry seasons to learn which months will be best suited for vegetable crops. Some vegetables require a lot of water and will not grow well in the dry season. On the other hand, some vegetables may not grow well during a rainy season if the rains are heavy. Ask your local agriculturist to help you learn the best months for planting various vegetables.
Make a garden plan.
Families should make a rough sketch of how their garden will be laid out, how the seed beds will be arranged, the kind of seeds to be planted in each, and where the paths will be. By planting the same vegetable at different times, they can have fresh vegetables for many months. For example, they could plant two or three rows of beans or sweet corn every 3 or 4 weeks. The garden plan should show these repeated plantings.
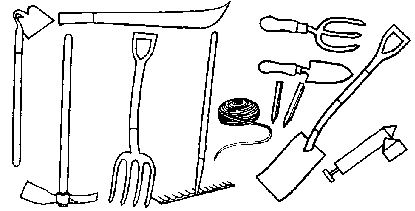
Only a few tools are needed to make a good garden. The kind of tools used will vary. In most villages, a farmer will have one or two basic hand tools with which he does most of his farm work. He will also probably use these for gardening. Get tools ready before they are needed. Garden work is easier when tools are sharp and clean. They should not be left lying around. The following are useful garden tools:
a. Machete or ax to clear brush
b. Mattock for digging out stones or large roots
c. Spade to turn the soil
d. Spading fork to turn soil, handle manure and compost, and harvest root crops
e. Rake for leveling soil and removing stones and trash
f. Cord and stakes to mark off rows
g. Trowel for transplanting seedlings
h. Sprayer or duster for insecticides
i. Hoe for cultivating, weeding, and opening row.
Be sure to teach families the following rules on tool use and care. Keep tools in good condition. Clean them after each use to prevent rust. Keep cutting tools sharp. Keep wooden handles tight, clean, and smooth. Mend or replace broken handles immediately. Store tools in a dry place. Grease or oil tools before storing them to prevent rust. Clean and dry sprayers and dusters after each use.
Use tools safely to avoid injuring yourself and fellow gardeners. Do not leave sharp tools on the ground where they can be stepped on. Tools are not toys. Even small children can help in the garden, but you must watch them carefully when they are using sharp tools.
This should be done at least 4 to 6 weeks before planting time. First, clear the site of trees and bushes. Dig out the roots and stumps and burn or haul them away from the plot. Clear away all stones, trash, and rubbish. This helps to keep down insects. Dig out any grass on the site and put it on the compost pile.
Fence the garden plot to keep out chickens, goats, cattle, rabbits, and other animals. It is a great waste of effort to let animals destroy vegetables that families have worked hard to grow. Wire, mesh, bamboo, or other durable local materials can be used for fencing. Thornless cactus, hibiscus, sisal, or other plants that will grow into strong hedges can be used to make an inexpensive living fence.
Prepare the ground. Carefully and thoroughly working the soil before planting makes it easier for the young seedlings to come up and start toward strong, healthy growth. It also makes later cultivation and weed control easier.
Work the soil when it is moist but not wet. When it is not possible to plow the ground, spade or thoroughly turn it with a fork to a depth of about 10 inches. Break up all clods and make the soil loose, fine, and crumbly.
Use animal manure, compost, green manure, or some of each to make the soil rich so that it will grow more and better vegetables. Mix in the manure or compost well.
Animal manure from chickens, cows, goats, sheep, or hogs is good. It should be well rotted because fresh manure is likely to injure the plants. Use about 1 pound of manure per square foot of garden area. Use only about one-fourth this much chicken manure. Spread manure over the ground before digging or plowing. Never use human waste on a garden.
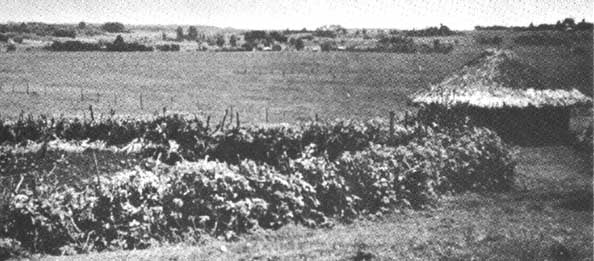
It can spread disease. If animal manure is scarce, it is especially important to have a good supply of compost.
Compost is made from plant and animal waste common in nearly all countries. This is called organic matter because it comes from living things. Compost is one of the best and cheapest ways of providing fertilizer for the garden. It also helps keep the soil the right texture to work easily.
Leaves, grass clippings, sugarcane, chopped corn cobs, cotton or tobacco stalks, paddy husk or rice straw, vegetable and fruit peelings, animal bedding, and garbage all make good compost. Some good top soil with wood ashes or lime and a little animal manure mixed with these wastes makes compost a better fertilizer.
Compost may be made in a trench or pit, or it may be made in a pile or heap on top of the ground. When it is made on top of the ground, make a little pen or fence around it to keep it from getting scattered. A good size for either a pit or a heap is about 2-� to 3 feet deep, 4 feet wide, and 6 feet long.
Start by putting a 6-to-8-inch layer of leaves, stalks, or other plant material on the bottom. On top of this put a layer of animal manure or complete chemical fertilizer. Cover this layer with well-pulverized soil mixed with wood ashes or lime to a depth of about 2 inches. Wet each layer evenly with water. Continue building up layers of refuse, manure, and soil, one on top of the other, until the pile is 2-� to 3 feet high. Keep the pile moist, but not wet. Keep the sides of the pile higher than the center so water will not run off.
After about 3 weeks, turn the heap with a fork or spade. Turn it again after another 5 weeks. This makes the heap decompose evenly. In 3 to 4 months, the compost can be used on the garden.
Any compost materials can be worked into the soil when the garden is plowed or spaded. They can also be used as a surface mulch during the growing season and worked into the soil the next time it is plowed or spaded.
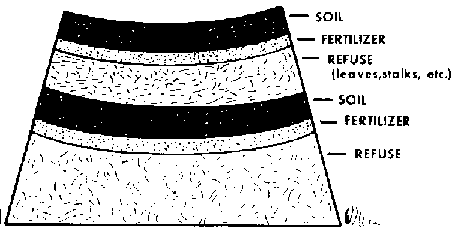
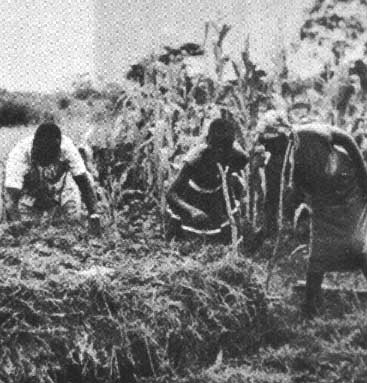
Green Manure. In warm climates, it is difficult to keep enough organic matter in the soil. Many good gardeners plant a field crop such as crotalaria, clover, vetch, rye, or millet on the garden plot. Crops such as these should be turned under while they are still green and not yet mature. This must be done several weeks before vegetables are again planted to allow them to decay. Ask your agriculturist which are the best green manure crops for your area.
Commercial fertilizers will improve the soil even when manure and compost are used. A complete fertilizer contains nitrogen, phosphorous, and potassium. The percentage of each of these in a fertilizer is always given in that order. For example, a 5-10-5 fertilizer means 5 percent of it is nitrogen, 10 percent is phosphorous, and 5 percent is potassium. Commercial fertilizer helps plants grow. Use about �-pound of 5-10-5 per 8 square feet of ground.
Fertilizer is used most efficiently when it is banded under the seed. To do this, open the furrow 2 to 3 inches deeper than seeding depth. Spread 1/8-pound of fertilizer per 60 feet of row. Cover the fertilizer to seeding depth, then lightly firm the soil by walking down the row or with the back of a hoe. Place the seed and cover it as usual. Then firm the soil again.
Some vegetable seeds can be sown "in the open". This means directly in the garden. Others will need to be sown in specially prepared seed boxes or nurseries. Partly grown plants are later transplanted to the garden.
In the garden. Vegetables that can be planted directly in the garden include beans, carrots, cucumbers, okra, squashes, beets, radishes, turnips, and potatoes. These seeds can be sown in raised beds, ridges, or hills that are about 8 or 10 inches high if excess rain or poor drainage is a problem. In areas where the rainfall is light and drainage good, they may be sown in flat beds or rows spaced 3 to 4 feet apart.
A convenient size for a garden bed is 3 or 4 feet wide and 10 to 20 feet long, depending on the size of the garden. Work up the seed beds when the soil is moist. It is generally best to lay out beds, whether they are raised or flat, on the contour. This means across the slope. This helps prevent rain from washing the soil away and also helps hold water during the dry season. Level the beds with a rake, break up any clods, and make the soil fine and smooth.
Plant seeds in straight rows. This makes it easier to plant, care for, and harvest crops. Mix a little fine sand with very small seeds like carrot or lettuce so they will not be planted too thickly. Cover them lightly with soil. Plant larger seeds in furrows 1 to 1-� inches deep. Sprinkle seeds with water each evening until they come up. Plant each kind of vegetable by itself. For example, plant rows of beans in one place and rows of squash in another. When raises beds are used for small seeds, plant one kind in one part of the bed and another kind in the other part.
In seed boxes or nurseries. Families can grow their own plants for transplanting by sowing seeds in boxes. However, if there is a good nursery nearby, it is often cheaper and easier to buy healthy plants of varieties that grow well in the area. Plants recommended for transplanting include tomatoes, onions, cabbage, eggplant, sweet and hot peppers, cauliflower, collards, etc. There may be others in your area. If families decide to grow their own plants, be sure they sow the seeds early enough to give the plants time to grow before they set them in the garden.
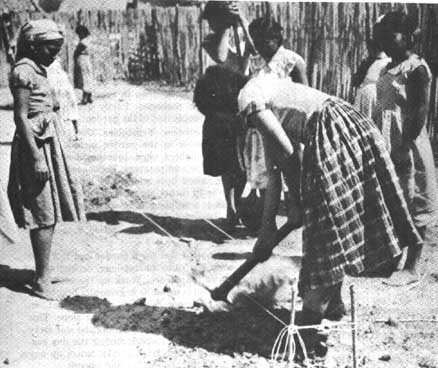
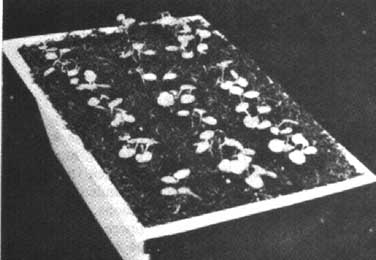
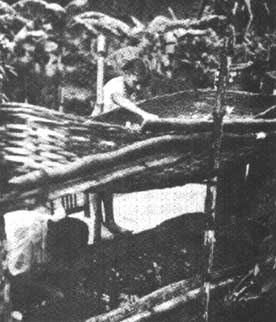
Seed Boxes or trays can be made from what is available. Shallow wooden boxes are ideal. Trays can be made of bamboo or pieces of metal roofing. Calabashes, gourds, or broken pots can also be used. Whatever kind of container is used, it should be at least 4 to 6 inches deep and have holes in the bottom to let extra water drain off.
1. Add a little fine manure or 2 to 3 teaspoons of fertilizer for each square foot of soil and mix it in thoroughly.
2. Fill the box to �-inch from the top with a good loam soil.
3. Make the soil fine, firm, and level on top so that it is very smooth for the tiny seeds.
4. Water the box so the soil is damp but not wet. Setting the box in water is a good way to water a seed box.
5. Make shallow grooves about 3 inches apart. Sow the seed in the grooves and cover them lightly with fine soil. Firm the soil gently with your hand or a flat board. Keep the boxes covered with a piece of burlap or paper until the seedlings first appear.
6. Place the boxes on a firm support and protect them from animals. Place them where they will get some sun but not the hot midday sun. Uncover them as soon as the seed starts to sprout. This will prevent tall, weak, spindly plants.
7. Water often enough to keep the soil damp but not wet.
8. After the plants start growing, they may need to be thinned or spread further apart in other flats before they are transplanted into the garden. This gives them enough room to grow strong and healthy.
Where the rainfall is heavy, plants should be transplanted to raised beds. Prepare these beds the same as for sowing seeds. Plan to set plants in the late afternoon or in cloudy weather. Water the seedlings in the seed box, then remove them carefully with as much dirt on the roots as possible. Make a hole in the garden bed large enough and deep enough to put the roots into without damaging them. Set the plants in the ground as quickly as possible to keep them from wilting. Gently press the earth around the roots to cover them completely so the plant will stand up. After setting the plant, water it. Do not put water in the hole before setting the plant. Using a starter solution to water plants gets them off to a good start. This can be made by using 4 tablespoons of fertilizer to 1 gallon of water or 1 cup of animal manure and �-cup of wood ashes to a gallon of water. Use about 1 cup of starter solution for each plant. Shade plants and dust insecticide around them to keep cutworms and crickets from cutting off the young plants.
Watering. This is the hardest work in growing vegetables during the dry season. If enough water is available, the best and easiest way is to run water through the furrows the length of the row until the soil around the vegetables is wet. If this is not practical, put water directly on the bed or around the plants. It is important to use enough so the water sinks at least 5 or 6 inches into the soil. On beds that are 4 feet wide, three kerosene tins or 12 gallons of water should be used for every 4 feet of length.
A good heavy watering twice a week after the plants have started growing well is better than just a light sprinkling every day. Watering should only be done in the late afternoon. The sun dries up the water and bakes the ground hard if plants are watered during the day. It is easy to make a watering vessel from a kerosene tin or calabash by punching small holes in the bottom. Then you can put the water on gently so the plants are not damaged.
Mulching. Mulch can be any material such as dried grass or straw placed on top of the soil around and between plants. It helps to keep the soil from drying out and makes the best use of water. A good mulch also helps keep the soil cool and keeps down the weeds.
Feeding. Plants should be fertilized once or twice, sometimes three times, during the growing season. This gives rapid growth with high production of good quality crops. The fertilizer can be put between the rows, near but not touching the plants. This is called sidedressing.
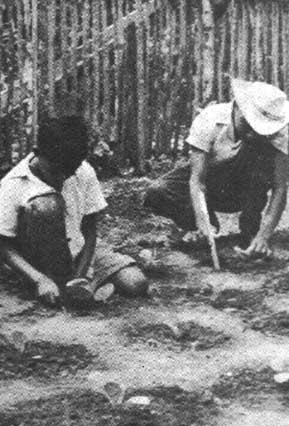
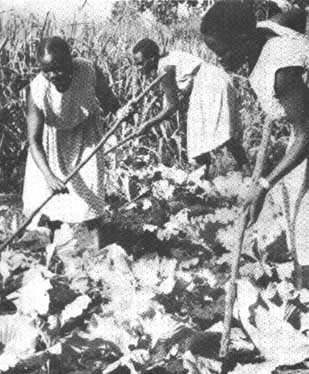
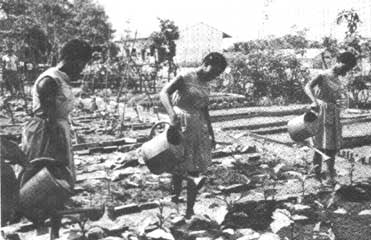
Because nitrogen stimulates plant growth, it is usually the only one used. Nitrate of soda is the form commonly used for sidedressing. Use 1/2 to 1 pound per 10 square feet.
Weeding. Weeds use water and plant food that are needed for the vegetables. Weeds also make it easier for insects and disease to increase. It is a waste of work already done to let weeds take over in your garden. They can be pulled up by hand or dug up with a hoe. You can also prevent them from growing by using a good mulch. Children enjoy gardening and can be taught to do the weeding, etc.
Hoeing. Keeping the- soil loose and open helps to save water. Frequent and regular hoeing can greatly increase the yield of vegetables. The first hoeing should be done soon after the plants are up.
Controlling insects and disease. When plants are strong and healthy they resist disease and insects better than when they are spindly and weak.
Many pests attack vegetable plants while they are growing and there are many ways of controlling them. The first and most important is to destroy their breeding places. Be sure the garden is free of weeds, trash, brush, etc. Bugs and worms can be controlled if they are picked off by hand early in the morning and late in the afternoon and killed. Insecticides and fungicides also control insects and disease. Your local authorities can tell you how to use them. Find out from your agricultural workers which plant diseases and pests give trouble in your area and what is recommended for controlling them. Keep all insecticides away from children and use them with care. Some are safer than others. Be sure that you follow the directions for using insecticides and wash all vegetables before eating them. Eating vegetables that have insecticides on them can be harmful.
When to gather vegetables is a very important part of good gardening. Many people let vegetables get too ripe before harvesting them.
Vegetables should be eaten while they are young and tender. They taste better and many of them have more protective food value then than they do when they get too mature.
Vegetables like beans, peas, okra, and lettuce should be gathered every day or two. Vegetables should not be allowed to stand after gathering. When they become wilted or dried out, they are not as good. All vegetables should be cooked, eaten, or preserved in some way as soon after harvesting as possible.
Many rural schools have a school garden not only to teach the children how to grow vegetables, but also to get them interested in eating vegetables. School gardens can furnish vegetables for the school lunch program. Subjects such as nutrition, science, and arithmetic can be related to the garden and made more interesting for the children.
A school garden can also influence the children to start a garden at home. As a village worker, you may be asked to help with important school projects of many kinds. Often this includes helping with a school garden.
A good way to teach gardening is through method demonstrations. But before giving a demonstration, be sure that the practice meets a real need and interest.
A demonstration on compost making provides an excellent opportunity to involve the people by asking them to help make the compost pile. Discuss compost while you work. Try to get favorable opinions from the group, and interest in making a compost pile. Try to get some of them to volunteer to make one when they return home.
A good result demonstration can also be carried out with a family that is making a compost pile, particularly if they record the time they spend with it, the cost if any, and the increased value of vegetables produced. It should be located in a place where neighbors can observe it.
Other method demonstrations you could give include:
1. How to make seed beds, ridges, and furrows on the contour.
2. How to transplant tomato or cabbage plants.
3. How to sidedress plants with manure or nitrate of soda.
4. How to make seed boxes and plant seeds in them.
5. How to make a hand duster for putting insecticide on plants. (Punch holes in the metal top of glass jar or tie cheesecloth over a can or jar.)
6. How to irrigate a garden.
7. How to select vegetables while they are young and tender.
Result demonstrations, such as growing a new variety or using improved cultivation methods, and garden tours are other excellent ways to teach good gardening.
Chickens are important to many village families. In your area there are probably chickens running loose, picking up whatever they can find to eat and laying only what eggs they can produce on the food they get. Such chickens contribute little to the food supply. Growing improved chickens for family use is one of the best ways to get more of the animal protein most village people need so badly in their diets.
A good poultry program can make a major improvement in the diets and health of people in your area. Even a small flock of 15 to 30 laying hens with good feed and good care can supply a family with fresh eggs and some meat during most of the year. They can have fresh meat when they want it without the problem of a large quantity on hand at one time as there is when a larger animal is butchered. Too often, villagers who keep poultry think only of selling the eggs and chickens for a little extra cash income. They do not realize the value of the meat and eggs to their health.
The family poultry flock is generally the responsibility of the homemaker and the children. Boys and girls like poultry projects in their club work. This is a good way to get them interested in eating more eggs and chickens as well as a way for them to make some money for themselves. Most of your educational work, then, may be with the women and children. However, the help and interest of the men is necessary if poultry is to become an accepted part of the family food program.
There are several different ways to start improving flocks. Many village workers have felt their best chance to bring about desired changes is in the improvement of native stock.
Native chickens are generally hardier than other breeds and they are used to conditions on the farm. A family can upgrade their present flock and have more meat and eggs from the same number of birds by using a good cockerel, better feed, and better care. The local agriculturist can tell you how to secure improved cockerels.
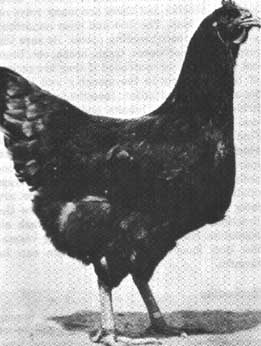
On the other hand, if people wish to get rid of their native stock and make a fresh start with another breed, or if they are just starting to raise chickens, they must first decide on the breed they want. Many improved breeds are good for both meat and eggs and, therefore, are desirable for a family flock. Such breeds include Rhode Island Reds, Plymouth Rocks, and New Hampshires. Leghorns are good layers and eat less feed, but do not provide as much meat as the larger breeds.
After deciding on the breed, families might wish to buy second-year layers from a commercial poultry grower if there is one in your area. These are hens that have laid for a year or more. The commercial poultry man wants to replace them with younger birds. He generally is willing to sell these second-year hens at a very reasonable cost. They should be better layers than ordinary chickens. They are from healthy stock and have most likely been vaccinated against disease. When they stop laying, they will provide meat for the family. Your agriculturist can help you make such arrangements.
To know how many second-year layers to buy, the family must decide how many eggs they can use in a day. Multiply this number by 2�. For example, if the family can use 10 eggs a day, they probably will want to start with 25 layers.
Another way to start a small flock is to buy day-old chicks and raise them with a homemade brooder. A brooder is a device for keeping chicks warm and raising them without the care of a hen. A fireless homemade brooder can be made out of a box. Bore holes in it for ventilation and line it with gunny sacks or other heavy material to keep the chicks warm. Put the chicks in the box at night and keep it in a safe warm place. They can be let out in the daytime.
The simplest way to produce chickens for home use is by setting carefully selected, fertile eggs under a broody hen.
The broody hen is usually set on a straw nest in a box about 18 inches square. Place the nest where the hen will not be disturbed and put 13 to 15 fertile eggs in it. Watch the nest because hens sometimes abandon the eggs.
The broody hen must be free of lice all through the hatching and brooding period. She should have access to feed and water all the time.
About 24 hours after the chicks hatch, take them from the nest and put them in a brood coop with the hen. The simplest coop is the A-type, but a box coop as shown in the illustration is also good. Second-hand boxes may easily be made over into brood coops.
The hen stays in the coop while the chicks are free to come and go. They need exercise and sunlight. The coop should be moved occasionally so the chicks will have clean dry ground to roam on.
Good feed is essential if chickens are to be healthy and produce well. Chickens need building, protective, and energy foods the same as people.
Baby chicks need finely ground or mashed feed 4 or 5 times a day. One good food can be prepared by hard boiling an infertile egg, chopping it very fine, shell and all, and mixing it with the same amount of bread crumbs, boiled rice, or other starchy plant. Very fine rice bran can also be used. This will feed about 25 baby chicks for a day. Keep finely cut green food and sanitary drinking water before the chicks at all times.
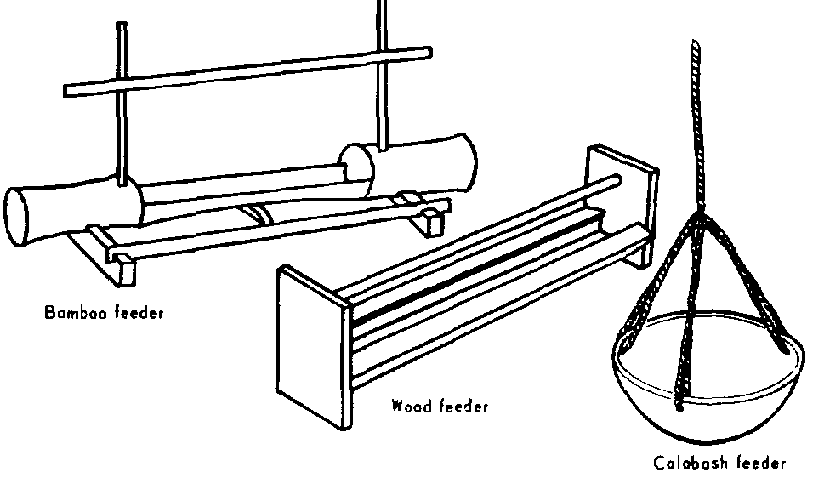
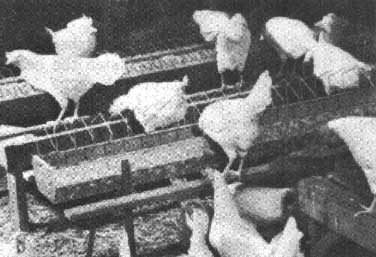
As chicks get older, they can begin to eat the same feed as the laying flock. One laying hen needs about �-pound or 2/3-cup of feed a day. For 25 hens about 6-� pounds or a little over 4 quarts are needed each day.
Many people give only corn to their chickens. But corn by itself does not have enough building material for the hen to produce eggs. Roasted soybeans and groundnuts can be added to corn to make a good ration. These should never be fed raw. Yellow corn is better than white corn. Other grains such as oats, barley, millet, and sorghum also make good feed if additional protein such as fish meal, sesame meal, groundnut cake, or maize gluten meal is added. Rice bran or rice polishings is used to feed chickens in some areas. If any family has a surplus of milk, this is an excellent food for chickens. Vegetable peelings and the green tops of vegetables also make good feed. Cook potato peelings before feeding them to chickens. Fresh kitchen scraps also can be fed. Never give chickens any spoiled food, especially meat.
Chickens need plenty of green feed. Letting chickens range on pasture grass is a good practice if they are not bothered by predatory animals. Range birds benefit from exercise and sunlight. With the green feed, they need less other feed. Some farmers plant a patch of rye, alfalfa, or other such crop to provide green feed. This is especially needed if chickens are confined.
Chickens eating whole grains need grit such as sand or "pea" gravel to grind the grain to make it digestible. Birds on range pick up plenty of gravel. Laying hens need calcium to make egg shells. This can be supplied by feeding oyster shell, mussel shell, or other suitable fish shells. These must be crushed fine for chickens to eat.
Chickens need plenty of water. Be sure it is clean, safe water. Twenty-five layers will drink 2 to 2� gallons of water a day. Keep water available in clean containers at all times.

Every family that has chickens needs some kind of a house for them because:
� Chickens need to be protected from heat, cold, rain, and wind.
� It will help protect them from hawks, owls, crows, foxes, weasels, rats, skunks, and other such animals that destroy them. Chickens can be locked in the poultry house at night to help prevent stealing by chicken thieves and let out in the morning to range.
� Eggs laid in nests provided in poultry houses are easier to find and collect.
� Suitable roosts can be built in a poultry house.
� The roost poles, walls, and floors of a chicken house can be disinfected to aid in controlling lice and mites. Ask your agriculturist about good disinfectants to use and how to use them safely.
� A poultry house can be used for brooding young chickens.
� Keep the poultry house clean and do not place it too close to the house in which the family lives.
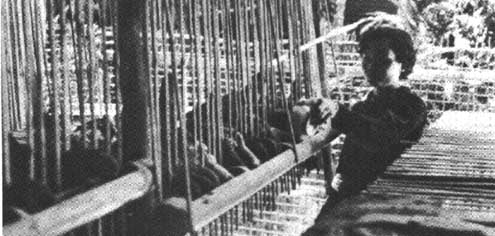
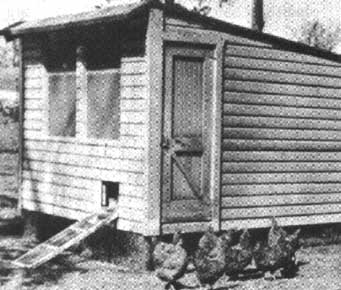
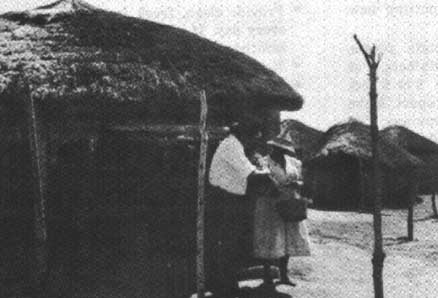
No one type of poultry house is best. Local conditions and the materials available will determine the best kind. A square or rectangular house is usually most satisfactory. A flock of 25 hens would need a house about 10 feet long and 6 feet wide. It should be about 6 feet high in front and 5 feet at the back. The house can be built of adobe, bamboo, lumber, or other local materials. The number of openings and ventilation will depend on the climate. The house should have some shade to help keep it cool in hot weather. A thatched roof would make the house more comfortable in both summer and winter than a roof of metal. The poultry house floor may be concrete, boards, or dirt. Make the poultry house ratproof by using wire or metal over all openings. Cover the floor of the house with a good litter. This may be cut or chopped straw or dried grass, ground corn cobs, tobacco stems, or other dry material that takes up moisture. Add fresh litter once or twice a month. Change the litter before putting new birds in the house.
The poultry house should contain roosts, nests, feed hoppers, and water containers. Put roost poles at the back of the house, 2 or 3 feet above the floor and 10 or 12 inches apart. Make a pit under the roosts to catch droppings. The pit must be cleaned often. Spread droppings and litter on the garden.
Along one wall build a nest for every four or five hens. Make each nest about 14 inches wide, 14 inches high, and 12 inches deep.
Rats and mice are among the worst enemies of poultry. They kill young chickens, destroy eggs, eat or contaminate poultry feed, and damage poultry houses and equipment. They spread disease and parasites. Losses from rats and mice in a farm-size flock are usually very great but often go unnoticed because the losses are gradual. A ratproof poultry house is one of the best ways to guard against these pests.
Get rid of rat and mouse breeding and hiding places. Clean out trash and dumps of any kind. Do not let garbage collect anywhere. Provide ratproof storage for all food and feed around the house or farm. Use rat poison. Follow the directions carefully and keep poison away from children and domestic animals.
Chickens get sick easily. Some of the most common diseases of poultry include: croup or a cold, Newcastle disease, and coccidiosis. When chickens have a watery discharge from the eyes and nose, do not eat well, become droopy, have pale combs and wattles, or their droppings have a bad odor or become bloody, you should advise the family to isolate the sick birds at once and get help from an agriculturist or veterinarian.
Parasites such as lice, mites, ticks, and chiggers are a constant problem. They lower production of both meat and eggs by sucking blood from chickens. They also carry disease germs.
Prevention is the best way to deal with poultry diseases and parasites. Sanitation is essential. The following measures can help prevent loss from disease and parasites:
� Provide clean, fresh feed and pure water every day. If water is contaminated, use a sanitizer.
� Keep the poultry house clean and dry.
� Clean feeders and waterers two or three times a week.
� Keep chickens on clean ground away from the house and out of the yard where the family lives.
� Remove any sick chicken from the flock. It is usually best to kill a sick chicken and burn or bury the carcass completely.
� For lice, mites, and ticks, treat roost poles, chicken houses, and litter with disinfectants. Ask your agriculturist which disinfectants are available and which you should recommend.
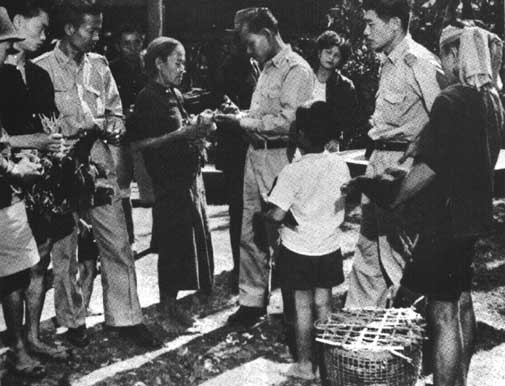
Gather eggs twice a day. If eggs are allowed to stay in the nests or on the floor all day some may be accidentally broken and the hens will eat them. From this they may develop the bad habit of breaking eggs for food. Clean dirty eggs. Any cracked or soiled eggs should be thoroughly cooked before eating. Encourage the family to eat some of their eggs instead of selling all they produce.
Culling means taking hens that have stopped laying out of the flock. When hens have stopped laying they should be culled out, killed, and eaten if they are healthy and in good condition. You can tell if hens are laying by examining them carefully. In a good layer the abdomen is soft and deep, the vent is large and moist, and the comb and wattles are bright red. The best time for culling is the late summer or early fall. It is easier to tell the good layers from the poor ones then. However, it is wisest to cull the flock when the family can use the meat.
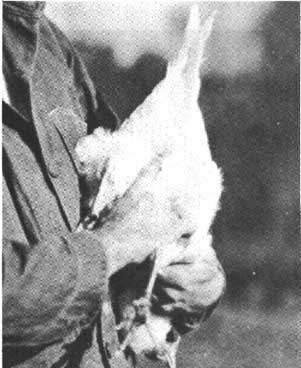
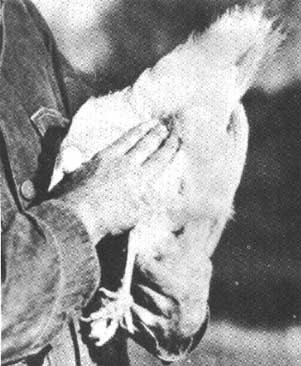
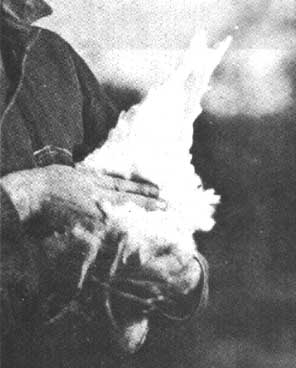
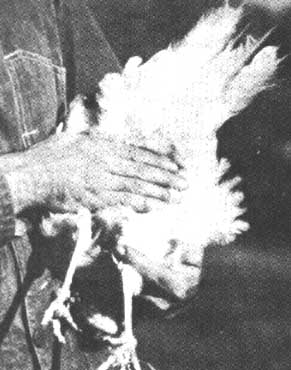
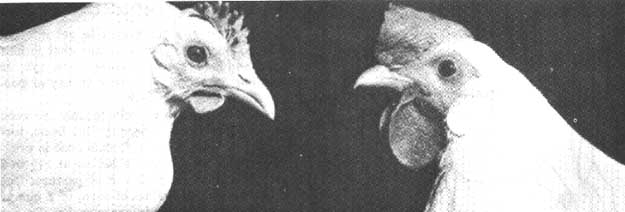
1. You may want help from an agriculturist when you demonstrate how to make such equipment as:
� Feeders
� Waterers
� Brooders
� Brood coops.
2. Show how to select eggs and prepare a nest for setting.
3. Show how to cull layers from non-layers.
4. Show how to prepare feed for baby chicks.
5. Show how to slaughter and dress chickens for cooking.
6. Show how to cook or barbecue chickens properly.
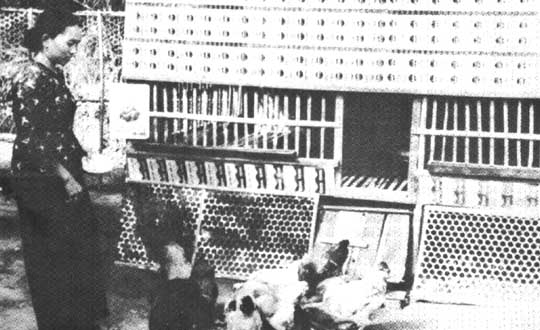
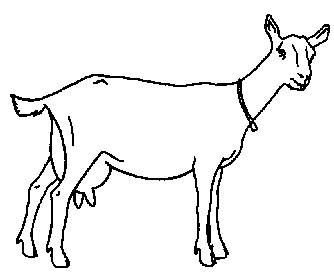
Goat's milk is a good food for the whole family. It compares well with cow's milk in food value. In some areas, goat's milk is preferred. It is good for drinking, cooking, and making cheese. Goat's milk is easy to digest. For this reason, babies, invalids, and others who cannot take cow's milk often thrive on goat's milk.
Many farmers do not have enough land for a cow or cannot afford one. They can still provide milk for their families by keeping milk goats. Goats can be kept where it is impossible to keep a cow. Goats are browsing animals. They will eat feed that otherwise would be wasted. They like leaves, twigs, and even brush. They can help clear land of brush and small trees. Be sure farmers protect valuable fruit or shade trees and shrubs. Goats will eat them too. Goats do well in hilly, mountainous country that will not support other kinds of livestock. However, they will produce more milk if they are kept on good pasture.
The best feed for goats is pasture or hay of alfalfa, red clover, soybean, or millet mixed with other grasses. Rye or wheat make good spring or fall pasture. A goat needs about �-acre of good pasture during a grazing season of 5 or 6 months. Overstocking ruins pasture and makes it easier for a goat to get internal parasites. Goats like early-cut hay that is half legume and half grass. Feeding oats, rye, or soybean or linseed meal along with hay or pasture will produce more milk.
When root crops are available they are good feed for goats. Goats especially like beets, turnips, and carrots. When a female goat is pregnant or fresh, she should be fed about 1� to 2 quarts of grain a day plus good pasture. One quart of oats and � quart of corn, or 2 quarts of oats make a good daily grain ration. Do not feed only corn to goats. Females that are not pregnant and not milking do not need grain. They can get along on hay, pasture, and root crops.
Goats need salt every day. They must be able to get water at all times. In hot weather they need shade. Do not let goats near surfaces that are painted with lead-based paints. They may eat the paint and be poisoned.
Goats are natural climbers. They will climb on low buildings and machinery unless they are tethered or enclosed in a tight fence. To tether a goat, you need a good stake with a light chain attached. Place the stake firmly in the ground and fasten the other end of the chain to a leather strap around the goat's neck. A goat should be tethered in a good pasture and moved several times a day. See that there is good, clean water within her reach.
Goats do not need any special kind of housing. Any well-built barn or shed that is clean, dry and free from drafts will do. Goats can get along without bedding if none is available. Goats may get foot rot. Trimming hoofs carefully and regularly and keeping pens dry will help control foot rot.

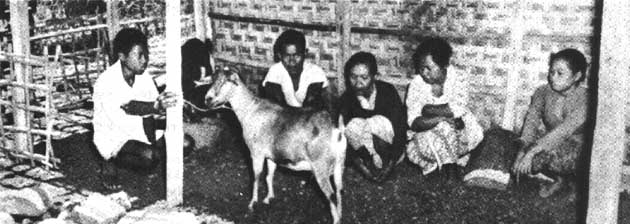
Dairy goats produce best on a regular schedule of feeding and milking. Heavy-producing does may need to be milked three times a day for a short time after freshening, but twice a day milking is usually enough. Be gentle with does. Whenever possible, the same person should milk a doe at the same time and place every day.
A good milk goat will give from 1 to 1� quarts of milk a day for about 10 months a year. If goat's milk is properly produced and handled, it should have no disagreeable odor or flavor. Bad odor and "off" flavor usually come from dirt or hair that has gotten into the milk. This can also happen if the goat eats strong-flavored foods such as onions, cabbage, etc., or if a buck is kept in with the milking does.
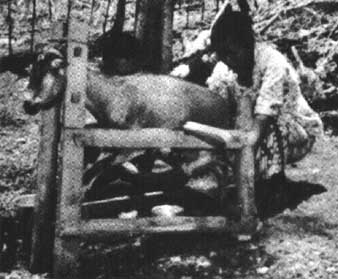
Goats are very clean and healthy animals. They are particular in their eating habits. They rarely ever have tuberculosis. This is a strong point in favor of goat's milk. However, they do sometimes have other diseases that can be transmitted in their milk. So it's safest to always boil goat's milk before drinking it or giving it to babies.
Milk the goat under as clean conditions as possible:
� Wash the goat's udder before milking her. Milk the first stream or two from each teat into a small cup. The openings in each teat may contain foreign matter that will affect the taste of the milk. Throw this first milk away with the garbage. Do not throw it on ground the goat may lie on. If a goat has a disease called mastitis, her udder may become hard and produce much less milk. If milk from an infected half gets on the other half or on the udder of another goat, the disease can spread. Goats with mastitis cannot give enough milk to help a family be better nourished.
� Be sure the milker's hands are clean and dry. Do not let them come in contact with the milk.
� Clip the hair on the goat's udder and flanks often to prevent it from falling into the milk.
� Use a clean, seamless, tin pail for milking.
� Use a milking stand. It is easier and helps to keep milk clean. (See illustration).
� Strain milk through a clean, finely-woven cloth which has been boiled, or a sanitary wire strainer.
� Wash utensils first in cold water, then in hot water and soap.
� Use boiling water to sterilize all milk utensils.
� Cool fresh milk as fast as possible.
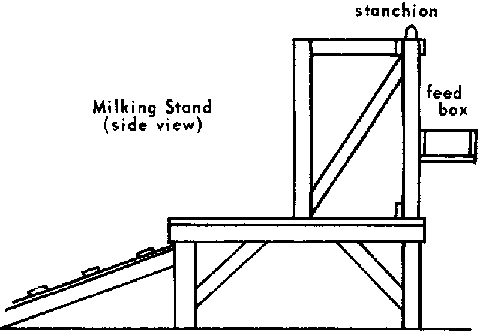
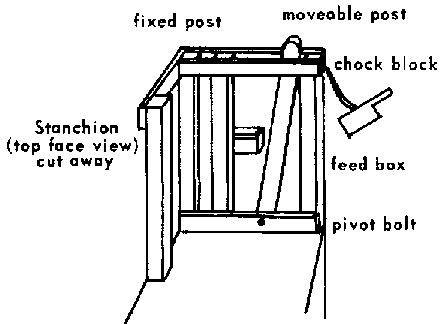
For selecting and breeding milk goats and raising the kids, consult your agriculturist. In most areas, you will be able to get a female goat bred. This saves the expense of keeping a buck. It does not pay to keep a buck for one or two does.
Goats and kids provide meat in many areas of the world. The skins when properly tanned make valuable leather. This may be another source of income for the family.
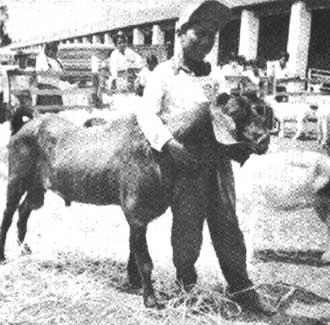
Rabbit meat is popular in many areas. It is very white and fine grained and has a mild flavor. It is nutritious and tastes good. Since rabbits are small, when they are butchered there is not more fresh meat than the family can easily care for at one time. In warm climates, this is especially important because of the difficulty of preserving meat. Rabbits do not take as much feed as larger animals. They breed and grow quickly and can fill a great need for meat, particularly in areas where there is a shortage of protein.
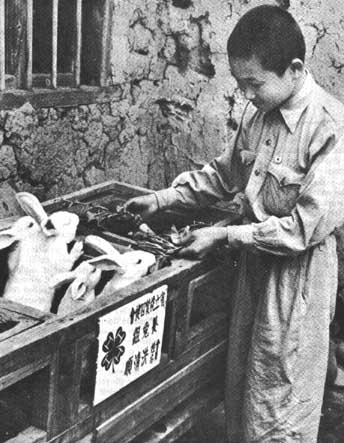

Rabbit manure is good for the garden and should be collected to use as fertilizer. It is easy to work it into the soil. There will be less loss of fertilizing elements if the manure is used in a compost pile.
A family can quickly learn how to grow rabbits. Usually it is best to begin on a small scale with one already-bred female rabbit, called a doe, or a pair, a female and a male. Boys and girls in club work have found rabbit projects a fine way to make money or furnish meat for the family.
Good meat rabbits are generally medium in size, rather short, compact, medium to fine-boned, broad and well covered with flesh. Wide heads and short necks go with good meat types. The does should be selected if possible from large litters because the tendency to produce large litters is inherited. Rabbit skins, if properly cared for, have some market value. The wool from Angora rabbits can usually be sold.
Rabbits require mostly plant foods. Fresh grass, good-tasting weeds, vegetables, and root crops make good feed. Do not feed rabbits cabbage, kale, or any strong-flavored plants. These greatly affect the flavor of rabbit meat. Such root crops as carrots, potatoes, turnips, and beets are especially valuable foods during the months when there is little green feed. At all times rabbits need some legume hay, such as alfalfa, soybean, clover, peanut, and kudzu. The hay should be green, leafy, and fine-stemmed. It should also be free from mildew or mold.
Also important are grains like oats, barley, rye, and the grain sorghums. These may be fed whole or milled. Soybean, peanut, or linseed meal also should be added to the diets to make sure rabbits get enough protein foods. This is especially important for mother rabbits nursing their young. Regularity in feeding is more important than the number of feedings. Rabbits eat more at night than during the day, especially in warm weather.
Fresh clean water is of the utmost importance, particularly during . the hot summer months. An average doe and her litter will consume at least a gallon of water every day. Rabbits also need salt. Put small amounts of salt in the feed or where the animals can nibble on it at will.
Rabbits are extremely sensitive to unclean surroundings. Therefore, strict sanitation practices must be followed if rabbits are to grow well and be healthy and strong. Remove manure, soiled bedding, and spoiled food daily. Wash water crocks and feed troughs often in hot, soapy water. Rinse them in clean water and dry them in the sun.
Rabbits are easily frightened and should be handled with care and gentleness. Rabbit shelters or pens should be enclosed so dogs and other animals cannot get to them. Keep cats and dogs away from rabbit food and bedding. Otherwise the rabbits may get tapeworms.
Rabbits should never be lifted by the ears or legs. This may injure them. To lift and carry a rabbit, grasp the skin over the shoulders with one hand. Place the other hand under the animal's rump to support its weight. If the rabbit struggles and scratches, hold it snugly under one arm.
A rabbit hutch or shelter can be made of wood, bamboo, or other available material. Provide individual hutches for grown rabbits. A hutch 2 feet high, 2-1/2 feet wide, and 4 to 5 feet long is desirable so that a doe and her litter may have about 10 square feet of floor space. A wire floor through which the droppings may fall is best because it can easily be kept clean.

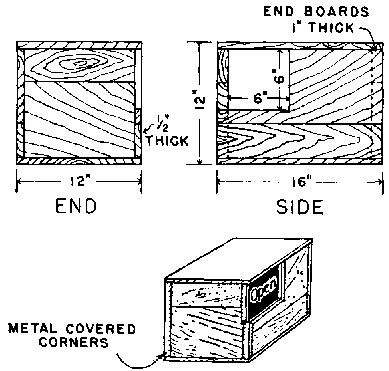
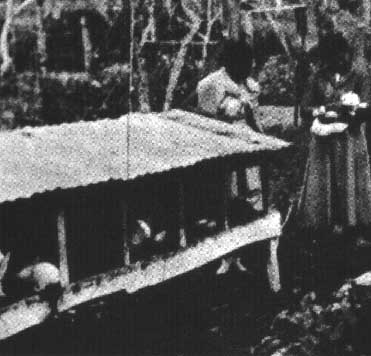
It is important to have a nest for the mother rabbit. This can be a basket or box kept in the hutch. Nest boxes should be large enough to prevent crowding and small enough to keep the young together. Clean and disinfect nest boxes before using them again. Ask your agriculturist for more information on breeding rabbits and raising the young.
Gnawing wood is natural for rabbits. Protect wooden parts of the hutch by placing wire mesh on the inside of the frame when you build it. Use strips of tin to protect exposed wooden edges. Treating the wood with creosote protects it as long as the scent and taste last. Placing twigs or pieces of soft wood in the hutch protects it to some extent. Rabbits may chew these instead of the hutch. Rabbits that have access to good-quality hay and are being fed some fresh green feed or root crops are less likely to gnaw on their hutches.
Rabbits are very sensitive to hot weather. Rabbit hutches should be placed where there is shade during the hot Dart of the day, but where they will get some sunlight during the cooler hours. Good air circulation is necessary, but rabbits should not be kept in strong drafts.
Move rabbits that seem to be suffering from the heat to a quiet well-ventilated place. Give them a damp sack to lie on. Wetting the tops of the hutches and the floors of the houses on a hot day will lower the temperature. Do not wet the rabbits themselves.
If grown rabbits are kept out of drafts, cold weather will not bother them much. Young litters need nest boxes and enough bedding to keep them warm.
1. To kill a rabbit, hit it on the head to knock it unconscious. Then stick its throat with a sharp pointed instrument so it bleeds well.
2. Then skin it. Be very careful not to let the hairs of the skin touch the meat. Any objectionable odor associated with rabbits comes from the hair.
3. Wash all the blood off the carcass with clean water. Then remove the "insides" by splitting the animal down the front. Wash and clean the inside thoroughly. Some people like to rub the carcass all over with a cut piece of lime or lemon to help remove any wild flavor the meat may have.
4. Cut the meat into serving pieces. There are many ways of cooking and serving rabbit meat. Here are two ways:
� Roll the pieces of meat in flour with salt and pepper. Fry them slowly in fat until they are tender.
� Brown pieces in fat, then add water and vegetables such as tomatoes, carrots, onions, and potatoes with salt, pepper, and any other desired seasoning.
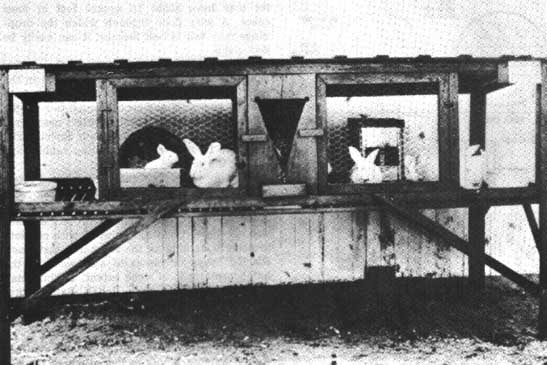
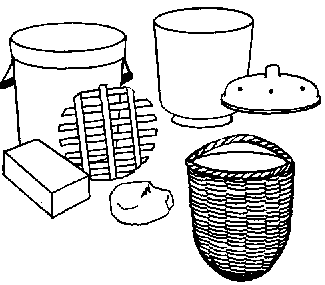
To keep from wasting food and to have it clean and safe, people must take care of it properly in their homes.
Foods can be spoiled by bacteria, molds, parasites, insects, rodents, warm air, freezing temperatures, light, and too little or too much moisture. Some foods may look and taste all right but still be bad to eat.
Bacteria are living things so small you can't see them. Many are harmful. Food is unsafe when bacteria that cause disease have gotten into it. Food can carry typhoid, botulism, tuberculosis, diphtheria, and salmonellosis. People may carry disease bacteria in their bodies and still appear healthy. When they handle food, the bacteria may get on the food.
Molds can be harmful. They grow where it is damp. If meat, cheese, or bread get mold on the outside, cut away the moldy part. The rest can be eaten. Throw away moldy canned food and foods that have gone soft from spoilage.
Parasites such as tapeworm and trichina live in meat animals. The tiny eggs of these parasites are found in the lean part of meat. They are waiting to complete their development in the human body or some other place. Cook meat thoroughly to destroy these parasites.
There is danger in eating uncooked meat even though it has been salted and smoked.
Insects and rodents not only destroy foods, they leave dangerous bacteria on them. The "fly specks" often found on food or dishes may have disease germs and eggs of dangerous parasites on them. Store food and dishes in a way to prevent this.
Temperature affects food. Foods ripen and spoil more quickly in warm air. Freezing can ruin the texture and flavor of some foods. For example, frozen potatoes are watery and have an unpleasant flavor. They are safe to eat though they do not look nice.
Moisture is needed to keep green leafy vegetables fresh. But too much moisture or dampness can cause foods to mold. Crackers and cookies lose their crispness when the air is moist unless they are in an airtight container. Soggy crackers or cookies are safe to eat, but may taste better if they are dried out.
Different kinds of food must be cared for in different ways. Certain foods are very perishable and spoil quickly in a warm climate or when kept in a warm place. It is important to destroy spoiled foods as soon as they are found.
Food generally shows when it is spoiled. Look for these signs:
� slime on the outside of meat
� bad odors
� sour taste in bland foods.
Fresh meat, poultry, fish, and other seafoods spoil very easily and quickly. They should not be kept more than a few hours in warm, damp weather. To store them, wipe off any dirt, wrap the food loosely in clean cloth or paper, and keep it in the coldest place you can find. Extra care must be taken with poultry because it often has the germ that causes a fever sickness. This germ grows very fast in a warm place.
Moist leftover cooked foods, especially those prepared with milk, eggs, meat, or fish, spoil easily. They should be cooled quickly, put in covered containers, stored in a cold place, and used at the next meal.
Milk must be stored in clean, covered containers in the coldest place possible. Boiling milk not only makes its safe to drink but helps it keep longer. Store butter and cheese in a cold, clean place. Dried milk powder will keep for several months, but should be kept dry and well covered.
Eggs should be stored in a cold, dry place. Remove any cracked eggs and use them first. Cook them well.
Fresh fruits and vegetables should be stored in a cool place with good air circulation.
Bread, cake, and cookies must be stored in a tightly covered tin box or some other suitable container with a tight cover. Keep them in a dry place off the floor.
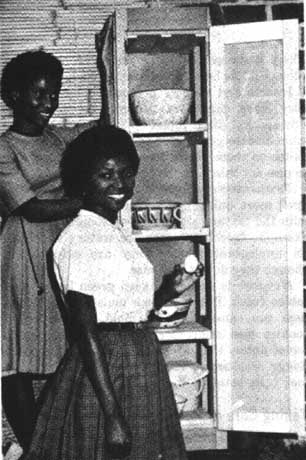

For good nutrition, people must eat well all year, not only during the growing season or for a few months after harvest, but every day of the year. This means some food should be preserved and stored for use when it is out of season. Some form of food preservation and storage is almost universal. It is a subject in which there is great interest and generally great need for improvement.
The way foods are stored is important. A good storage area is well ventilated, cool, dry, and free of rodents and insects It is clean and neat.
Food can be stored in the kitchen in cupboards, on open shelves, in a food safe, or in a closet with shelves. Cellars, caves, and outdoor pits are used in some areas.
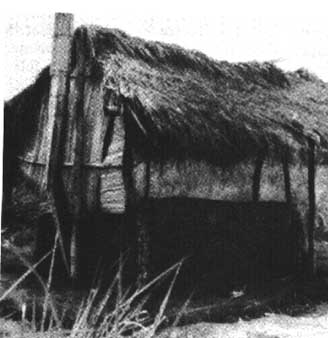
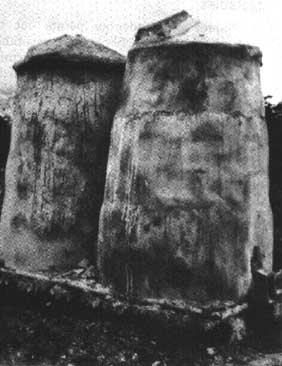
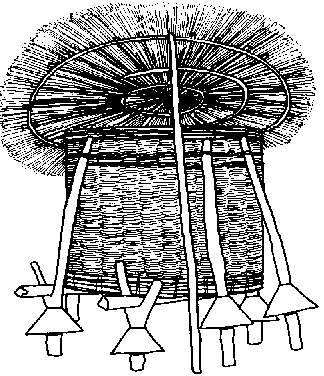
Storing grains, nuts, and pulses in the house where the family lives is generally not a good practice. There is not enough room and it is hard to control insects and rodents. In many areas, these crops are kept in special grain storehouses.
Learn how families store them in your area. How many families have a special storehouse or bin for such crops? How many store them in the house where they live? What kind of containers do they put the grain in, such as sacks or clay pots? How much of each crop is destroyed every year by rats, mice, weevils, and other pests? Do they use any insecticide or poison to get rid of them? What do the people think about such food losses?
You will probably find that those who are most successful in storing these crops:
� Keep their grains, pulses, and nuts in a special storehouse or bin.
� Keep rats and mice out of the storage area.
� Use insecticides to keep down weevils.
� Clean the storehouse thoroughly before a new crop is stored.
� Dry grains and pulses thoroughly to keep down molds.
� Keep the storage place as dry and cool as possible.
� Store good quality grains-not broken or damaged.
It is good to use storage methods that people in your area have found successful. Keep this in mind as you suggest improved storage methods.
Prepare the storehouse for each new harvest. Even one weevil-infested bean or grain of maize left over from last season can start weevil damage in the new grain. The storage area, including every corner and crack, should be cleaned thoroughly each year before the new crop is put in. Then it should be dusted well with an insecticide recommended by your agricultural department.
Remind villagers to follow the instructions carefully. The insecticide will probably be a strong powder and should not be used on the grain itself. Many insecticides can make people ill if they are on food.
Make the store house ratproof by using metal and strong fine wire. Remember, mice can get in through the smallest openings. Page 93 shows two kinds of good grain storage.
Prepare the new crop. Cereal grains such as maize, rice, millet, sorghum, wheat, barley, oats, and rye should be cleaned as well as possible. They must be dry. They can be packed in clean, suitable containers such as strong, closely woven bags, tight boxes with covers, or clay pots with covers.
In some areas a safe, mild weevil control powder is mixed with the grain. It is not the same one used in the cracks and corners of the storage area. Ask your agricultural department about such powder and be sure villagers follow the instructions carefully.
Pulses, peas, beans, etc., should be picked as soon as they are completely ripe and spread in a warm dry place until they are dried out. They can then be shelled and stored in bags or other containers. Treat them with the mild powder as suggested for cereal grains.
Some homemakers hang small bags of peas and beans in the kitchen where the heat and smoke from the fire help keep out weevils. Also to help keep out weevils, peas and beans that are not being saved for planting can be placed in a pan and heated slowly in an oven until they are too hot to touch. They should not be overheated or allowed to burn.
Groundnuts should be left inside their shells until they are needed for food. They should be picked when they are mature and spread on drying trays in the sun. When they are thoroughly dried, they can be packed in bags with some of the mild powder as instructed by your agriculturist.
The chapter on gardening points out the value of growing fresh fruits and vegetables as much of the year as the climate permits. Fruits and vegetables fresh from the garden taste much better than those that have been preserved or stored.
However, it is not always possible to have a continuous supply of these essential foods. For this reason, some method of keeping them when they are out of season is important. Various methods of preserving and storing include:
� storing in the field
� storing in a cool, dark place such as a cellar, pit, or cave
� drying
� salting and brining
� bottling.
Certain greens such as collards, kale, leaf mustard, and some others will stand quite a lot of cold and frost. In some areas, they will stay green in the garden for a long time. Root vegetables such as carrots, sweetpotatoes, cassava, beets, celery, kohlrabi, and turnips can often be left in the ground and used as they are needed. How long they can be kept without being dug will depend on the amount of rain, drainage conditions, etc. With too much rain they would rot quickly.
Dry onions, pumpkins, cabbages, and root crops such as potatoes, yams, carrots, beets, turnips and others can also be kept in a cool, dark place. Some of these, especially potatoes, will sprout quickly in warm areas. To retard sprouting, cover the vegetables with sand.
Various types of storage can be built for fruits and vegetables. They should be:
� cool and with little or no light
� slightly damp so vegetables will not dry out
� ventilated to carry off odors and to help regulate the temperature and amount of dampness
� insulated-the walls and ceilings should be protected with straw or other material to keep too much moisture from forming and dropping onto the vegetables and also to help regulate the temperature
� well drained.
Your agriculturist can help you with recommendations and instructions on building storage facilities.
Vegetables and fruits may be dried in the sun in warm, sunny climates, but not in rainy or damp weather. It is a suitable way of preserving such vegetables as green leaves, cabbages, green beans, green maize, potatoes, sweetpotatoes, pumpkin, cassava, and carrots, and such fruits as apples, peaches, apricots, figs, etc.
To dry fruits and vegetables:
1. Wash the food.
2. Cut it up if it is big.
3. Steam it until it is thoroughly hot.
4. Spread the food on a clean surface in direct sunlight until it is brittle and dry. Foods can also be dried on racks over a kitchen stove or they may be dried in an oven.
5. Protect the food from dust, dirt, and flies by covering it with thin, loosely woven, clean cloth or wire screen.
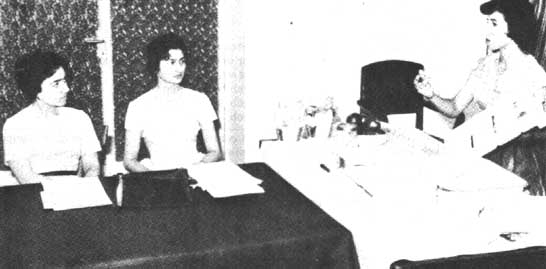
CHART OF INSTRUCTIONS FOR HOME DRYING OF SOME FRUITS AND VEGETABLES
|
FOOD |
PREPARATION |
STEAMING TIME |
DRYING TIME |
|
Spinach and other green leaves |
Select young, tender leaves. Wash. See that the leaves are not doubled over when they are placed on trays. Cut large leaves crosswise into several pieces to hasten drying. |
Steam 4 minutes or until thoroughly wilted. |
Dry until the leaves are brittle. |
|
Tomatoes |
Select tomatoes of good color. Dip them in boiling water to loosen the skins. Chill them in cold water. Peel. Cut them into pieces not over �" square. Cut small tomatoes in half. |
No steaming. |
Dry until the pieces are leathery. |
|
Green chili or peppers |
Use full-grown, bright green pods. Peel and split the pod, remove the seeds. |
No steaming. |
Dry until the peppers are crisp, brittle, and a medium-green color. |
|
Cabbage |
Remove the outer leaves. Cut the head in quarters. Remove the core. Cut the quarters into shreds about 1/8" thick. |
Steam 5-6 minutes until wilted. |
Dry until the shreds are tough or brittle. |
|
Green peas |
Select young, tender peas. Shell. |
Steam them immediately for 10 minutes. |
Dry until the peas are hard and wrinkled. They will shatter when hit with a hammer. |
|
Green beans |
Remove bad pods. Wash the good pods and remove the strings. Split the pods lengthwise. |
Steam the pods 15-20 minutes. |
Dry until the pods are brittle. |
|
Green maize |
Select tender maize. Husk. |
Steam 5-15 minutes or until the milk is set. The maize can be cut from the cob or dried on the cob. |
Dry until the kernels are brittle. |
|
Carrots |
Select crisp, tender carrots. Wash, Trim off the roots and tops. Peel. Cut into slices or strips about 1/8" thick. |
Steam 8-10 minutes. |
Dry until the strips are tough and leathery. |
|
Berries |
Look the berries over; remove bad ones. Wash. |
Steam 1/2-l minute. |
Dry until the berries are hard. Test by crushing a few to be sure all the moisture is removed. |
The steaming helps to retain the protective value in these foods and gives them a better color and flavor. It also reduces the time needed for soaking the vegetables before cooking them later. Tomatoes, onions, and green and red peppers do not need to be steamed, but otherwise the process is the same.
When they are drying food in the sun, remind villagers to keep racks off the ground and away from animals. The food needs to be turned two or three times each day so it will dry as quickly as possible. Drying will take several days. Test for dryness by squeezing some of the food in your hand. There should be no apparent moisture.
It is a good idea to keep the dried food in a large container for 8 to 10 days before packing it into small containers or bags. If bags are used, seal them in a large container to keep out air and insects. Store them in a clean, dry, dark, cool place.
All dried vegetables should be soaked in water before cooking to reduce cooking time. Use just enough water to cover them, and use the same water for cooking. It will contain the protective values of the food. Dry green maize should be rinsed quickly in cold water and put to soak for several hours in a small amount of water. It should be cooked slowly in the same water. Add more water as it is needed.
A number of problems must be met before home canning is practical, safe or even possible in many countries. One is the lack of suitable canning containers and equipment.
Canned foods must be sealed airtight and free of germs if the food is to be safe. Almost all foods must be heated to a very high temperature if they are to be safe after canning. This requires a pressure canner in which steam under pressure produces a much higher temperature than boiling does. The high temperature kills the germs. It is important to remember that for home canned meats and vegetables to be safe they need to be cooked again until hot all the way through before they are eaten.
Often, even if glass jars with tops that seal are available, they are not the kind to withstand high temperatures. In some countries, the cost of glass jars and tin cans is so great that most village families cannot afford them.
As you think about the need to preserve food in your area and the possibilities of canning, discuss the problem with your agriculturalists. Are glass jars or tin cans manufactured anywhere in your country? If so, are they suitable for use in a pressure canner? Does the quality need improvement? What are the possibilities of manufacturing glass jars or tin cans for sale at a price practical for the average village family?
Even if containers are available, the average village home is not equipped for home canning. Could small community canning centers be developed where equipment could be used cooperatively and the canning be done under supervision ? Are pressure canners available at a practical cost?
Are there commercial plants in your area that can either fruits or vegetables? If so, a visit to such a plant would be useful. You will need to study and investigate all phases of canning before making any attempt to introduce this method of preserving foods in the average village. In some areas, canning may not be feasible for many years.
This is a practical method of preserving fruit juices and fruit purees used in many areas. Wine bottles or soft drink bottles are available in most countries and are within the means of most families. New caps for such bottles must be purchased, but they are not expensive. A small mechanical capping machine is also necessary. Families might join together to buy a capping machine to seal the bottles.
Water bath canner-For bottling juices and purees a water bath canner is needed. This can be any large metal container. It must be deep enough to have an inch or two of water over the tops of the bottles. It must have a cover and a rack to fit in the bottom. The bottles must not touch the bottom or they will break. The rack can be either wood or wire. A water bath container should have a loose-fitting cover on it during the processing time.
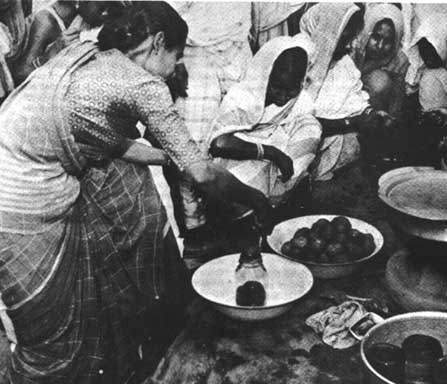
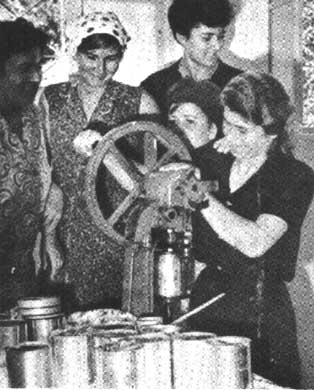
Select ripe firm fruits such as grapes, berries of all kinds, cherries, etc. Clean the fruit of any trash such as leaves, small sticks, insects, etc., and then wash it in safe water. Heat the fruit slowly to a simmering temperature without water. Simmer it until the fruit is soft. Strain the juice through clean cheesecloth or other thinly woven cloth which has been boiled for 10 minutes. Add sugar if desired-1 cup to a gallon of juice. Reheat juice to boiling.
Wash the bottles and caps with soap in clean hot water and rinse them well. Then put the washed bottles and caps in a container, cover them with hot water and boil them for 2 to 3 minutes. Fill the hot bottles with hot juice to within 2 inches of the top. Place the cap on and seal the bottle with a mechanical bottle capper. Place the filled bottles in a container of boiling water so that water covers the bottles. Keep the water boiling 5 minutes. Remove the bottles, cool them, and store them in a dark, cool place.
Prepare fruit purees by running washed fruits through a sieve or food mill. Heat the puree to boiling. Add sugar to taste. Fill hot bottles with hot puree to within 3 inches of the top. Place the caps on and seal the bottles. Process them in boiling water that comes over the top of the bottles for 10 minutes.
Use ripe juicy tomatoes. Wash them well. Remove the stem ends and any bad spots. Then cut them into pieces, leaving the skin on. Simmer the pieces until they are soft. Put the pulp through a strainer or sieve. Add 1 teaspoon of salt to each quart of juice or puree. Reheat it to boiling. Fill bottles with the hot juice or puree. Leave 2 inches from the top for juice and 3 inches for puree. Put caps on and seal. Process the bottles in boiling water for 10 minutes.
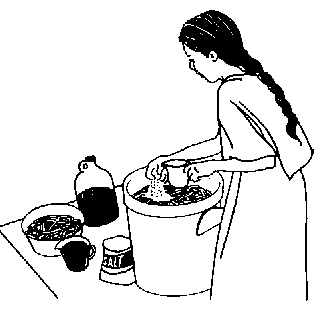
Vegetables preserved by salting or brining are very popular in some areas. People like their flavor. Sauerkraut, made by salting cabbage, is well known and widely used in many countries.
Salting or brining may be a practical method of preserving vegetables in your area and one which you will want to recommend. The process is not difficult. It is inexpensive and requires little equipment. The vegetables preserved in this way retain a fair amount of vitamins and most of their other food values. Vegetables properly preserved with salt or salt and vinegar will keep for many months in a cool climate. They will keep a much shorter time in a warm climate unless they can be sealed and heat processed when the brining is finished.
For any method of preserving vegetables to be practical there should be a surplus, more vegetables than the family can eat when they are in season. Remember, in areas where there is a year-round growing season, having a continuous supply of fresh vegetables in the family garden is better than preserving.
Before trying to teach salting or brining, study any methods of preserving vegetables already being used in your area. Are people now salting or brining vegetables? If so, are they successful? Is the product of good quality? Do families like vegetables preserved this way? Do they fit into their food patterns? Do some methods give better results than others ? Do families grow enough vegetables to have a surplus for preserving? Can they get the salt? In some countries salt is expensive. Do they have large containers suitable for salting? Could you yourself try two or three vegetables, using the different methods of salting and brining, before you try to show how they are done? You will want to be thoroughly familiar with these methods and the results before you start teaching them to others.
Equipment and Supplies Needed
1. Containers such as crocks, glazed pots, or kegs or pails of hard wood. If containers of soft wood are used, the food will likely have the taste and odor of the wood.
2. Cover-may be a solid lid made from hard wood, a latticed wood cover, or a heavy plate-whatever cover is used must fit inside the container so that it can be weighted down to keep the vegetables under the brine.
3. Weight-can be a clean stone or brick which should be covered with melted wax, or a glass jar filled with water.
4. Clean white cloth or clean leaves such as cabbage.
5. Wooden spoons, a sharp knife, and measuring cup.
6. Pure salt and household vinegar.
7. Scales for weighing (when possible).
Three methods of salt preservation are described in this handbook. Certain vegetables like peas, corn, and lima beans contain considerable starch. They require more salt than vegetables like cabbage or turnips. Adding vinegar to the brine for some vegetables insures a better product.
Several different vegetables are listed under each method. This does not mean that those vegetables would be mixed together for salting or brining. Each would be processed separately. For a few vegetables there is a choice of methods.
For fuller instructions and additional information on salting and brining, you may wish to refer to Homemaking Around the World.
Observe these precautions for good results:
1. Follow directions carefully.
2. Weigh salt and vegetables if scales are available. If not, measure both salt and vegetables as accurately as possible.
3. Use clean, fine salt.
4. Use only clean, safe water for washing vegetables and making brine.
5. Be sure containers and all equipment are thoroughly clean.
6. See that brine covers the vegetables at all times to prevent the top layer from spoiling.
7. Keep the top of the brine free from scum and insects.
8. Boil all salted or brined vegetables except those pickled in vinegar for 15 minutes before eating to prevent any danger from botulism.
Method I. For Light Dry Salting
Vegetables for which this method is recommended: cabbage, turnips, rutabagas, and tender snap beans.
Preparing: Wash all vegetables thoroughly in safe water. If you are using cabbage, remove the outer leaves and core, and then shred the rest with a sharp knife or cut with a cabbage cutter. If using snap beans, cut off the ends and break the rest into short lengths. Scald the beans in boiling water for 5 minutes. Cool them quickly. If using turnips or rutabagas, trim them well and shred or slice thinly.
Salting and Packing: For each 10 lbs. of cabbage, turnips, or rutabagas, allow �-lb. or �-cup of salt. Mix the salt well with the shredded vegetable. For each 10 lbs. of snap beans, allow �-lb or 1-� cups of salt and 8 ozs. or 15 tablespoons of vinegar. Mix the salt thoroughly into the beans, then add the vinegar and mix again.
Pack the vegetable firmly into the container. Lay a clean white cloth or clean leaves over the top of the mixture to completely cover it. Then place a fitted cover of hard wood or a thick plate over the cloth or leaves, and weight it down with a stone or other suitable weight. Tie another clean cloth over the top of the container to keep insects out. Set the container in the coolest place possible.
In a short time water will be drawn from the vegetable by the salt. It will form a brine that will rise above the cover. Every day or so take a look at the brining process. When the brine begins to get low, more will need to be added. It is very important to keep the vegetable well covered with brine at all times, otherwise the top layer will spoil. Make more brine by dissolving 1 tablespoon salt to 1 quart of safe water.
The salted vegetable will soon start bubbling. This means fermentation has started. Soon a white scum will form on top. This should be removed every day so. Lift off the weights and the cover of cloth and leaves. Carefully remove the scum with a spoon or cup so that it does not get mixed with the brine. Wash the cloth or leaves and the weights in safe water, add more brine if needed, and weight the vegetable down again. It will take about 2 weeks for the bubbling to stop. Then it is likely the fermentation is over. The vegetable then is cured and can be used.
It should be cooked for 15 minutes before eating. To keep cured vegetables for a longer time, repack them into smaller containers that can be sealed. These then are heat processed in a boiling water bath 25 minutes for pint containers and 30 minutes for quarts. If it is not possible to heat process the cured vegetables, keep the container in as cool a place as possible, and keep the scum removed until the product is entirely used up. Remember if the weather is warm, a cured vegetable may only keep a short time unless it is heat processed.
Method II. For Heavier Dry Salting
Vegetables: Corn, shelled peas, shelled lima beans, celery, okra.
Preparing: Select fresh tender vegetables of good quality. If you are using corn, remove the husks and silks. Boil it 10 minutes to set the milk. Cut the kernels from the cob, but not too close. If using peas or lima beans, shell and scald them in boiling water for 5 minutes. Cool them quickly. If using celery or okra, wash the vegetables in safe water. Cut them crosswise into short lengths. Scald celery in boiling water for 5 minutes and cool it quickly.
Salting and Packing: Use 1 lb. or 3 cups of salt for each 5 lbs. of vegetables. Mix the vegetable well with salt. Pack it firmly into the container, cover with a clean cloth or clean leaves, and weight down following the directions in Method I. Be sure to watch the process and keep the brine over the top of the vegetable. To make additional brine for these vegetables, use 7/8-cup of salt to 1 quart of safe water.
Fermentation may continue with these vegetables for a month. Repacking and processing in hot water is not necessary because of the heavy salting. These vegetables will be quite salty when finished and will likely need to be drained and soaked in water overnight before cooking. However, the salted vegetable might be added directly to unsalted soup stock without soaking. Use �-lb. of salted vegetable to 2 qts. of soup. All these vegetables should be cooked at least 15 minutes before eating.
Method III. Weak Brine Plus Vinegar
Vegetables: Beets, carrots, cauliflower, snap beans, turnips, beet tops, mustard greens, and turnip greens. Note that snap beans and turnips can also be preserved by Method I.
Preparing: Select tender good quality vegetables. Wash well in safe water. If you are using carrots or beets, trim the tops. Leave the carrots whole without slicing or cutting. Snap beans can be cut into pieces or left whole. Scald them in boiling water for 5 minutes. Cool them quickly. Cauliflower should be cut in pieces. Greens must be washed several times to remove grit.
Brining and Packing: Pack the vegetables firmly in clean containers. Cover them with a clean cloth or leaves and weight down as outlined in Method I Then pour over them a brine made by dissolving �-cup of salt in 1 gallon of safe water and 1 cup of vinegar. Be sure the brine comes up over the weighted cover. Store the containers in a cool place. Watch and remove scum as it forms. Add more brine when needed.
The fermentation period is about 10 days or 2 weeks. Vegetables preserved this way will keep longer if they can be repacked in smaller containers, sealed, and processed in boiling water as outlined in Method I.
Before cooking for table use they need only to be rinsed with water. They will not need soaking.

It is not hard to get parents, government officials, or agencies interested in something that affects the well-being of children. For example, in one small village it was a miracle if a child survived his second year. The village chief told the new village worker, "you are welcome to work with the women if you teach them how to keep our children alive." Her program started right there.
Almost everything you teach in home economics affects children. Bring children and their needs into every subject you teach: food and nutrition, sanitation, home improvement, home management, gardening, clothing, and so on. Consider child care as part of a total program for improved living.
Even the best teaching on child care cannot do much good unless the home and community become healthful places to rear children. If houses have no windows, if they are hot, damp, and unsanitary, if there are no latrines, if water for the family is unsafe and scarce, if there are flies and mosquitoes everywhere, then you can not accomplish much by teaching mothers better ways of caring for their children. Under such poor living conditions, they would have a hard time putting the principles of child care you are teaching into practice.
Many people are helping to teach child care: health workers, doctors, trained midwives, sanitarians, social welfare workers, and school teachers. Working together, you and these people can have a better and broader program than any one person or group can have working alone.
This chapter tries to highlight some of the most important things about caring for babies and children. Adapt methods to your area. Every country has much material on this subject: books, pamphlets, posters, films, and many other teaching aids based on local needs and resources. You should learn what these are and where they may be obtained. Get them for your own use. Two other booklets you should have are:
1. Care for Your Baby-FES-AID Sanitation Series #9
2. Child Care-by Dr. Mary Elizabeth Keister, FAO.
Help women who are pregnant understand how important it is for them to do certain things before their baby comes. A pregnant woman must think first of her own health. The surest way for her to have a healthy baby is to be healthy herself.
If possible, a woman should go to a doctor, trained midwife, health center, or dispensary as soon as she knows she is going to have a baby. They will check her health, tell her how to take care of herself, help her plan for the baby's delivery, and teach her how to take care of the baby.
You can help teach village mothers many things about taking care of themselves while they are pregnant. One of the most important things a pregnant woman can do is to eat the right foods. This will help her stay well and have a strong baby. It will also prepare her body to make milk to feed the baby. (See page 43 )
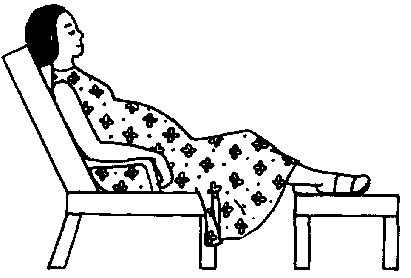
Pregnant women should be very certain they also get plenty of rest, sleep, and exercise. Encourage pregnant women to rest when they are tired during the day, and to get plenty of sleep at night. Lying down for a while each day helps keep a pregnant woman from getting too tired. If she cannot lie down, suggest that she sit with her feet up for a few minutes at least once a day.
Pregnant women need moderate exercise. They can keep on with most of the things they usually do. However, if possible, they should avoid lifting, pushing, or pulling heavy things. Doing their normal work around the house or taking a walk each day is enough.
A pregnant woman should keep her body clean. A clean skin is important to good health. Washing her body every day, or as often as possible, will make her feel more comfortable and look more attractive. The little pores or holes in the skin can do their work better if dirt and sweat are washed away every day.
After the seventh month of pregnancy, she should take a little extra time to wash her breasts well. A small amount of liquid comes out of the nipples at this time. If it dries in the tiny wrinkles in the skin, the skin will crack and become sore. Germs can enter the cracks and cause infection. The woman can help prevent soreness and cracking by rubbing cocoa butter or a mild oil on her nipples.
Not only the pregnant mother, but also the whole family should be extra careful to avoid disease at this time. The health center, the doctor, or visiting nurse can provide immunizations or medication to protect the family against disease or worm infestation. It is important for the new baby to be born in a healthy family.
Teach women to keep themselves as comfortable as possible. A few small discomforts are normal during pregnancy, but women can be more comfortable if they know what causes these discomforts and how to relieve them.
As a baby grows in size within the mother's body, it crowds some of the organs that lie near it. It presses on the bladder that lies below the womb and makes the mother feel she needs to pass urine more often. She should not reduce the amount of liquid she drinks unless her doctor tells her to. She will keep in better health if she continues to drink 6-8 cups of liquid (water, tea, coffee, or milk) each day.
If her bowels do not move regularly, she may be helped by eating more fruits and vegetables. Pregnant women should not take strong medicines to make their bowels move or get rid of worms unless the doctor tells them to.
Sometimes a pregnant woman's legs feel very tired and heavy. It may be because the baby is pressing on the blood vessels. This slows down the flow of blood from the mother's legs. This is another reason why lying down for a few minutes several times a day with her legs propped up higher than her body helps relieve discomfort. If a pregnant woman has swollen legs or hands, she should see a doctor if at all possible. One important thing she can do to help get rid of the swelling is stop adding salt to the food she eats and to stop eating foods that taste salty.
During the first few months of pregnancy, some women feel sick at their stomachs early in the morning when they first get up. After the first 3 months, the body gets used to the changes of pregnancy and morning sickness disappears. Pregnant women can often avoid nausea if they eat a small amount of dry food before getting out of bed. If a woman feels sick, suggest that she not drink anything for an hour or until her stomach feels all right.
Later during pregnancy many women have a hot feeling in their throat or stomach after eating. If this happens, suggest that the woman eat less at each meal, but eat more often and avoid spicy foods. When a woman is pregnant, her stomach has less room in which to work. She will be more comfortable if she puts smaller amounts of food in it at mealtime and if she sits and walks around for about an hour before lying down to sleep or rest.
A pregnant woman's back may ache at times, especially during the second half of her pregnancy. Flat shoes and a wide band of cloth snugly tied or pinned around her body where the baby is growing will help hold the baby and her back. When she is lying down, a small pillow or folded cloth under the lower part of her back may make her more comfortable. You might also suggest that she ask someone to give her back a good rubbing now and then.
It is very important that pregnant women report unusual problems at once. Teach village women to recognize when something is wrong. They should go to the health center, if possible, and tell the doctor or nurse about it. Many problems can be corrected before they harm the mother's health or her baby's.
Here are some of the unusual problems pregnant women should watch out for and report to a doctor or nurse:
� swelling of hands, face, legs, or feet
� dizzy feeling
� spots before the eyes
� a very bad headache that doesn't go away
� a sudden gain of weight (clothes and rings feel tight)
� vomiting day after day
� only a small amount of urine each day
� pain when passing urine
� chills and fever
� blood or other fluid coming from the birth canal.
If bleeding continues from the birth canal, it may be a sign that a miscarriage is starting. A miscarriage occurs when the baby is born before the fifth month of pregnancy. It is still too small to live outside the mother's body. A miscarriage can sometimes be prevented by complete rest in bed. If bleeding occurs, advise the woman to save the discharge, go to bed, and be examined by a doctor or trained midwife at once, if possible.
A good home for a baby is one where he is wanted, and the whole family is glad he is coming. A good home is also one where everything is clean and ready for him. Here are some things a village woman can do to prepare a good home:
� Keep the house and its surroundings extra clean.
� Arrange to have clean, safe water for all the family to drink and to bathe the baby in every day.
� Prepare a clean, comfortable bed for herself and one for the baby.
� Brush and air the mattress or pad.
� Wash sheets and blankets with soap and water and hang them in the sun to dry. Fold and store them in a clean place until time for the baby to arrive.
� Have clean clothes ready for herself and the new baby.
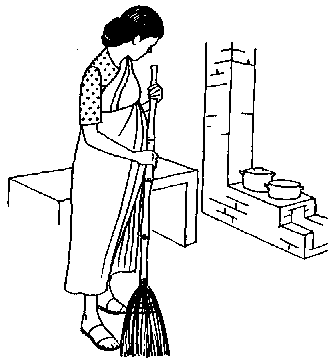
When getting ready for a new baby and after he arrives, it is important for the mother and father to give some extra attention and love to their other children. Sometimes, older children may feel they are no longer loved because the baby needs so much of the parents' time.
A mother should plan to have enough baby clothes to keep the baby clean and dry at all times. Baby clothes should be loose and full so the baby can move his arms and legs freely. They should be made of soft, lightweight material that is easy to wash. Babies often spit up on their clothing. Choose baby clothing that is cool or warm as needed.
Shirts and gowns with openings are the easiest kind to put on small babies. Garments that tie are easier to handle than those that button. Clothing with a drawstring around the neck is dangerous.
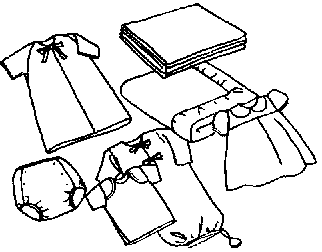
In some countries, babies wear diapers or nappies. In other areas, pads are placed under the baby's bottom. Remind mothers to change a diaper or pad as soon as it becomes wet or soiled. She should prepare enough to keep the baby dry and clean at all times.
Diapers and pads need special care in washing. Show mothers how to soak wet or soiled diapers or pads in a pail of cold water until they can be washed. Some vinegar can be added to the water as it will help stop bad smells. The pail should be covered to keep out flies. Leaves, cardboard, cloth, or any other material available can be used for a cover.
Diapers and pads should be washed in hot water with mild soap. Remind her to be sure she rinses all the soap out. Strong soap or soap left in diapers will make the baby's skin sore. After washing, diapers should be hung in the sun to dry if possible. Otherwise they need to be boiled frequently. Sun or heat help to kill germs.
The newborn baby should have his own place to sleep. When a baby sleeps with his mother or some other grownup, he may get smothered or catch any illness or disease the adult may have. However, a mother may want the baby in her bed at night to keep him warm, protect him from rats, or make it easier to nurse him. She should put him in his own bed as soon as she thinks it advisable.
Baby's bed may be a crib, basket, or cloth-lined, padded box. It should be kept off the floor or ground so it will not get damp or dusty. It must be protected from animals and insects. If mothers use a crib, they should be sure the bars are close enough together so that the baby cannot get his head caught between them.
Before her baby arrives, each mother should have:
� A firm mattress or pad to put in the bottom of a baby's bed. You can show her how to make one from local materials such as corn husks or dried grasses cut up very fine.
Kapok, sometimes called silk-cotton, trees grow in many countries. When the seeds have been removed (pulled out by hand), kapok makes an excellent filler for a baby's mattress.
Put the filling in a bag. Make a cover for the mattress from heavy, washable material. Remind her to keep it clean and change the filling when it gets soiled or starts to smell. A folded clean blanket makes a good pad that can be easily washed. It is not good to use a pillow for a pad because it is too soft to provide firm support for a baby's back.
� Waterproof material to protect the mattress or pad. Rubber, plastic, or soft, smooth leaves such as banana may be used under the baby to protect the mattress. The baby's skin should never touch the waterproof covering because he may get sores on his skin.
� Sheets for the bed should be made from some washable cotton material. A mother should have enough sheets to keep the bed clean and dry at all times.
� Blankets are needed to keep the baby warm in cool weather. They can be cotton or wool, depending on the weather.
� Mosquito netting to cover the baby's bed if the windows and door of the house are not covered with screens. Insects can carry disease. They will also make a baby very uncomfortable.
If her baby will be delivered at home, a pregnant woman should:
� Make a large waterproof pad to protect her mattress from being soiled during delivery. Pads can be made from rubber, plastic, large leaves, rush matting, or newspaper. She should cover the pad with a clean cloth if it can't be washed with soap and water.
� Prepare 12 rags about 45 centimeters or 18 inches square. They should be washed in soap and water, hung in the sun to dry, then folded and stored in a clean place. She will wear these until the bleeding stops after the baby is born.
� Arrange with the doctor or a trained midwife for her delivery.
Baby beds take many forms around the world.
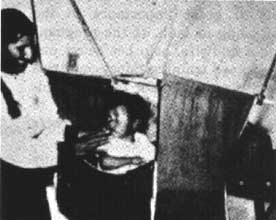
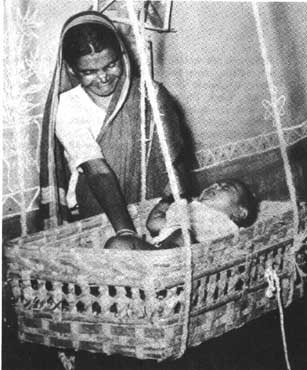
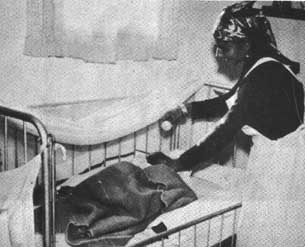
If her baby will be delivered in a maternity center, she should:
� Make arrangements with the center ahead of time, if possible.
� Take clean clothes for herself and the baby.
In a maternity center, a pregnant woman will have proper assistance and her baby can be given expert care in the first hours and days after birth. This is an important time for both the mother and the baby.
A woman will know when her baby is starting to be born. The process is called labor, and it usually begins with mild cramps or pains in the lower back or lower part of the stomach. As time passes, these cramps happen more often, get harder, and come at regular intervals. Sometimes the bag of water around the baby breaks during labor and there is either a sudden gush or a steady leak of water from the birth canal. Remind pregnant women that they should be sure to let the doctor or midwife know when this happens.
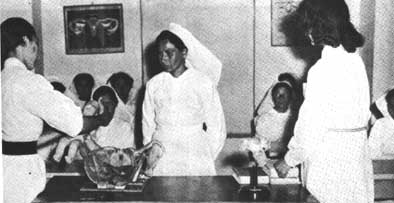
The care a mother and her baby receive during delivery is of great importance to the health and wellbeing of both. If the pregnant woman will use a midwife, help her select one who has received good training. Most countries now have extensive programs for training midwives. Generally it is no longer necessary to use one who is not trained. A trained midwife will:
� wash her hands well before touching any materials to be used during delivery and before delivering the baby.
� cut the cord with a clean instrument which she has boiled just before using.
� cover the cord stump with a clean, dry cloth, and nothing else.
� put silver nitrate drops or penicillin ointment on the baby's eyes within an hour after it is born.
� get help from a doctor if there are problems.
A baby should be kept clean, comfortable, and contented and he will grow steadily and gradually. The one thing that does more than anything else to keep a baby healthy, happy, and growing well during his first year is to be nursed at the breast. Mother's milk is exactly right for a baby's needs. A baby finds comfort and feels safe when he is held in his mother's arms for nursing. The mother must eat well herself to make enough milk for the baby.
Sunshine helps babies grow strong bones. In some parts of the world, babies always wear so much heavy clothing that they get the direct rays of the sun only on their faces. In other countries, especially in the tropics, babies are always kept in the shade. These babies may need some fish liver oil or vitamin D to help make their bones strong. Refer mothers to your health department to learn how to get any special vitamins their babies need.
Babies should be bathed every day to keep them clean and comfortable. Just before feeding is a good time. Warn mothers to use only safe water for baby's bath. Have them boil it for at least 10 minutes and let it cool before using it. Everything that is used for the bath should be thoroughly clean. Mothers should wash their own hands before starting to bathe the baby. They should use a clean soft cloth and mild soap to wash the baby and a clean soft towel to dry him.
Teach them to pay special attention to the baby's face, hands, and buttocks. Show them how to wash all the creases and between the fingers and toes. Remind them to bathe the baby in a warm place out of drafts. The baby should not be put in a tub until his navel is healed. He may be sponged off with warm, clean water for the first few weeks.
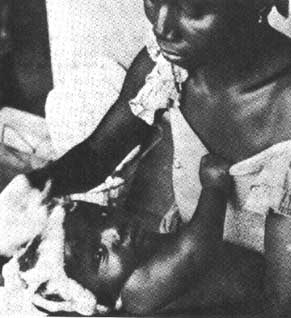
A very young baby sleeps most of the day and night. His bedding and clothing should be clean, dry, and suitable for the weather. Until a baby is able to turn over by himself, he needs to have someone change his position in bed from time to time. This is less tiring for the baby and more interesting. He also has more chances to learn to use his body.
A baby sleeps better when he is not disturbed. This means, for example, when he is not in someone's arms or lap or tied to a person's back. The baby should be put to sleep in a place where he can stretch and play when he wakes.
Babies should be taken to the doctor or clinic for regular examinations. The doctor will tell a mother how often to bring her baby to see him. This is the best way for her to be sure the baby is growing normally and learn how to care for him. The doctor will treat any disease or injury a baby may have and give him injections to protect him from some of the serious diseases.
Everything that touches a baby should be kept clean-his food, water, dishes, clothing, and bedding.
A baby should have plenty of fresh air and sunshine, but he should not get sunburned.
Babies need protection from flies, mosquitoes, and other insects. These carry diseases. Sick people should stay away from babies. If the baby's mother is sick or has a cold, she should keep her face away from his and not breathe on him. This will help prevent her from giving the cold to the baby. If she is very sick, someone else should care for the baby. The mother will get well faster too if she can rest while she is sick.
Taking care of a baby and watching him grow and develop can be a delight. Getting him off to a good start toward a healthy, happy, useful life gives much satisfaction and joy.
All children need to feel loved, wanted, and safe. Usually a child's own family, his mother and father, possibly with the help of an older brother or sister, or grandparent, are the people best suited to care for him. A child cared for away from his home may need extra attention to feel safe and secure. Of course, a child should always be treated kindly but firmly.
Even when a baby is only a few days old, he needs love as much as he needs food. He should be cuddled when he is fed. Talk to him. A baby enjoys being talked to and he learns to talk by imitating what he hears. Both his parents and his brothers and sisters should show that they love him by patting him and playing with him not only when he is crying but also at other times.
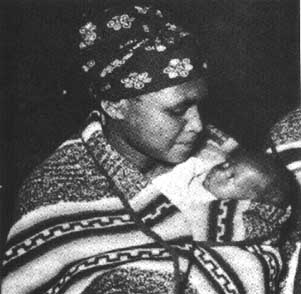
When a baby plays, he uses his eyes, mouth, hands, and whole body. Let him have many chances to play and give him things to play with. The best toys for a baby or small child are large, round, or blunt objects that cannot break and that can be washed. He should be able to hold them easily. They should be safe for him to chew on. If the toys or objects are a bright color, he will see them more easily, especially when he is very young. Small, sharp, pointed, or breakable playthings should not be given to a child. Keep toys clean.
A healthy baby grows every day. He grows heavier and taller. He becomes more skilled in the use of his whole body. You will also notice that he becomes more interested in making sounds. He sees and begins to notice people and things around him.
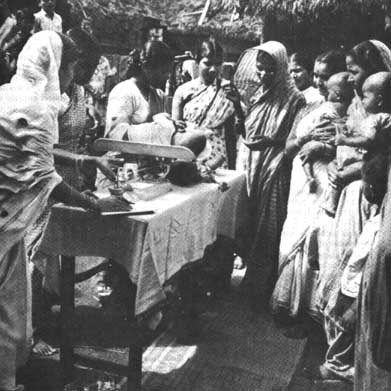
Not all babies grow and develop at the same rate. Some grow and develop fast. Some grow large. Others grow slowly and never become very large. The following is about the order a baby learns to do things:
� Makes sounds and cries as soon as he is born.
� Begins to look at mother or other familiar person and smile at about 2 to 3 months.
� Begins to gurgle and coo and hold up his head at about 3 to 4 months.
� Reaches for and tries to grab an object, laughs out loud, and babbles at about 4 months.
� Sits up with support at about 6 months.
� Sits alone and plays with toys, putting everything in his mouth; back, arms and legs become stronger at about 8 months.
� Crawls or hitches along to get across the floor, pulls himself up to standing position, and tries to stand alone at 9 to 10 months.
� Tries to walk holding to someone's hand - learns a few words-legs, arms, back, and brain much more developed (about 1 year).
� Begins teething-sometimes at 6 months, sometimes at 1 year.
� Walks alone and explores everything around-picks up objects-learns more words-laughs and enjoys all members of the family-mind and body developing.
� Works at being a real member of the family (between first and second year).
People can help a baby grow and develop by:
� Holding bright things for his eye to follow and for him to try to reach.
� Holding, cuddling, talking, and playing with him.
� Putting him on his stomach to play and look around.
� Letting him sit up on their lap or a clean mat.
� Propping him up with pillows.
� Giving him clean, safe things to handle, play with, and suck on.
� Giving him a clean, clear space to crawl in.
� Holding both his hands while he toddles.
� Making the house safe for him to explore, talking to him, letting him try to feed himself, giving him lots of praise and loving attention.
All over the world too many babies become sick and often die during their second year. Why? It is because this is the time a baby is weaned from his mother's breast. Often the food he is given is not sanitary and also does not give him enough nourishment. Whether the baby lives and becomes strong and healthy after he is weaned depends almost entirely on how his mother feeds him. See page 49 on how to feed a child of this age.
Remind mothers that having everything very clean is just as important for this little toddler as it is for the infant-food, dishes, water, clothing, bedding, and his body. Children should not sit or lie directly on the ground without a shirt and pair of pants for protection. They can get diseases from the dirt. Shoes or sandals help protect their feet from picking up infections from the soil.
This is the time to begin training a child to use the pot or latrine and to begin teaching him good habits of eating, sleeping, and cleanliness, such as washing his hands before handling food.
Sometimes children from 2 to 5 years old are neglected by their parents. They are no longer considered babies, but they are not ready for school. Children this age are not old enough to look after themselves. They often do not get the attention the children in school get. But these years are highly important to the health and future development of every child.
Parents want their children to do well in school. The best way they can help each child is to give him a strong, healthy body. Food continues to be of great importance. See page 51. These are the years when children have the usual childhood diseases. They need plenty of the right foods to help them resist these diseases and to rebuild their bodies after illness. During this time, children are also growing fast. They are very active, running and playing. They need foods for energy and body building at this time too.
Parents should take special care to continue training the young child in good habits of eating, sleeping, and cleanliness before he starts to school.

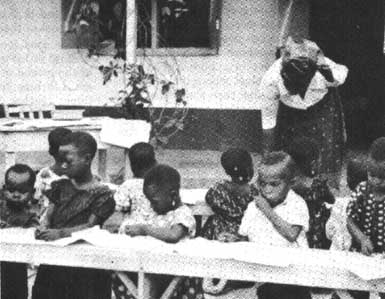
Children need firm treatment. Love them and treat them kindly, but be firm, too. Parents should show the child clearly what they want him to do and then see that he does it. If they want him to learn to obey, they must be sure to follow through to see that he obeys. Parents should never let a child feel it doesn't matter whether he obeys or not. This may happen if they threaten a child with punishment and then fail to carry it out. Constant threatening makes it harder to train children to obey. Children respond to reasoning, kindness, and love much quicker than they do to threats of punishment Remind parents to praise the child when he does well. Then he will want to do well again.
Most small children are very active and curious about the world around them. They learn about many things by feeling them and tasting them. Because they do not understand which things will hurt them and which will not, parents must be careful to keep harmful objects such as knives, scissors, arrows, pointed sticks, and broken glass out of their reach. They can cause painful cuts and even make a child blind if they strike his eyes.
Little children like to taste everything and cannot tell what tastes good or bad. Medicines, soaps, household cleaners, bug killers, kerosene, acids, and lye can poison or burn a child if he touches or swallows them. All of these things should be kept in a high cupboard or locked in a box or cabinet where the child cannot get them. The same care should be taken with all poisons or chemicals used in farming.
Until he learns about the dangers of fire, road traffic, deep water, etc., a child should always be carefully watched by a responsible adult or older child to keep him from being burned, drowned, or run over. They must keep him at a safe distance or provide protection from open fires, ovens, hot water, firecrackers, pools, drainage canals, and open wells.
Play helps children's bodies grow. It also helps develop their minds and teaches them to get along with other children and with adults. Time spent in play is time spent learning many important things. Children learn from playing as well as from working.
Play is one of the chief ways children use their curiosity and learn to invent and create. Play helps them develop their own individuality and find interests that will be useful to them when they grow up.
It is important for a child to have toys. Toys need not cost much money. A child can learn from simple things his father or mother can make for him. Building blocks, a cart with wooden wheels, and stuffed dolls or animals made from cloth scraps are examples. All toys should be washable and kept clean in case a small child puts them in his mouth. Toys should be too big for a child to swallow and strong enough so he cannot pull off small parts of them to put in his mouth, nose, or ear. Children put everything in their mouths so it is better not to paint the toys since many paints have lead in them. Lead is poisonous and hard to get out of the body.
It is good for every child to have some possessions of his own. It teaches him to take care of things and to respect the possessions of others. Learning to take care of their own playthings teaches children responsibility. This is important to their success in school and through life.
As children get a little older, they learn to play with anything available, such as sand, shells, sticks, leaves, etc. They also invent their own games. Play helps to make children more ready for school. When they play, they are learning by themselves about the real things which they will later read about in books.
Parents and older children should take a little time each day to play with the small children, talk and sing to them, and take an interest in what they are doing. Parents can tell pleasant stories to their children and help them learn to sing little simple songs. They should not tell children stories that scare them, and should answer a child's questions in a kind, intelligent way. Remember: playing is growing, learning, and preparing for school. Playing is for every day.
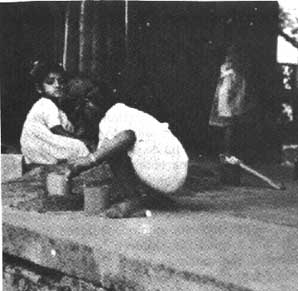
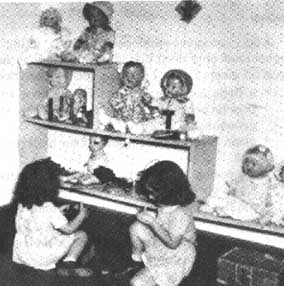
Children need the help of their parents and the whole family if they are to like school and do well in their studies. The mother and father must take an interest in what their children are learning in school and help them in every way they can. Children need praise for studying hard and parents should, if possible, arrange a quiet place for their children to study. Homework for school is as important as any other work in the house.
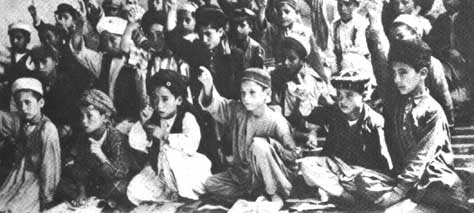
Like younger children, children going to school not only need lots of sleep, but they need restful sleep. What helps a child to sleep well?
� a little cot or small bed all his own when this is possible. He should not sleep with grownups.
� clean bedding and a good firm mattress or pad.
� if needed, a net to protect against insects.
� fresh air circulating around his bed.
� a quiet place away from noise, loud voices, etc.
� exercise in the fresh air and a nourishing meal before going to bed.
� light covering for cool weather.
� loose and dry clothing for sleep.
Clean. neat clothing and a clean body give the school child self-confidence. Children should not be sent to school in dirty or torn clothes. If he has clean clothes that he feels proud of, it will be easier to get the child to wash or take a bath so he will be clean all over before he goes to school.
Encourage mothers to choose cotton materials that can easily be washed for their children's school clothes. School clothes should be simple, not fancy. They should be comfortable and suitable for play and sports as well as for the schoolroom.
Mothers should watch their children for any signs of sickness. If a child feels hot, looks pale or flushed, does not want to eat or play, vomits, or has a bad cough and cold, she should seek help. The doctor or nurse can help you teach mothers the danger signs of illness and what to do.
A mother should keep a sick child quiet and away from other children. She should not force him to eat, but perhaps try to give him a little boiled water. She should not give a baby or child any medicine unless it is recommended by the doctor or health nurse. If the child becomes worse after several hours or overnight, she should go to the health center or dispensary right away and carefully follow the advice they give her.
Children learn from what they hear and see around them every day. Parents should realize that children watch everything they do and imitate them. Children want to be like the people they like and admire. Parents should set a good example. If parents want their children to behave well, they must tell them and show them what they expect. If they say "please" and "thank you", the children soon will copy them. When parents quarrel, children quarrel.
It is not good for children to live in noise, disorder, and unpleasantness. Children do best where family members are kind and pleasant with each other, where parents show interest in their children's growth and learning, and have regular times for eating and sleeping. It is good for children to have a place to keep their clothes, toys, books, and personal belongings. Then they know where to find them and learn to be responsible for them.
Use or adapt these examples in your teaching to make learning more interesting in classes for parents. Refer to the "Food and Nutrition" chapter for suggestions on foods.
I. Getting ready for the baby
� Give demonstrations on:
(a) How to prepare a simple, inexpensive meal that meets the food needs of a pregnant woman.
(b) How to prepare clean utensils for storing boiled water.
� Use a flannelgraph to show the needs of a pregnant woman:
good diet, rest, exercise, and regular visits to a health center.
� Use films, filmstrips, slides, or posters when you discuss:
sanitation in and around the house. cleaning the house and surroundings. immunizations and preventing disease. food for healthful growth.
� Have mothers list things in their houses and yards that might cause sickness or accidents to babies and children.
� Invite a health nurse or doctor to talk with mothers about why they should visit the health center regularly for checkups before and after the baby comes, and what health services are available for mothers and children.
� Exhibit and discuss:
clothes needed for a new baby. equipment needed for bathing the baby.
� Show prospective parents how to make baby beds.
II. After the baby arrives
� Give demonstrations on:
(a) Bathing a baby-include boiling and cooling water, preparing needed equipment and supplies, etc.
(b) Washing, drying, and caring for a baby's diapers and other clothing.
� Use a flannelgraph, posters, or films to show:
(a) Importance of breast feeding.
(b) Kind of diet nursing mothers need.
(c) How a baby grows and develops.
� Invite four or five mothers with healthy babies of different ages to bring them to a meeting. For example, a baby 2 months old, a baby of 5 to 6 months, a baby 8 to 9 months, and a baby a year old. Point out differences in the stage of development each has reached. You might make a record or photograph of each child and, 6 months later, have them bring the same babies again to see the changes that have taken place in each.
� Show how to make suitable toys for infants (such as a rattle from a gourd) and how to provide things to attract their attention (hanging a bright-colored cloth, feathers, or ribbon over the baby's bed for him to watch. )
III. Baby's second year
� Give demonstrations on:
(a) Preparing foods for the baby who is being weaned.
(b) How to feed the baby with a spoon or give him milk from a cup.
� Use puppets to show the mother of a healthy baby talking to the mother of a baby who became sick and weak after he was weaned. Have her tell what foods a baby needs after he has been taken off the breast.
� Give demonstrations and use visuals to show how to guard a toddler from danger. Arrange a display of things that are dangerous to the child such as kerosene, medicines, sprays, knives, nails, pins, etc., and that must be kept out of reach.
� Show how to make simple safe toys such as spools, blocks, small boxes, beanbags, and stuffed animals.
� Set up an exhibit of safe, easy-to-make toys.
IV. The years before school
� Display the different kinds of foods a child needs each day to grow and be healthy. Include energy, building, and protective foods.
� Demonstrate how to prepare a nourishing meal for a pre-school child.
� Use posters, flashcards, film, or filmstrips to show children practicing such good health habits as eating a variety of foods, sleeping long hours, keeping hair, eyes, nails, and teeth clean, washing hands before eating and after going to the toilet, and taking a bath.
� Invite a primary teacher or school principal to tell mothers and fathers how they can prepare their children for school and what the children should be learning before they start to school.
V. When children go to school
� Give demonstrations on:
(a) Preparing a good nourishing meal for a child to eat before he starts off to school.
(b) Preparing a simple, nutritious lunch for the child to carry to school.
� Let mothers act out a play or skit about two families with children in school. Let one be a family in which parents do not help or encourage children in their schoolwork and the other one where the parents pay careful attention to the child's need for food, clothing, rest, play, and study. Try to bring out the difference in the interest and progress the children in the two families make in their schoolwork.
� Invite teachers to your meetings to talk to parents.
� Arrange for a group of parents to visit the school to learn more about the school program.
� Exhibit a bedroom with a part screened off that a school child can claim for his own. Show a small homemade bed and homemade storage for a child's clothes and personal belongings.
� Demonstrate how a well-lighted study area for a school child can be arranged in a village home.
� Invite health officials to teach mothers how to recognize that a child is sick and what simple remedies and first aid treatments they can use for accidents and minor illnesses.
� Arrange skits and plays to show:
(a) Two families, one quarrelsome, noisy, and disorderly; the other calm, happy, and well organized. The skit should show how children react in each type of home.
(b) A family in which parents are not firm with the children, let them disobey at certain times, and at other times threaten to punish them and then don't do it. Try to show in the skit the effect lack of discipline has on the children.
Many people have never known what it is like to feel well and be healthy.
When a person does not feel like eating, cannot work, or has a severe pain, he may take medicine, see a doctor, or go to a hospital. He knows he is sick. Serious sickness is a big problem and often a big expense to the family. But many people have sicknesses such as malaria, dysentery, parasites, and malnutrition that they have lived with all their lives. They do not realize they are sick or know they can do something about it. All over the world people need to understand what good health is and what they can do to make themselves, their families, and their entire village healthier.
People need to understand that their everyday living habits have a great influence on their health. These include what they eat, how they cook and wash dishes. the kind of water they drink, and whether or not they keep themselves clean and live in a clean house with clean surroundings. They need to learn what sanitation has to do with good health.
Many people thought to be lazy and shiftless actually are sick and do not have enough energy to work. Their thinking is dulled because they are in poor physical condition. They do not make productive citizens.
Most governments now consider health as one of the first and major problems to deal with in national development. They know healthy citizens will be happier, able to work better, more energetic, and more alert. They will be better citizens, better villagers, and better parents. Most countries have many kinds of health programs. Find out about those in your country.
The World Health Organization (WHO) was formed within the United Nations to deal with health problems that are important to people in all parts of the world. WHO has many different kinds of programs. Find out what work this organization is doing your country.
Also learn what health resources are available in your area; where the clinics, health centers, and hospitals are located; who the doctors, nurses, licensed midwives, sanitarians, and health education workers in your area are and where they are located; and what kinds of health programs are carried on in the schools.
As you work and talk with the people in the village, you will see and hear about their health problems almost every day. This will give you a chance to help them better understand what causes many of these problems and what they can do. Much of the work you do in the village will be related directly or indirectly to improving the health of the people. You will want to work closely with all the other people doing health work in your area.
Some village workers have made a mistake by overlooking the "medicine man" or "witch doctor". While these men are not professionally trained and may not have reliable knowledge about health, it is wise to recognize their influence on the people who go to them. Some village workers have worked successfully through these medicine men, teaching them and giving them correct information on the kinds of health problems they deal with.
It is important to remember that the medicine man cares about the people in the village where he works and that he is always trying to help them. You may be able to help him do a better job by telling him what is in this chapter of your handbook or by letting him read it if he can. Another way you might help him is by letting him assist you with some of your demonstrations.
One of the most important ways you can help village people improve their health is by helping them to get and use safe water. Safe water is free from germs that cause typhoid fever, dysentery, cholera, infectious hepatitis, and other diseases. Even though water may look clear and clean, it can have disease germs in it. You cannot tell if water is safe by looking at it.
How many people in your village get their water from an open well, an irrigation ditch, a river, or a stream ? Water from such unsafe sources will most likely be full of disease germs because people put human excrete in them. Human excrete always has germs in it.
Consult your local health officers about ways to help people get a safe water supply. A sanitary well to supply water for a number of families or the whole village is probably the best way. This can be one of your most important improvement projects.
Unless water comes from a source which has been tested and found safe, boiling is the surest way to make it safe. Boil water for at least 10 minutes. Store it in a clean, covered container. Always use boiled water for drinking, washing fruits and vegetables to be eaten raw, mixing with powdered milk, making ice, and brushing teeth.
Each member of the family should have his own drinking cup. These can easily be made from a tin can, gourd, or coconut shell if cups are not available. Separate cups help prevent the spread of germs from one person to another.
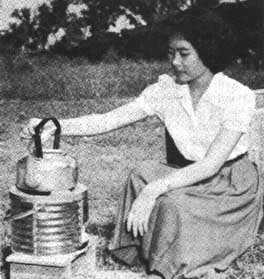
Wastes include trash, garbage, used water, human excrete, and animal wastes. Garbage and trash left around the home are food for flies, roaches, mice, and rats. These insects and rodents often carry disease germs from one person to another. These germs may cause diseases like typhoid fever, dysentery, murine typhus fever, ratbite fever, food poisoning, and cholera.
It may be hard to convince villagers how important cleanliness is to their health. However, keeping the house and yard clean is one of the best ways families can protect themselves against these diseases. Disposing of wastes safely is one of the first steps in having a clean house and clean surroundings.
Teach families never to let garbage, trash, or wastes of any kind pile up in or around the home. Help them to understand that when every house and yard in the community is kept clean, everyone benefits.
Human waste or night soil is very dangerous. It always carries disease germs. Diseases that human waste can spread include hookworm, typhoid fever, dysentery, cholera schistosomiasis (bilharzia), infectious hepatitis (liver disease), roundworm, and many others.
Night soil should never be used on the garden. People should never touch it with their hands. There is no known way to treat night soil at home to make it safe. It is responsible for much of the hookworm people have. Both children and adults should always wear shoes if they come in contact with night soil because hookworm enters the body through the feet.
In most villages, the safest and cheapest way to dispose of human waste is the sanitary latrine. In most countries, the health department has sanitary inspectors working in rural areas. Ask the sanitary inspector from your health department to help you get people to build sanitary latrines. He can help you choose suitable locations. He will also know the best kinds of inexpensive material available and how to build the latrines.
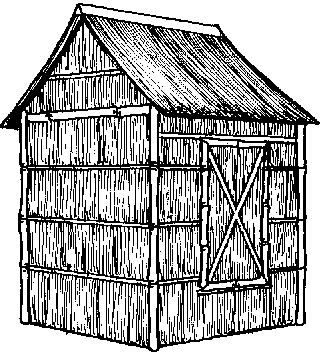
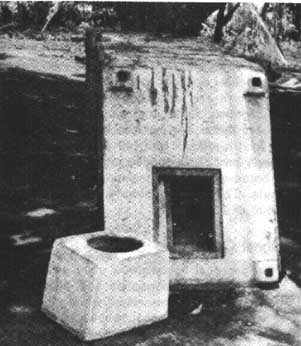

Garbage consists of food wastes such as peelings, scraps, and bones. Every family should collect its garbage in a container with a tight-fitting cover. Use garbage as feed for farm animals such as pigs, chickens, and goats, bury it, or use it for fertilizer. To use garbage for fertilizer, empty it into a pit or trench, sprinkle a thin coat of lime over it, and then cover it with about 10 inches of dirt to keep flies and animals out. Leave it buried 2 to 3 months before using. The lime helps make the garbage become better fertilizer to use in your garden.
Trash such as tin cans, old bottles, rusty nails, broken dishes. old rags, paper, dead brush, and other rubbish provides breeding places for rats. Stagnant puddles and anything that holds water can be a breeding place for mosquitoes. Families should keep trash separate from garbage. Get rid of it regularly. Don't let it pile up. Burn all that can be burned Trash like broken dishes, glass, tin cans, etc. should be buried. Put trash in a container with a tight-fitting cover until it can be burned or buried. This will help keep it away from insects and animals.
Animal wastes inside or around a house make it dirty looking and unsanitary. These wastes also contain disease germs and they attract flies. Animal manure makes good fertilizer. It should not be allowed to pile up around the house or in areas where animals are kept. It is much more sanitary to have a special yard or lot away from the house for chickens and farm animals. Wastes in or around the house from pets such as cats and dogs should be cleaned up or covered over and not allowed to stand to attract flies and other insects.
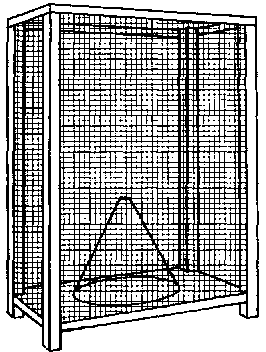
Flies, mosquitoes, cockroaches, bedbugs, fleas, lice, ants, scorpions, rats, and mice are some of the worst household pests. No one wants them around. They bite and make a person uncomfortable. They carry disease germs. Malaria, yellow fever, and filariasis are diseases carried by different kinds of mosquitoes. Rats and mice are very destructive. They eat food and feed that the family and animals need. All of these dangerous pests live and breed in dark, dirty, and damp places. They like places where garbage, trash, and filth pile up and where there is stagnant water.
The first step in getting rid of pests is to get the whole village to recognize the danger and want to control them. Most of these pests go from one house to another. One family's efforts may not be very effective if the family next door does nothing. It takes community action with people working together. Every family in the village must keep its own house and yard clean and sanitary.
Health and other government officials can be most helpful in carrying out a village or communitywide program on pest control. They often put on mosquito control campaigns or spray all the houses in a village against mosquitoes and other insects. They can advise you on the use of insecticides for controlling and getting rid of pests.
Insecticides are now commonly used in most areas. There are many different kinds. Some come in spray form and some in dust form. Some are better for certain pests than others. Your health officials can tell you the best kind for each pest. Insecticides must be used with care because they are poisonous to people and animals. They should always be kept out of reach of children.
Good personal appearance, good health, and a happy pleasant personality will help people to be well liked and respected in the village. To look well and feel comfortable and happy, a person must keep his body clean, wear clean clothing, sleep in a clean bed, and live in a clean house.
For good personal cleanliness each person should:
� Bathe every day.
� Brush his teeth with safe water when he gets up mornings and before going to bed. When possible, brushing after each meal is a good practice.
� Keep his hair and scalp clean by washing hair as often as necessary to keep it clean and attractive. For many people, this is 10 days to 2 weeks. Oily hair will need to be washed more often.
� Comb and brush his hair every day with his own brush and comb that no one else uses.
� Wash his hands with soap often-before eating, before starting to prepare meals or handle food, dishes, or cooking utensils, before handling the baby, or after touching a sick person. He should wash his hands after each time he goes to the latrine, handles animals, does any farm work, or coughs or sneezes.
� Have his own towel that no one else uses and wipe his hands dry every time he washes them.
� Keep fingernails clean.
� Take good care of his feet. They perspire. Keep them dry. Wash them before going to bed and oftener if needed.
� Wear clean clothes-underwear and top clothes. Dirty clothes can carry disease germs and attract body lice. Sleep in clean clothes and in a clean bed. Do not sleep in underwear worn during the day.
� Wash sheets, blankets, quilts, and mattress covers often.
� Use special care during menstruation. Bathe often in warm water. Wear sanitary pads and change them often to avoid bad odor.
� Live in a clean place.
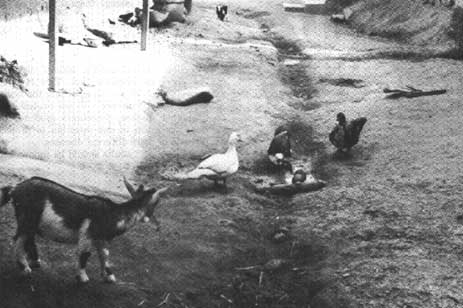
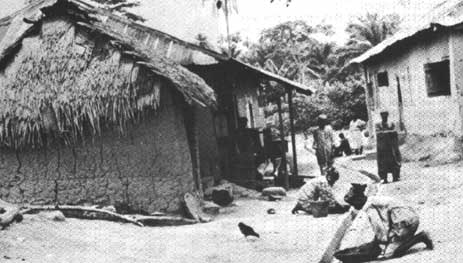
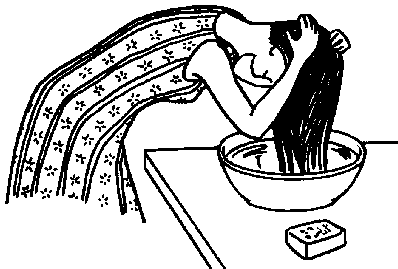
Protection against certain serious diseases can be given by immunization. This is done with vaccines which are injected into the body. A vaccine for one disease will not protect you from another disease. Sometimes mixtures of vaccines are given in one injection to protect against two or more different diseases.
All children and adults should be immunized against certain serious diseases if the vaccines are available. For children, many of the immunizations can be started in the first months of life. At the present time, vaccines have been developed for polio, smallpox, diphtheria, whooping cough, tetanus, measles, typhoid fever, cholera, yellow fever, and tuberculosis.
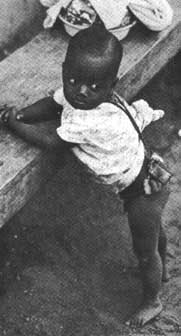
Sometimes, as noted below, the person will suffer from fever, headache, a tired feeling, and fussiness (in children) after having injections. This discomfort will go away in a day or two after the injection. It is worth suffering this discomfort to avoid bad illness or even death from the diseases.
When a person gets an injection, he should ask the doctor what kind of reaction he might get from it. If he gets this reaction, the person should stay in bed, drink plenty of fluids such as water, fruit juices, or milk, and eat his normal diet. He can also take aspirin. The doctor, nurse, or druggist can say how much aspirin to take. The very uncomfortable person should see a doctor.
Smallpox is a very serious disease that causes many deaths, disfiguring scars, and blindness among people of all ages in many parts of the world. A person who has smallpox gets a rash on his body that turns into ugly blisters. This disease causes a person to have pain in his head, back, and stomach. Vaccination is a sure way to keep from getting smallpox. Many health departments have vaccinators who visit villages every year to vaccinate the people. Or, people can ask for a smallpox vaccination from their nearest health center or dispensary.
Vaccination is usually given by making small pricks on the arm and placing a small amount of vaccine on it. The site of the vaccine will become red and itchy, form a blister, and then a scab. This will fall off and leave a small scar. There may also be slight fever for a few days. It may take up to 4 weeks from the time the vaccine is given until the scab falls off. The arm should be kept clean and dry during this time.
In countries where smallpox still occurs, children should be vaccinated at about the age of 3 months and again at about 18 months. In some countries, the health department recommends that adults and children should be revaccinated every year Ask your health center or vaccinator what is recommended where you live. In many countries, governments are trying to get rid of smallpox completely by vaccinating the entire population.
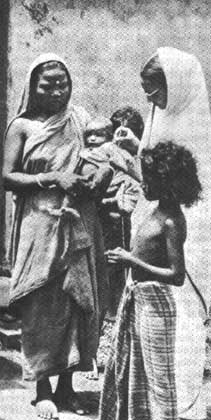
Measles is a childhood disease which can be very serious. In some countries, it causes many deaths and disability among children. This disease shows itself in a rash on the body and causes a person to have fever, sore throat, and a swollen sore neck under the jaws. A vaccine is now available to keep the child from getting measles. This vaccine should be given to the child when he is 9 months old. If this is not possible, he should have the vaccine as soon as possible after he is 9 months old and before his sixth birthday. This is because most children get measles before they are 6 years old. Only one injection is required to protect the child against measles. It does not have to be repeated.
Some children may get fever about a week after taking the injection. A few of these children will also have a mild rash on the body, headache, and fussiness a few days after the fever starts. These reactions may last for a few days. They will then go away.
If the health center or dispensary in your area provides measles vaccine, tell the mothers about it. They may also be able to get the measles vaccine from teams of health workers that come to the village. Ask your health department about this.
Diphtheria, whooping cough, and tetanus are serious diseases that can attack children. Adults can also suffer from diphtheria and tetanus. A person who has diphtheria has a very sore throat, a swollen and painful neck, and sometimes has trouble breathing. With whooping cough, a child has fever and a very bad, noisy, and choking kind of cough. Tetanus causes a person's jaws and neck to feel tight and causes the body to become stiff. To prevent diphtheria and tetanus, a vaccine called DPT is given to children up to 5 years of age. After this age, a vaccine for diphtheria and tetanus called DT is given. These vaccines are examples of immunizations for more than one disease that can be given in one injection. Your health center, hospital, or dispensary will tell you if they are available.
The child may have some soreness and swelling of the arm where the injection was given. He may also have some fever and fussiness. These reactions may come within a day or two after the shot.
Polio, also called poliomyelitis or infantile paralysis, can cripple arms and legs or cause death. The muscles of a person who has polio feel weak to him. Sometimes he cannot move at all. Not much can be done after someone has polio, but it can be prevented. Two vaccines have been developed. The Salk vaccine is given in injection. The Sabin vaccine is given by mouth. Both keep people from getting polio. Your health department can tell you if polio vaccine is available and how you can get it.
Yellow fever is carried to man by the bite of a special mosquito called Aedes aegypti. It is a very serious disease, but it can be prevented by injections of yellow fever vaccine. A person who is sick with this disease has fever, headache, and vomiting. Sometimes, the whites of his eyes look yellow. If you live in an area where there is yellow fever, ask your health department about immunizations.
Cholera causes many deaths and much suffering every year in some parts of the world. A person who has this disease vomits, has a great many watery stools, and becomes very weak. The best way to prevent the spread of cholera is by keeping your body clean, getting rid of body wastes in a safe way, drinking safe water and milk, eating cooked food, and keeping a clean home and yard. Cholera shots are also available in some countries. They help keep people from getting cholera. The injection is given in the arm and may cause some soreness and, in some cases, a slight fever. You should check with your health department to find out if these injections are recommended in your area.
Typhoid fever is a common disease in many countries. It causes severe sickness and often death. This disease causes a person to be tired and feel very bad. He will have a very high fever and severe cramps in his intestines. The best way to keep from getting typhoid fever is to always drink safe water and milk, get rid of body wastes in a safe way, keep home and yard clean, get rid of flies, and keep your body clean, especially the hands.
Typhoid vaccine injections give protection against typhoid fever. Ask your health department if it is available and if it is recommended where you live.
Tuberculosis is a serious catching disease which is still a big problem in many countries. It causes long periods of sickness and disability and many deaths. Most often, the disease affects the lungs. It can also attack the skin, glands, bones and joints, intestines, and other organs. In the early stages of tuberculosis, the person may not even know he has it because he does not feel sick. Later, though, the person develops a cough, feels very tired, has night sweats, and somethimes coughs up blood.
To keep from spreading this disease, people should always cover their mouths when they cough. They should not spit on the ground or floor because tuberculosis germs are coughed or spit out by a person who has the disease. People with chronic coughs should see a doctor and get treatment. If people know someone with a chronic cough, they should be careful that he does not cough or breathe in their faces.
Teach the people in your village to always boil milk before drinking it, unless it is pasteurized milk. Milk from tubercular cows will have tuberculosis germs in it. Boiling for 16 minutes will kill these germs.
Other ways they can keep from getting this disease are: always eat enough clean, safe, and the right kinds of food to stay strong; keep home and yard clean; keep clothes and body clean; get rid of flies; and try not to sleep in the same room with anyone who has tuberculosis.
A vaccine called BCG is available in many countries through the health department. This vaccine will help protect the person against tuberculosis. It is generally given in one injection to babies and children. After he gives the injection, the doctor must check the person later to be sure the vaccination did its work. You should ask your health department if BCG is available in your area and how you can get it.
The health department may also give chest X-rays. These are used to help find people who have tuberculosis so they can get medical treatment and be cured. Ask your health department about this.
People everywhere want to have a better way of life. They want better housing, food, and clothing; education for their children; medicines and hospital care when they are sick; and jobs where they can earn enough money to take care of their families.
Governments are making great efforts to raise the standards of living of their people. They are trying to bring more and better services to the people. These include hospitals, health centers, schools, housing, roads, electricity, water, and many others. But the number of people is growing so fast that many governments do not have enough money and resources to give the people the services they want and need.
Families are faced with the same problem. They often do not have enough money to buy the things they need. Every new baby makes it harder. More food, more clothing, more living space, more money, and more medicines are needed. Usually, the family gets poorer as it gets larger.
Many mothers and fathers also realize that having too many children harms the health of the mother. She becomes weak and may even die. When mothers have many babies close together, the babies may be weak and small or they get sick easily. The mother's body needs rest between babies to become strong again.
Sometimes, the overburdened mother is unable to carry the baby long enough, then she has a miscarriage. This means the baby comes before it is ready to be born and, therefore, it does not live.
Sometimes women, especially if they have had many babies and feel very sick and tired, will use unsafe ways of forcing a miscarriage to get rid of the baby starting inside of them. This is called an abortion. Abortions can be very dangerous to the mother when they are not done by a good doctor. The doctor can do it safely, but other people cannot, and so many women die. In many areas, abortions are not allowed because this is seen as destroying life after it has begun. It is much wiser to prevent a pregnancy than to try to stop it once it has started.
Parents are beginning to want smaller families so they can enjoy a better life. They realize that it is no longer necessary to have many children so a few will live. Many more babies and young children live now because of better living conditions. Many are saved by immunizations that protect them from diseases such as smallpox, measles, polio, diphtheria, tetanus, and whooping cough. Others are saved because mothers can take them to child health clinics and health centers for regular care. Safe water and safe disposal of human wastes are now available to many communities. These have also made life much safer, especially for babies and young children who often died from diarrhea.
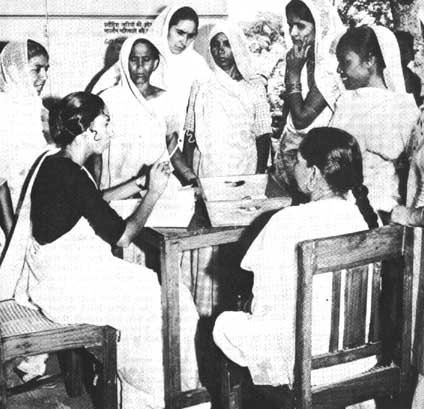
What is "birth control''? Birth control is a way to keep life from beginning. Most people know that nature requires the sperm from the man to combine with the egg the woman produces. This combination travels down into the womb where it starts growing to form a baby. Birth control methods stop the egg and sperm from uniting and starting a new baby.
There are many different recommended methods of birth control which do not endanger the health of the parents. However, using a method regularly is important. Using a method only once in a while does not work even if it is a good method.
Many governments have started new programs to help people learn how to have only the number of children they want. Family planning programs give information and help through hospitals, health centers, maternal and child health centers, and even through village shopkeepers.
To learn about the birth control methods recommended and used in your country, go to a health center or family planning clinic. Here you can get the information and materials you need to show and explain the services the clinic gives to people. Find out what family planning services are available in your area. Encourage the people to use these services.
You may be able to arrange for a family planning worker or a nurse from the health center to come to your village to meet with parents. Ask them to discuss and explain birth control methods and how parents can get help in planning their families. Or, you may arrange for a group of parents to visit the family planning clinic.
You can also help parents understand the importance of having smaller families and the number of babies they want. In this way, the birth of every new baby can be a joyous event because the parents want the baby and are prepared to take care of it.
A good time to talk to women about birth control is just before they get married or just after they have had a baby.
When a person is injured, a family member or other person may have to give some emergency care immediately. If it is a serious injury, a doctor should be called as soon as possible. Here are some things you can teach villagers to do in the meantime.
Small cuts. Wash a small cut, scratch, or insect bite with soap and clean water. Cover it with a bandage. If you do not have a bandage, cover the cut with a clean cloth and tie or tape it over the cut.
Keep cuts or sores covered so that flies and dirt cannot carry germs to them. If redness and soreness appear, show them to a doctor or a dispensary worker.
Major wounds or cuts. If a person has a large wound or cut:
� Call a doctor immediately or take him to the nearest hospital or dispensary.
� Stop the bleeding promptly. To do this, press directly on the bleeding part with a clean cloth. If you do not have a clean cloth, use your bare, clean hand.
� Place finely woven clean cloth next to the wound and tie or pin it into place. Raise a wounded arm or leg to help stop the bleeding.
� Give the injured person plain water to drink if he feels thirsty. The water should not be hot or cold. If the wound is in the chest or abdomen, if he is unconscious or partly conscious, or if he is sick to his stomach, the injured person should not drink at all.
� Keep the patient lying down and quiet.
� Protect the patient by covering him lightly with a blanket if it is cool or cold. Do not apply heat.
Burns. If a person's skin is burned, he may get reddening, blisters, or damage underneath the skin. When you give first aid for serious burns, try to lessen the pain and shock and prevent infection. To do this:
� Wash your hands well with soap and water before handling the injured person.
� Cut the clothing from the burned area rather than taking it off. This will avoid further injury to the burned area by pressure or brushing against the burn.
� Cover the burned area with a clean dry cloth wrapped lightly around the burn five or six times. This relieves the pain and protects the skin from dirt and germs. Do not break blisters.
� If the burn covers a large area, wrap a clean sheet or towel around it in addition to the dry clean cloth.
� If the burn is serious and covers a large part of the body, keep the person lying down. If the hand is burned, raise it above the level of the body and place pillows under it.
� Severely burned patients need fluids. If the injured person can not get to a doctor within half an hour, give him a half glass of water containing salt and soda every 15 minutes. If the injured person is a child (up to 12 years old), give him one quarter of a glass of the salt-soda water every 15 minutes. Put � teaspoon of salt and 1/8 teaspoon of baking soda in a liter (quart) of clean safe water to make the mixture.
� Take a severely burned person to a hospital or dispensary as soon as possible.
Snakebite. If a person is bitten by a poisonous snake from the group called pit vipers, he will feel immediate pain and swelling around the part where the snake poison entered the skin. The skin in the affected part will change color.
If the bite is by one of the group of snakes that include the cobra, coral snake, and their relatives, there may be slight burning pain and swelling at the wound, nausea, vomiting, dimness of vision, and sweating.
The bite of a nonpoisonous snake gives little pain and very little swelling. If the snake is nonpoisonous, first aid is the same as for ordinary wounds (see section on first aid for small cuts).
If a person is bitten by a poisonous snake and you have a snakebite kit, carefully follow the instructions given in the kit. If you do not have a snakebite kit follow these first aid measures within an hour after the victim was bitten:
� Have the victim lie completely still. He must not walk or move around.
� Tie a band or narrow piece of cloth firmly 2 to 4 inches above the bite if it is on the arm or leg. If the band is properly adjusted, there will be some oozing of blood from the wound. It should not be tight enough to stop the blood flow to the arm or leg. Move the band away from the place of the bite if the swelling spreads away from the wound on the arm or leg.
� Sterilize a knife blade with a flame and make small cuts in the skin. Try to make the cuts into the place where the snake poison went into the skin. Cross cuts, about ),6-inch long (like this x), may be made at each fang mark. Make shallow cuts. Beware of cutting muscles and nerves of the fingers, hands, or wrist because they lie very close to the skin.
� Suck with your mouth at the crosscut area. The poison is not a stomach poison, but you should rinse the fluid from your mouth. Continue suction for an hour or more. Do not suck from the crosscut area with your mouth if you have an open sore or cut on your lips or in your mouth.
� Put ice water or ice on the wound if possible when you rest from giving suction. This will give some relief from pain and may slow the absorption of the poison into the body.
� If the victim stops breathing, give him mouth-to-mouth artificial respiration at once. (See section below on how to use this method. )
� Take the victim to the nearest hospital or clinic as soon as possible. In moving the victim, keep him lying down.
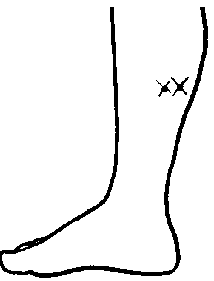
Certain accidents and illness sometimes cause a person to stop breathing even though he is still alive. In these cases, artificial respiration may save his life. It causes air to flow into and out of the lungs when natural breathing stops. If you are not sure if a person is breathing, place your hands on his sides just above the waist. If he is breathing, you will usually be able to feel the movement.
Artificial respiration must be started promptly after normal breathing stops. Most persons will die within 6 minutes or less after breathing stops unless they are given artificial respiration.
The mouth-to-mouth method is the best method of artificial respiration. It is used for all unconscious and non-breathing victims of drowning, electric shock, smoke or gas poisoning, drug or chemical poisoning, injuries to the chest, head, neck, and abdomen, convulsions, and choking or strangling.
1. Place the victim on his back immediately.
2. Quickly clear his mouth and throat. If there is food or other material in the mouth, wipe it out quickly with your fingers.
3. With one hand grasp the victim's chin. Place your other hand on top of his head and tilt the head backward.
4. Place the thumb of one hand between the victim's jaws. Grasp the lower teeth and pull the jaw forward. Pinch the nostrils closed with the thumb and index finger of your other hand. Never let the victim's chin sag. Always keep his head tilted back.
5. Take a deep breath and place your mouth over the victim's mouth. Keep your mouth open wide while you breathe out deeply into the victim's lungs.
6. As soon as you see his chest rise, remove your mouth so that the air can come out of his lungs. Repeat steps 5 and 6 every 5 seconds until the victim breathes naturally.
For infants or small children, cover both the mouth and nose with your mouth. Blow with small puffs of air from your cheeks. Puff into the child's lungs every 3 seconds.
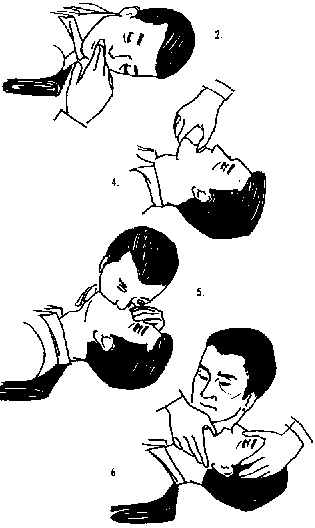
Your first breath into the victim will let you know if there is anything blocking his throat. If there is, the chest will not rise.
If you cannot remove the obstruction with your fingers, quickly place the victim on his side. Then give him a sharp blow on his back between the shoulder blades to free the material in the throat. With a small child, hold him by the ankles with his head down. Give him two or three sharp pats between the shoulder blades. This will generally free the object in his throat.
Often, village people may get sick and be cared for by their family in their home. Teach them the following ways to help the sick person get well and prevent others from getting sick.
� Serve clean food.
� Serve safe, clean water.
� Bathe the patient once a day in clean water.
� Wash hands in clean water before and after caring for the sick person.
� If possible, keep patient away from other members of the family if the illness is catching.
� Keep all medicine in a clean place out of the reach of children.
� Keep the room of the sick person clean and tidy, and have plenty of fresh air in the room.
Dishes that are used by the sick person should be washed with soap and hot water and kept separate from dishes the rest of the family use. The bedding the sick person uses should be washed with soap and hot water and dried in the sun, if possible. Put his bedding in the sun to air between washings. The sick person's bedding should always be clean and dry.
If the sick person can move in bed, he should move to different positions in the bed often. If he cannot move himself, a family member should move him to a different position at least four times a day. The family member should rub his back at least twice a day. This care will help keep good blood circulation and prevent sores from developing on his skin.
If the sick person cannot leave his bed to use the latrine, keep a container in his room that he can use in bed or beside his bed. This can be a bottle or a pot or pail with a wooden seat on it. A shallow pan can be used to slide under the sick person if he cannot get out of bed. Keep these containers covered and empty the contents of the bottle or pan into the latrine after use. To clean these containers, first rinse them with cold water and then wash with hot soapy water. Rinse them and place them in the sun to dry.
A sick person may have disease germs in any material he coughs up. He should cough into a paper or into a tin or gourd that has some sand or dry leaves in it. Keep the container covered and burn or bury the contents.
If the person is seriously sick, he should be taken to the nearest dispensary or hospital to see a doctor. If the person is too sick to walk, he can be carried in a chair, on a board, or on a blanket stretched between two sticks.
Health practices can be made a part of your teaching on almost any subject. Think of ways to emphasize safe and healthful ways of doing everyday tasks.
Throughout your work in the village you will need to keep emphasizing these basic measures so often mentioned in this chapter.
� Always drink safe, clean water.
� Eat clean, nourishing food.
� Keep your home and surroundings clean.
� Keep your body and clothes clean.
� Keep all food in covered containers.
� Keep garbage in a covered container until it can be fed to animals or buried.
� Burn or bury all trash. Do not leave it lying around or let it pile up.
� Keep chickens and animals out of the house, from under the house, and out of the yard.
� Work together to get rid of pests such as flies, mosquitoes, mice, and rats.
� Destroy breeding places of insects and other pests.
� Do not allow water to collect or stand anywhere around the house.
� Use a sanitary latrine.
� Use insecticides on the advice of government officials.
� Get protection against certain diseases by having immunization shots that are available where you live.
� Give the sick person good care at home to help him get well and avoid spreading his sickness to other people.
� If a person is injured, give him good first aid until he can get treatment from a doctor.
� Use birth control methods to have the number of children you want.
Good health is a personal, family, and community responsibility. This responsibility can be put into practice when the people accept the idea that good health is important to them; when they understand how to get it; and when they see good results from new health practices.
Conducting campaigns. Many villages use a "clean up" campaign as a way of getting interest and involving all the people in:
� Keeping cleaner houses and yards.
� Avoiding diseases.
� Making the village a better place to live.
You can use campaigns to teach many other health practices. For instance, "Drink Safe Water" or "Safe Water for Our Village" are slogans around which you could start a campaign on improving the water supply for a village.
Health materials. Your Ministry of Health will have good materials on health problems in your country. The United States/AID Mission generally located in your capital city will have, or can get for you, a series of simple Extension bulletins on sanitation. These were written especially for use in developing countries. They not only contain basic information on sanitation, but they also suggest many kinds of demonstrations to use in your teaching.
These bulletins are the FES-AID Sanitation Series:
Drink Safe Water, #1
How to Wash Your Clothes, #2
Personal Cleanliness, #3
Wash Dishes Right, #4
Get Rid of Household Pests, #5
Dispose of Wastes, #6
Storing Food at Home, #7
Prepare and Serve Safe Meals, #8
Care for Your Baby, #9
Make Your Own Soap, #10
Demonstrations. There are many practices that need to be demonstrated before people can really understand how to do them. You can show how to:
� Wash and bandage a small cut on a finger.
� Apply pressure and bandage for serious bleeding from the arm or leg.
� Wrap the skin of a seriously burned person.
� Treat snakebite. Show where to make cuts in the skin and how to apply suction.
� Sterilize a knife.
� Perform artificial respiration. Practice on a student. Then have students practice on each other.
� Bathe the patient in bed.
� Store medicines out of reach of children.
� Make a stretcher.
� Make and care for an excrete container for the bedridden patient.
� Prepare a container for a sick person to cough into.
� Make containers for garbage and trash.
� Build a sanitary latrine.
Get the people interested in immunizations by arranging for a group visit to the local health center, dispensary, hospital, or other health facility where they can learn what services are available and what immunizations are recommended. If a visit is not possible, arrange for a person from a nearby health facility to come to your village and explain about immunizations that are available and how the people can get them.
Set an example. If you live in the village or close to the people, remember that you can give good examples of healthful living by practicing the things you teach the people. For example, when people see that you boil your own drinking water, have a well-kept sanitary toilet, and a neat, clean house and yard, they know you are sincere and your teaching is good.
If you are in the village often, you will probably have to give first aid at times. Be sure you know what to do in an emergency. Use these accidents to teach both first aid and safety precautions.
When a person points with pride to the house he lives in and says, "This is my home", you can be sure it is more than just a house. The word "home" is precious to most people. Home is something in the hearts of those who live in a house. Home is the place where members of a family find companionship, where they share love, joy, and sorrow.
A house is not a home until people live in it. It does not take a large, expensive house to make a good home. However, the kind of house and its surroundings can have a great influence on the people who live in it.
Poor construction, lack of light and ventilation, crowded sleeping quarters, and unsanitary conditions do not contribute to health and satisfactory living. In houses with too few rooms, there is no privacy. If too many people sleep together, it is easy for disease to spread. Children cannot get the extra sleep they need if they share a room with adults who stay up late. Because of lack of storage facilities, personal belongings are kept anywhere. Children have little chance to learn to respect the property of others.
Governments around the world want families to have good houses. They know that poor people-both urban and rural-suffer from poor housing. Every country has some kind of project to improve housing. Often other groups such as private industry, estates, housing cooperatives, and building societies are also helping to improve housing for those in need. Learn what is being done in your area.
Every country has housing experts who have devised useful methods for building houses suited to the climate, the needs, and the economic resources of the people who are to live in them. Before you start a home improvement project, learn where the housing specialists in your area are located and what their program is. Find out what kind of help you can get from them.
Your first job may be to convince yourself that any home can be improved regardless of how little the family has. You may also have to remind yourself that any family, if they are given some help, will want a better place to live-more convenient, more comfortable, more healthful, and more enjoyable.
As you work in the village, you may not talk about home improvement as such. But this will not stop you from planting many good ideas on making the home a better place as you talk about other projects. For example, while you are teaching how to dry fruits and vegetables, point out the need for light and ventilation in the kitchen. When you talk about the body's need for good food, also explain the body's need for clean air, sunshine, and sanitary living conditions. Point out the need for clean walls and floors, a good place to sleep, and proper food storage in your discussions of good health.
Even on your first visit to a family, you can encourage home improvement by finding and praising something good they have already done such as a beautiful grapevine planted against a whitewashed wall, a shelf to hold a lovely copper vessel, an embroidered hanging that is like no other in the village, a woven mat made into a screen to give more privacy, or a well-thatched roof that gives coolness as it protects from the rain. Most families have something of which they are proud. Praising this can lead them to desire further comfort, beauty, or convenience.
To meet the basic needs of a family, every house should:
1. Provide shelter. That is-keep out rain and protect the family from heat and cold. This means the roof, walls, floor, and foundation should be in good repair.
2. Protect the health of the family. This includes sleeping space to prevent overcrowding, windows and doors for light and air, sanitary facilities, drainage, and ways to keep animals out of the house.
3. Be a safe place. This means steps and walkways in good condition, nothing lying around to trip on or fall over, and no sharp corners, nails, broken glass, tin cans, or other safety hazards in or around the house.
4. Have some beauty. This can be added by painting, whitewashing, planting flowers and shrubs, and keeping the house and yard clean and neat.
To provide for the safety and security of family members, certain basic things are needed. Think of the things the family does daily and once in a while.
The house or the area around it should provide for:
1. Preparing and cooking food. This includes cleaning up afterward.
2. Eating.
3. Sleeping space for all members of the family.
4. Bathing.
5. Resting, visiting with friends, relaxing.
6. Washing clothes.
7. Storing food, cooking and serving utensils, clothing, bedding, and other equipment that is not in use.
8. Sanitary disposal of garbage and human excreta.
9. A safe and easy to reach water supply.
Better housing must always be a family concern. Even with all that is being done by governments, the job is so great that many families must still improve their own houses. Many of these cannot build or buy new houses. Therefore, improving and repairing the old house is important.
In every village there will be some families who have made good homes for themselves. There will also be those who are existing in very poor homes. Study the good ones. There may be features you can recommend to improve housing.
Usually these changes can be made by the villager and his family. In housing, as in other subjects, be careful that you do not inspire changes impossible for the family to make because of lack of money or labor.
As you get to know people and learn their values, or what they want in life, you will probably change some of your own ideas about home improvement. You may be seeing for the first time the beauty there is in order, cleanliness, and lack of clutter.
In every country, houses have been repaired and improved by simple methods. There is much experience to draw from. You may wish to consider some of the following in your area:
Many houses are built on poor or no foundations and they begin to sag. The foundation should be of strong, durable material, preferably stone or concrete. Often only corner stones or corner blocks are used. The foundation of an old house can be repaired or improved so that the house sits more solidly and more nearly level.
Do the houses have good roofs? If not, what is the best way to improve them? They may need to be patched or repaired. In some cases, a new roof may be needed.
Roofs of thatch, grass, or bamboo go bad rapidly and soon begin to leak. They should be kept in good repair. Such roofs may need replacing about every 3 years. A thatched roof must be thick enough to keep the rain out and protect the house from the sun. It needs to slant enough so that rainwater easily runs off. Thatched roofs are a real fire risk but keep the house cool.
Roof materials that reflect the sun's rays and are poor conductors of heat will help to keep the house cool. Metal roofs are safer from the danger of fire, but they make the house warmer than many other materials.
A gutter pipe of bamboo or metal can be fitted around the roof to collect the water and carry it to a tank or where there is good drainage. This helps to protect the house and keeps puddles from forming in the yard. Collecting rainwater can be of great help to the home maker if water is scarce or a distance from the house.
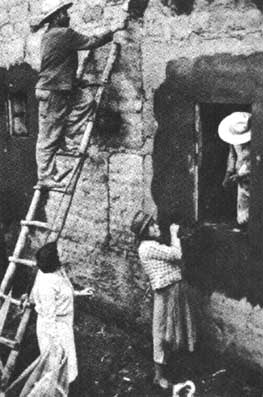
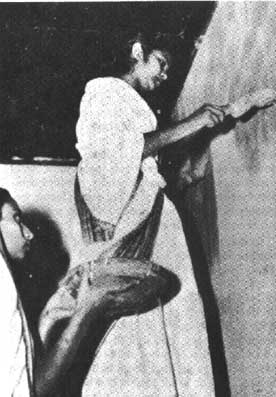
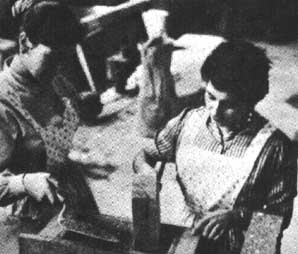
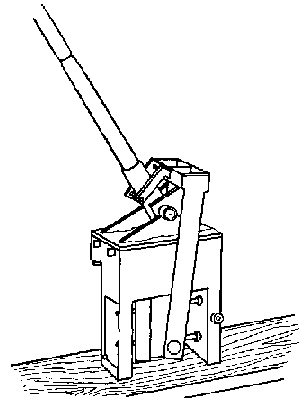
Are the walls of houses in the village in good condition ? Do they need repair ? If so, what is the best way to improve them? There are ways to make improved mud or clay plaster for walls. By adding a little cement, cow dung, or straw, villagers can make mud walls that do not crack so easily. Many families completely remove the old cracked mud plaster, replaster the walls both inside and out, and then whitewash or paint them.
In many areas, houses are built of handmade mud bricks which have been dried in the sun. These are more durable than mud-plastered walls. Now a simple brickmaking machine called Cinva Ram is being used in many parts of the world. It makes bricks of earth mixed with a little cement or lime and water. They are pressed very hard and firm by the machine and then dried. Houses made of these bricks are more durable than those built of handmade bricks. Mud or brick houses can be very attractive when they are painted a pretty color or whitewashed.
Ask your housing specialist about this machine.
Houses must have light and air to be comfortable. It is hard to work in a dark house. Houses with no light or air are often damp and mold grows very easily. Rodents and insects like dark, damp places.
When there are windows in opposite walls, the air makes a breeze through the house. Also, having one or more windows reach to the ceiling helps to take out hot air more quickly. In many areas, windows are covered with netting or screen wire to keep out flies and mosquitoes. In Taiwan, where the houses are built solidly of brick, windows have been added in the roof by removing a few tiles and substituting glass.
Doors should be large enough to take furniture in and out. Usually a door at the front of the house and one at the back are more convenient for the family. They save time and extra walking.
Are steps and walkways leading into the house safe? Are they solid and in good repair? Many home accidents happen because a step is broken or loose or too narrow or too steep.
Floors should always be smooth and without cracks. In many homes, the floors are of earth. Often these become uneven and dangerous to walk on. They are hard to clean and care for. A dirt floor can be made level and hard by mixing a little cement or wood ashes with the dirt. At the end of this chapter is a recipe for using wood ashes.
Wood floors wear well, but they may need repair in time. When a board warps or cracks, it can be dangerous. Bad boards can be removed and replaced with good ones. They are easier to clean if the wood is finished in some way. Your housing specialist can help you learn how best to improve wood floors in your area.
Concrete floors last well if they are properly made. Many times, however, not enough cement is used in making a concrete floor and it soon cracks and needs repair.
In some villages animals roam at will. You may find pigs, dogs, chickens, or goats wandering in and out of the houses. It is hard to have a clean, healthful house with animals in it. Screen doors that can be kept shut are good for keeping out animals as well as flies and other insects.
Many families cannot afford screen doors, but have solved the problem of animals in the house by building a kind of gate for the lower half of the door. This can be closed to keep out the animals but still allow the air to get into the house. People may also build a lattice fence or fasten wire around the lower part of their houses to keep animals from getting under the house.
In many respects the cooking area is the most important part of the house, yet it is often the poorest. How many houses in your area have a nice looking and comfortable living room to which company is invited, but a dark, poorly equipped, and unsanitary kitchen where the housewife has to prepare meals for the family?
Home improvement often begins with kitchen improvement. Gathering, preparing, and cooking food for the family means much work on the part of homemakers everywhere. Many women must also work in the fields, do all the family wash, carry water, get the fuel, and look after the children. With all this work to do, a woman needs a convenient and well-equipped cooking area.
The kitchen should have light and air. The walls should be a light color, the floor easy to clean. It should be a pleasant place to work.
This does not mean a kitchen must be costly. Very simple and cheap equipment and furniture can make a good cooking place.
What does a woman need in her kitchen ? Help homemakers think through the jobs they do in their own kitchens and list what they need to work with. A kitchen needs:
Something to cook on. This could vary from a small open fire between three stones to a modern cook stove.
Something to cook in. The kinds of pots, pans, and utensils needed will depend on the kinds of food cooked, methods of cooking, family meal patterns, and kinds of vessels available in the market.
Containers to prepare food in. Metal, wood, or enamel bowls, gourds, calabashes, crocks, pails, etc., are needed for mixing or preparing foods.
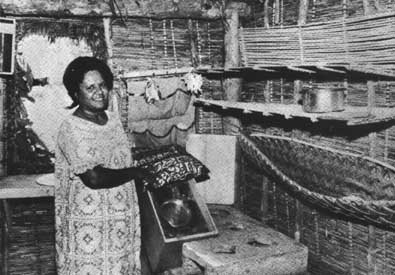
A place to store things. Cooking utensils, dishes, and food all need to be stored near the place where they will be used. Brooms, mops, and other cleaning materials and equipment need a place. A knife rack and wall pegs can be used for hanging small equipment.
A smooth surface to work on. This could be a table, a counter top, a strong box or packing case, or a shelf attached to the wall.
Containers for storing water unless there is running water. There should be a covered sanitary container for drinking water and pails or other vessels for water for other purposes.
A place to wash dishes. Dishpans and a dish drain.
A covered container to collect garbage in.
A place to sit. A stool, chair, or keg.
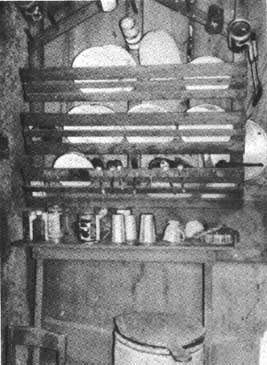
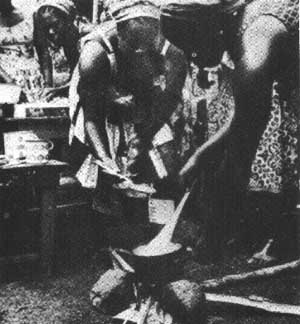
Many women still cook on three stones over an open fire or on a charcoal pot on the ground or floor. While stooping or squatting to cook may be comfortable for some women, for many others it is tiresome and a waste of energy. An open fire is always a hazard. Children are often burned by an open fire, and a woman's clothing can easily catch fire while she is cooking. The smoke from an open fire is harmful to the eyes. An open fire also wastes fuel. Much of the heat is lost in the air and does not help cook the food.
A good cooking stove should help a woman prepare better meals and reduce fire danger. Before you try to show a new and better stove, give thought and study to the methods women are now using and learn how they feel about them. For example, what is their fuel? What kind of cooking do they do most? Boiling? Frying ? Baking ? What utensils do they use on the stove? Do they use an oven in the yard to bake bread or do they join other women to bake in a common oven ? If a woman cooks over an open fire inside, how does she feel about the smoke? Does she dry fish or other food with the smoke ? Does she think the smoke helps to drive insects out of the house? Is the kind of heat she uses for cooking also used to help keep the house warm?
Improved smokeless stoves take many forms.
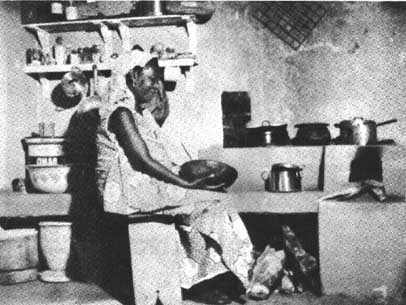
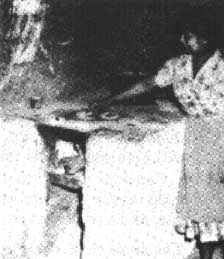

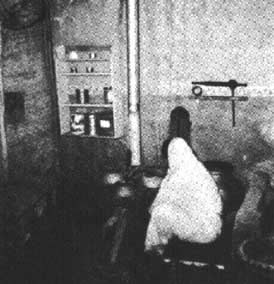
As you begin to learn food patterns and habits, note the differences in the stoves women use as well as in the ways they cook. As you visit families and talk with village leaders, you may find stoves that are new or different. Examine these to find their good points. Look for stoves suited to the needs of the people who use them and that do not use too much fuel. This will give you a basis for advising women.
Consider the kind of fuel families can get most easily and its cost. Charcoal, wood, oil, gas, and cow dung are commonly used fuels.
A smokeless stove directs smoke away from the woman's eyes, saves fuel, and can be made of native clay. This stove made of mud burns wood, coal, or charcoal. The earth may crack at first, but a few layers of fine red clay mixed with cow dung will help to prevent cracking.
Some of the advantages of this stove are:
1. It gives good heat and also saves fuel.
2. It is made mostly with earth.
3. It is simple to build. The average villager can learn to make it.
4. Women generally like its shape and the way it operates.
Remember, if a smokeless stove is not made correctly, it may not draw well. The opening to the chimney should always be larger than the opening to the firebox. This allows all the air that gets into the firebox to go out through the chimney. It is desirable but not essential that some type of closure be put on the firebox. There must be enough draft to draw well and a good damper to control the draft. The eyes or cooking holes must be covered at all times. The stove will work better if the outlet at the top of the chimney is higher than the highest part of the house.
You may have an engineer or village potter who could help develop a smokeless stove suited to Your area.
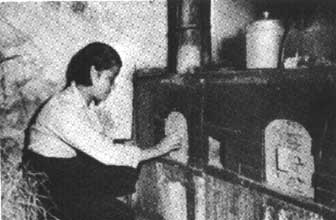
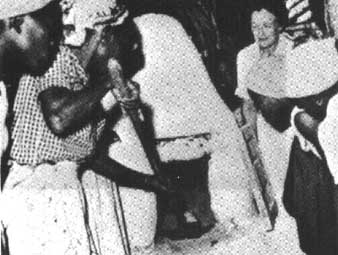
An oven is a great asset to the housewife. Modern stoves are often fitted with ovens. Separate ovens which can be placed over a fire or over oil or gas burners are fairly cheap. Directions for making an oil can oven are given at the end of this chapter. An oven can be improvised by lining a wooden box and its cover with galvanized iron. Put a pot with live coals on the bottom and place the baking pans on rods inserted through the sides of the box above the pot. Close the door tightly.
Where fuel is scarce a fireless cooker can help. A fireless cooker is a small container that fits into a larger container with enough space between the two so that some material can be packed around it. This material might be sawdust, hay, straw, ground cork, wool, cotton, or finely cut-up paper. The large container can be a small barrel, basket, wood box, or kerosene can, but it must have a cover. The smaller inside container can be a tin can or pail with a tight fitting lid. It must be large enough to hold a heating stone and the cooking pot.
The food to be cooked should be put in a regular cooking pot, brought to a boil, and cooked 4 or 5 minutes on the stove or over a fire before it is placed on top of the hot stone or brick in the fireless cooker. The packing material holds the heat inside to complete the cooking. It is especially good for foods that take a long time to cook. If you teach some skilled man in the village the principle of a fireless cooker, he may come up with a plan for a better one.
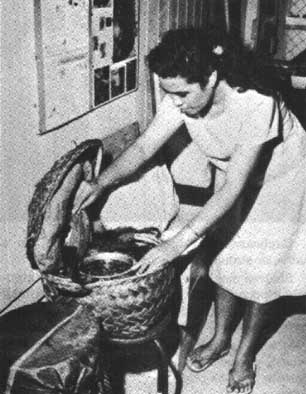
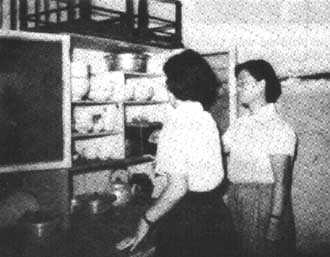
A woman preparing meals must have a place to work on. Work surfaces must provide room to prepare food for cooking and also to wash dishes and clean up after the meal is over. Many women also use the kitchen work surface for ironing.
This work surface can be a table, a strong box, or a counter top. It may have shelves and drawers built above or below it. Sometimes women use a shelf to work on and some women may even work on the floor or ground. Kitchen work surfaces should be up off the floor or ground to keep food and utensils clean. The height of the work surface should suit the woman who is to use it. The average height is 32 to 35 inches.
Work surfaces should be smooth and easy to clean. Hard wood is a good material. It should have several coats of vegetable oil to protect the wood but it should not be painted. If soft wood is used, a covering of sheet metal, linoleum, or oilcloth will protect the wood and make it easier to clean.
Sometimes a folding wall table can provide extra work space in a small kitchen. This is a wide board attached to the wall with hinges so it can be lowered for work and folded up when it is not in use.
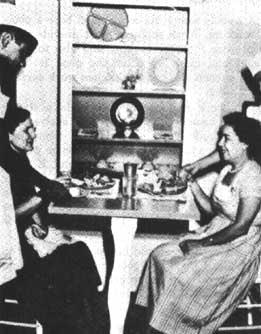
The kitchen or cooking area needs room to store:
� Pots, pans, and all cooking utensils and equipment.
� Food, including drinking water.
� Dishes and utensils used for eating.
"A place for everything and everything in its place" is a good saying to teach women as you help them plan storage in their kitchens. The most important thing is to plan so the food and untensils can be kept clean and safe from rodents, insects, and dust.
It makes work easier if dishpans and cleaning supplies are stored on shelves near the space used for washing up. If there are other shelves or cupboards underneath a work surface, store pots, pans, and larger equipment on them. Small equipment can be hung on hooks inside cupboard doors or kept in drawers. Dishes and glassware are best stored on the shelves of a closed or curtained cupboard.
Storage can be made at little or no cost, especially where wooden boxes are available. At first, women may feel that handling hammers and saws is not their work. Soon, however, they will be enjoying the activity, like the group of Brazilian women in the picture below.
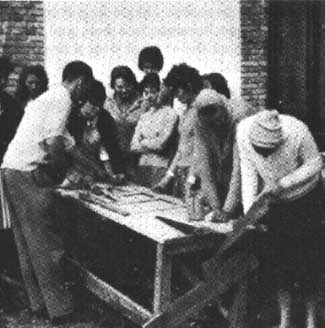
Cupboards may hang on the wall, sit on a table, or stand on the floor.
Shelves may also be used to store some utensils. Spoons and other equipment can be hung from hooks put in the under side.
Simple racks for hanging spoons, knives, ladles, etc., can be made of wood, leather thongs, woven grasses, bamboo, or other available materials.
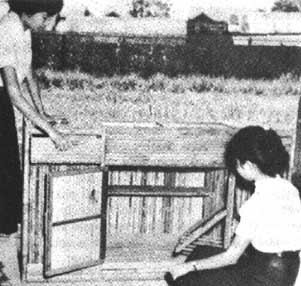
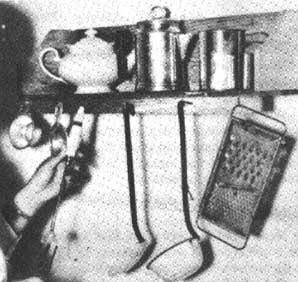

Your imagination is your only limit in creating storage. For ideas of more things to make and further directions, see:
Sanitation Series #7-Storing Food at Home
Ideas for South Pacific Kitchens
Simple Home Mechanics
Housing and Home Improvement in the Caribbean
While you are helping women to make storage equipment for their cooking areas, you will have many chances to teach them how to care for their food and utensils in a sanitary way and why this is important.
Most families store some food in the kitchen in cupboards, on open shelves, or in a closet with shelves. Sometimes a small separate room next to the kitchen, called a pantry, is used for storing food. Also, in some parts of the world, cellars, caves, and outdoor pits are used for food storage.
Any place where food is stored should be:
� well ventilated
� cool
� free of rats, mice, and insects
� clean and neat.
Some foods are quite perishable. These include:
� fresh meat, fish, and poultry
� some fresh fruits and vegetables
� milk, butter, margarine, and cream
� left-over cooked foods.
In warm climates, it is best to use such foods quickly rather than store them. Teach village women to buy only the amount of perishable foods that they can use before there is any danger of spoilage. All perishable foods should be kept as cool as possible until they are used.
For keeping foods cool, an iceless cooler is used in many places. It is made of a wooden frame covered with burlap or other coarse material. It stands in a container of water and has a pan of water set on top. The water is drawn into the burlap. As it evaporates, the temperature drops. If the cooler is placed in a shady place where the wind blows, evaporation will be faster and the temperature lower. For directions, see Sanitation Series #7-page 12 - "The Iceless Refrigerator."
Another simple cooler can be made using a basket for a base. Directions for this are also given in Storing Food at Home.
For storing root vegetables and some fruits, a simple cupboard can be made of a wooden box with shelves and a door of chicken wire so air can circulate. A small safe with fine mesh wire on three sides will provide good air circulation and can be used for short storage of foods that spoil easily.
For storing leafy vegetables such as spinach and lettuce, which need to be kept cool and damp, use a wooden nail keg lined with a thin layer of cement. Put a little water in the bottom of the keg. Place the vegetables in a cloth or plastic bag and hang them on a small hook screwed into the cover of the nail keg.
For storing dry foods such as flour, sugar, etc., use containers with tight fitting covers.
For storing food for a short time in an open container, make a food cover out of mosquito netting over a wood or metal frame.
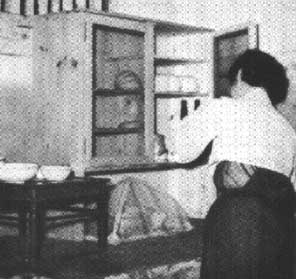
The village woman needs a clean space to wash dishes, cooking pans, spoons, knives, etc In most cases, this will mean a surface raised off the ground. She may use the same table or work surface where she prepares food. Or she may have a special place for washing her dishes.
In several African countries, women have made a table at which they stand to wash dishes. It has a top of bamboo. They use it over a soak pit so that water falling through the bamboo top drains away in the soak pit. Directions for making this table are given in Home Improvement Series #1.
In Taiwan many families have-made sinks from cement and brick. Directions for making such a sink are given at the end of this chapter.
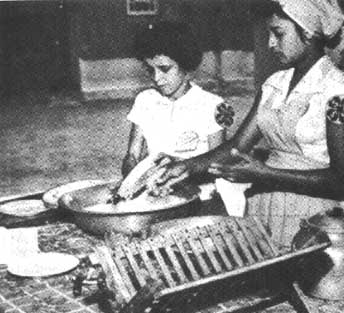
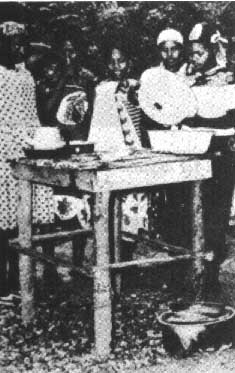
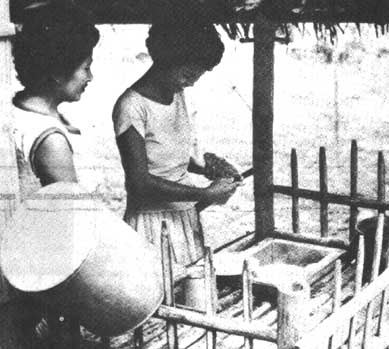
People follow different eating customs in different parts of the world. In some places, they simply put food from the cooking pot into eating bowls and sit down to eat wherever they can. In other countries, families sit down around a table and eat together.
In some homes, there is room to eat in the kitchen and the family may like to eat there. In modest homes, one room often serves as both a living room and a place for eating meals. In hot climates, it may be more comfortable to eat outside the house. A shelter or porch may provide a place. When members of the family sit together at meals, they can enjoy each other's company. The mother can watch what the children eat and how they eat and train them in table manners.
For a family to sit down and eat together, they will need a table. If this is low, the family may sit on the floor or on low stools. Or the table may be high enough to use chairs, benches, or stools.
A table can be made of lumber, bamboo, or metal. Chairs or stools can be made of the same materials. Wooden boxes and small barrels can also be used to make stools.
The top of the table should be easy to clean. If a cover is used on the table, it should be of material that can easily be washed or wiped clean. When the family is ready to gather around it to eat, the table should be clean and look nice.
This portion of the house is very important. The average person spends about one-third of his time sleeping. Unbroken sleep is needed each night if a person is to feel good the next day. For this reason, each person needs a safe, clean place in which to sleep.
Each person should have a comfortable bed. Many families do not have enough beds for every member of the family or enough space. One solution is to make a nest of beds. Since each bed is a different height, they can be stored under one another during the day. This takes up less space in the house and makes a place to sit during the day.
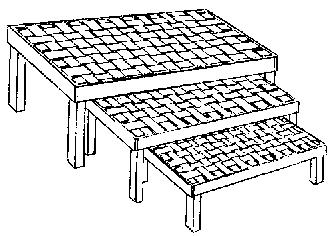
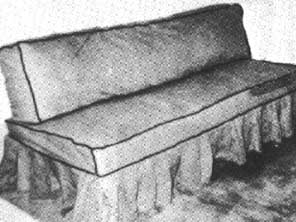
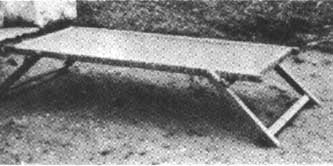
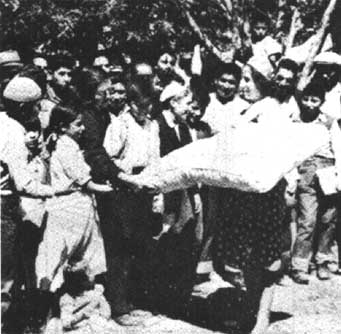
In hot climates, a mat may be spread over the bed to sleep on. In many countries people like to sleep on a mattress.
In the United States and countries where cotton is grown, mattresses are stuffed with cotton. In some countries, as in Brazil, corn shucks are used. In others, rice or wheat straw, wild hay, or banana or palm leaves are used.
Directions for making a mattress of cotton are given in Home Improvement Series #5. These directions can be adapted for use with other stuffings.
When corn shucks are used, they should be dipped in hot water, then shredded into small strips by a small hand paddle with short nails in it. The tough top part of the shucks is then cut off with a sharp knife and the filling is ready to put in the tick.
A baby needs a separate bed in which to sleep. He should not sleep with any one because he may smother.
In Latin America, women make a hanging bed of canvas or other firm cloth. Directions for making this bed are given in Sanitation Series #9.
In other countries comfortable beds for babies are made of local baskets or built of wooden boxes. See the chapter on Child Care, for pictures of these beds.
To feel refreshed and to lessen the danger of catching disease, people need fresh air while they sleep. In some places, people think that night air is dangerous. You may need to find out what the people think about this before you advise ways to increase the fresh air in poorly ventilated homes.
People who live in one-room houses often want to learn how to make partitions to separate the sleeping area from the remainder of the house. Partitions or room dividers can be made high enough to give privacy and still have enough space at the top for air to circulate freely. A sturdy movable screen, preferably one that folds up and can be moved during the day, is used in many small houses. Directions for making wall partitions are given at the end of this chapter.
In the sleeping area or other suitable place in the house, there should be a special place protected from dust and insects where people can hang or store clothes that are not used every day. A closet may be built into a room or a simple one made of boxes or scrap lumber. It may be only a curtained-off space where clothing can be hung on hangers and kept in shape for wearing.
Suitable storage is needed for:
Underwear. Drawers or shelves make the most convenient place for keeping clean underwear. It should be neatly folded when it is not being worn.
Out-of-season clothes. Clothes that are not being worn regularly can be stored on shelves, in a cupboard, or in a box.
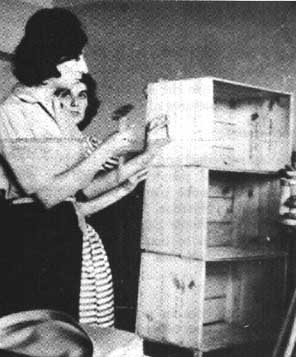
Bedding. Sheets, pillow cases, etc., that are used regularly are best stored on shelves where they can be easily reached. Quilts, blankets, extra pillows, etc., that may be needed only at certain times can be stored in boxes, on shelves, in trunks, or in cupboards.
Never overlook the importance of storage space. It is impossible to keep a neat, orderly house without a place to keep things that are not being used. Every house can have some storage. Many kinds can be made by families themselves at little cost.
For the convenience and safety of the family, bathing facilities in or near the house are desirable. In some places people bathe in the river. This can be dangerous as river water is often polluted. If river water is used for bathing in the home, it should be boiled.
Some families screen a private place in the yard with sacking or bamboo and bathe outside the house. Other families provide a small private area, no more than 3 or 4 feet square, inside the house. In either space, a common method of bathing is to pour water over the body-or improvise a homemade shower. A plan and description of an improvised shower is given at the end of this chapter.
The bathing space can have a floor of concrete or wood slats, but it must have good drainage. A wash basin placed at convenient height and within easy reach should also be available with water and soap for washing the face and hands. Such an arrangement off the kitchen or near the back of the house will give people a place to wash up when coming from the fields or the toilet.
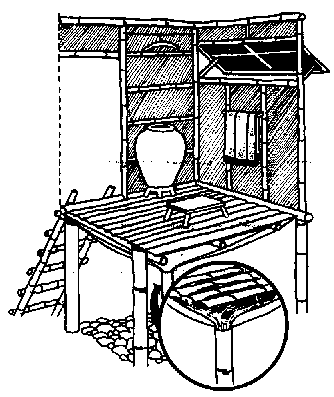
In some villages community bathhouses are used. Cleanliness in these is extremely important because they are used by many people. If you are working in such a village, learn the customs regarding bathhouse use. Later, when you are well accepted, you may want to encourage a community project to maintain high sanitary standards in the bathhouse if it seems to need it.
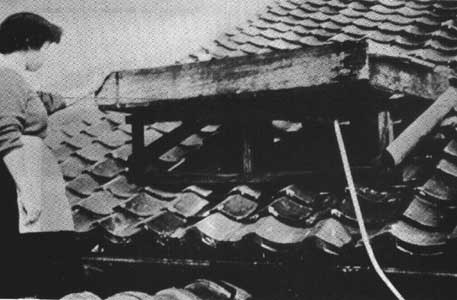
People need a place where they can sit down and rest, where they can talk among themselves or with guests, where they can meditate or read. They also need a place to sit and mend garments, do hand sewing, or knit. A living room where the family can meet for common activities helps to develop a cooperative spirit among family members.
Various rooms of the house may be- used- for more than one purpose. The living room may also be used for sleeping: Outside the house in the yard under a tree may be a more pleasant place to entertain a guest or relax than inside the house. A woman may prefer to sit and do her mending on a porch. The dining area is frequently combined with the living area. In cold countries, the large kitchen with its stove may be the most inviting place in the house to sit and talk. The climate, customs, and needs of the family will influence the kind of living area needed and the place they will most enjoy for their moments of relaxation.
The amount and kind of furniture and furnishings for a living area will differ greatly according to what the individual family likes and can afford. But most families need and want:
1. Something to sit on. This may be chairs, stools, a bed that doubles as a sofa in the daytime, a bench, or a clean mat spread on the floor.
2. A table on which to place refreshments, books, or other things.
3. Light to make the room cheerful and inviting. Also to provide light for anyone doing handwork, reading, writing, or studying.
4. Something to add beauty-such as pictures, curtains, gay looking pillows, a growing plant, or fresh flowers. Beauty is added when the walls are made pleasing and attractive by painting or papering. Light colors on the walls make the room seem not only lighter but also larger.
Furniture may be made of local materials.
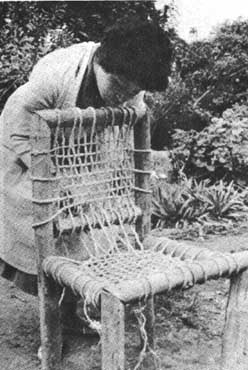
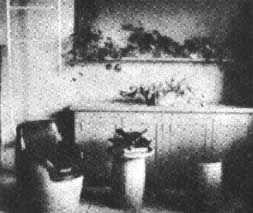
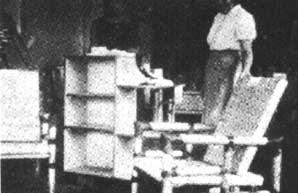
In many areas, you may be able to make chairs and tables of local materials, such as scrap lumber, barrels and boxes, bamboo, or tree branches. When you use small branches of trees, you may need to lace them together with a strong grass or other fiber rather than nail them.
The kind of materials used to build a house, as well as its design and size, varies from country to country and from family to family. A house should be built so it can be enlarged if necessary. Consider what materials people can get, how much they cost, and how well they will last when deciding what type of house to build or what to use to repair or improve a house. The following are commonly used materials:
Bamboo-In many countries, bamboo is used to build or repair any part of a house except a fireplace or chimney. Because of its beauty and strength, village workers seeking a cheap building material often turn to bamboo. Different kinds of bamboo are suitable for different uses. Villagers or an agriculturist may be able to show you the best kind for a particular use.
Wood-Where wood is plentiful, it is often used to build the entire house. In other places, it may be used only for the frame, or for shingles for the roof. Houses of wood are generally painted to protect the wood. A pleasing color of paint adds beauty to the house.
Wattle and daub-Usually this means a mixture of mud, clay, straw, or cow dung used as a plaster for the walls of a house of sticks, bamboo, or cane.
Grass and thatch-Many different grasses and leaves are used in building. Learn which ones in your area are suitable. Some fibers can make strong houses when they are properly handled and used. The leaves or fronds of coconut can be made into an excellent roofing material by weaving the leaves to make a slat. These slats are placed so they overlap. They can be made waterproof and they are very durable.
Concrete-This is the most suitable material for the foundation of the house. Reinforced concrete blocks are generally cheap and widely used for building.
Brick, tile, and stone-These last a long time but in some areas they are expensive.
Adobe brick-These are made of mud, clay, and straw or cow dung and generally dried in the sun. They are used widely in dry climates.
Aluminum or galvanized iron-These are being used more often than before, especially for roofing.
Materials needed:
ashes
earth
water
shovel
wire strainer
trowel or heavy board
ruler
Instructions:
1. Prick the earth floor, moisten, and level it. (If the floor has holes, fill them with pieces of rock or earth.)
2. Evenly apply a �-inch thick coat of a well-strained mixture of 2 parts earth, 1 part ashes, and enough water to hold them together.
3. Smooth the mixture with a trowel or straight board.
4. Let this coat dry for at least 2 days.
5. Evenly apply �-inch thick coat of a mixture of 2 parts ashes and 1 part earth. (These are the reverse amounts of ashes and earth used in the base layer.) They should be mixed with just enough water to make a very thick paste.
6. Smooth and level this second coat.
7. Let dry for at least 3 days. Do not use the floor during this time.
Special instructions:
1. Strain the ashes and earth well to remove all rocks, coals, or other materials.
2. Mix the ashes and earth very thoroughly and slowly add just enough water to make a paste.
3. When sweeping the finished floor, add a little water so that the mixture will not "dust off" but become harder.
4. It is best to finish one-half of the floor before starting the other part.
5. If the floor cracks, go over it with the second mixture. Fill in the openings and smooth.
For Use With Charcoal
Materials Needed:
Two 5-gallon oil or similar cans
One or two ordinary cans to provide "tin" for shelf
One light iron rod 20 inches long
Two pairs of light hinges
About 2 dozen small stove bolts about 1/8" x 1". long or same number of soft rivets ii: cans are riveted together.
Bricks for base (number depends on size)
Sand (optional)
Tools Required:
Measure-ruler or tape
Sharp nail to scratch lines on can and make holes for bolts
Tin snips or old heavy scissors
Heavy knife to start cuts
Hammer
Screw driver
Pliers
Metal bar or similar item about 8 inches long with square corner
Directions:
This oven is designed so cans may be joined with either bolts or rivets without solder.
Cut the corners carefully as shown in the drawing. Material from this cut provides the doors. If this-is not done correctly, the material may- require patching or more material must be secured from other cans. Cut the cans on corners away from the vertical seam of the can. This avoids having the seam in the material to be used for the door.
Leave a 1-inch edge around the sides of the can to provide room for bolting and to reinforce the finished oven. Turn back �-inch on the edges of the sheet metal (tin) around the door opening and on the doors. Hammer them flat.
The latch can be made of "tin" folded to form at least three thicknesses of metal and flattened. Bend it as indicated. Bolt the pieces together.
Make a shelf out of the metal from an ordinary can, as shown in the diagram. Bolt or rivet it to the back of the oven after the sides have been put together. Make a hole in either side of the oven. Slide the iron rod through one hole, pass it through the roll at the front of the shelf, and slide it out the other hole.
Some ovens have the original can bottoms left in place. About an inch of dry, clean sand is placed in the oven. This becomes heated and in turn heats the oven. Others have open bottoms so that heat from the charcoal fire goes directly into the oven; The ovens with the sand probably maintain a more even temperature. If an oven is made this the bottom can be cut out later if-the open type-oven is desired.
If the oven is not steady, it may be weighted down with several stones. If a greater heat is desired, some of the burning charcoal may be placed on top of the oven so that it will be heated from both the top and the bottom. In cooking some types of foods, it may be desirable to unscrew and open the little holes through which the oil was originally poured. This will create a draft. Experiment with local foods to find the best methods of using this oven.
Thoroughly clean the oven before use. It should be heated up at least once and allowed to cool before it is used for baking. Oil will burn off and the fumes would taint any food being baked.
This oven is being used successfully in a number of countries. Baking and roasting are quite effective with this simple and inexpensive appliance.
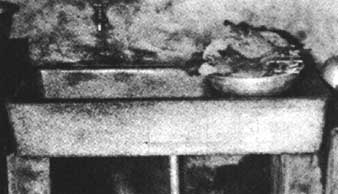
Tools and materials needed:
The tools can be found in any rural home. They include a water pail, dipper, saw, knife, wooden boxes, and a sifter.
The materials needed are bricks, cement, sand, small stones, old or new #8 steel wire, a bamboo tube, and rubber hose.
Remove sticks and other material from the sand. Sift the stones to get only the smaller ones.
Steps:
Mix 4 parts of sand, 2 parts of cement, and 1 part of stones.
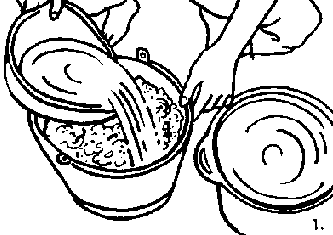
The stones supplement the cement and reduce the cost. The proportions of materials can be changed a little. If more cement is added, the surface of the sink will appear more smooth and durable, but it will cost more.
The amount of water to be added depends on the dampness of the sand and stones. If the sand and stones are very wet, add just a little water. If they are very dry, add more water. It is best to add water gradually. Mix well.
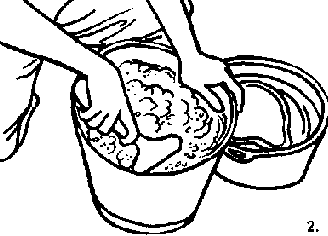
Use a trowel to mix the sand, stones, and cement. It is easier to mix if you use a large but shallow pail. If no pail is available, you can mix the materials on the ground.
Draw the size and shape of the sink you need on a large piece of paper. Then put bricks on the lines. Usually a sink is about 60 cm. long, 35 cm. wide, and 12 cm. deep.
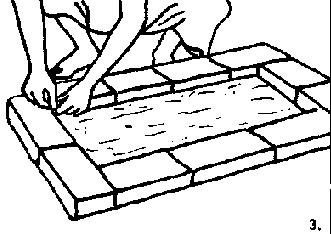
Use a bamboo tube about 3 cm. in diameter and 10 cm. long as a mold for the sink outlet. Pour the cement mixture around the bamboo tube and inside the brick frame.

Use the trowel to make the cement surface even. Be sure to make every part firm and even. The cement should be about 2 cm. thick.
Cut the steel wire into pieces the length of the sink and lay them on the cement surface. This strengthens the bottom of the sink.
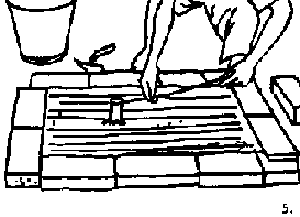
Add one more layer of cement mixture on top of the steel wire. Make it even and smooth. This is the bottom of the sink. Have the area near the outlet lower than the rest of the sink so that the waste water can drain out more easily.
Wet the bricks thoroughly, then place them on the smooth cement surface along the outside brick frame. Connect the brick ends with a mixture of 1 part of cement and 2 parts of sand with water. Use no small stones for this. This frame makes the sides of the sink.
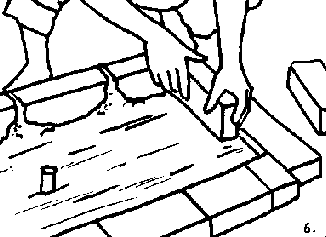
Now carefully remove the outside bricks you used to outline the size and shape of the sink. Do not disturb the bricks on the cement layer or the sink is apt to leak.
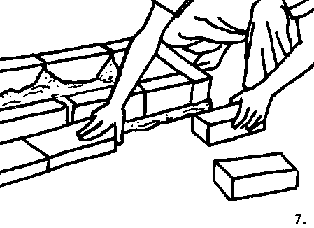
Again wet the bricks you are using to make the sides. Then cover both the inside and outside of the sink with a mixture made of 1 part of cement and 2 parts of sand. Be sure to make the surface as smooth as possible. Remember, you must wet the bricks first to make the cement stick on.
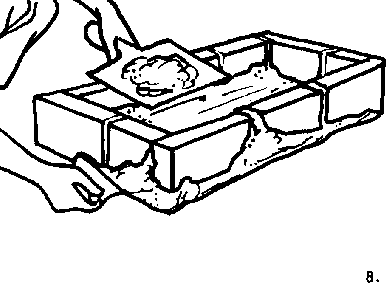
Now, the sink is complete. Cover it with a piece of thick paper, a piece of damp burlap, or a wooden board so that the sink does not dry directly under the sun. It is best to let it dry slowly for 4 or 5 days. If it is good drying weather, sprinkle the sink with water several times. If the sink dries too fast, the cement may crack. This would cause the sink to leak.
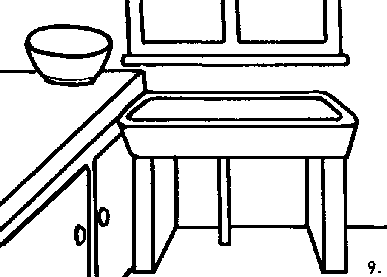
After the sink is well dried, take it to the kitchen. Place it on a wooden or brick support made for this purpose Then connect the outlet of the sink to the drainage with a piece of rubber hose or bamboo tube. Then the waste water will go out through the hose, and the floor of the kitchen will be kept dry all the time.
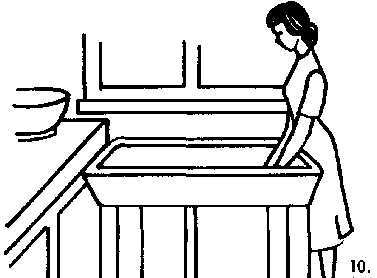
Place the sink at a comfortable working height. To determine the best height, the homemaker should stand straight with her arms by her side. The palms of hands should touch the inside of the bottom of the sink. If the sink is too high or low, she is apt to get tired easily.
Materials needed:
gunny sacks
cement
lime
powdered glue
water
pail
handsaw
nails ( 1" long)
hammer
strainer
pieces of wood (any desired length)
brush
sticks to stir mixture
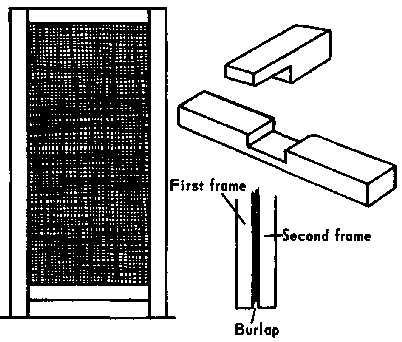
Instructions:
1. Measure the length and height of the desired partition.
2. Decide whether it will have a door-to which side it will open and its size.
3. According to these measurements, cut 4 pieces of wood (�" or �" thick by 1" or 2" wide) for the frame of the partition.
4. Nail the frame together. Use lap joints. ( See diagram. )
5. Open the gunny sacks. Sew enough of them together to make a piece big enough to cover the frame.
6. Nail the sacks to the frame.
7. If you want the wall to be finished on both sides, make another frame and nail it over the first one on the other side of the gunny sacks. (See diagram.)
8. In order to stretch the gunny sacks out well, place pieces of wood in the middle of a large partition. Place these pieces of wood on both sides of the sacks like the rest of the frame.
9. Nail the partition in its proper place.
10. Mix together 1� parts of lime, 1 part of cement, and � part of powdered glue. Strain the mixture. Stir the mixture and add 2 parts of water, little by little. If necessary, add more water.
11. Paint the sacks on both sides with the lime mixture.
12. Always remember to stir the mixture while you are using it. Prepare only enough mixture to use immediately. The mixture is ruined when it hardens.
13. Paint the wood frame and the limed gunny sacks if you wish.
A simple shower can be made from an ordinary can.
Remove half of the top of the can. Punch several small holes on the other side, a little below the top.
Attach a wire handle at the top and a hook at the bottom (on the opposite side from the small holes).
Fasten a strong cord to the handle.
When using the shower, lift the can to a suitable height by tying the cord around a strong tree branch or bar.
Let the cord run through the hook.
Pull the end of the cord enough so that the water may pour through the small holes.
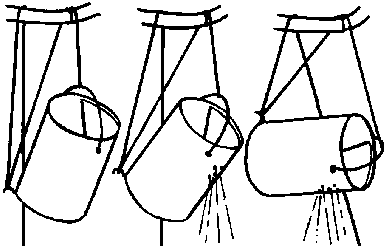
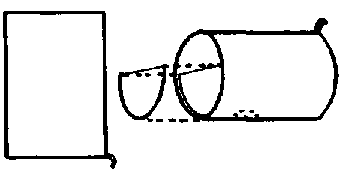
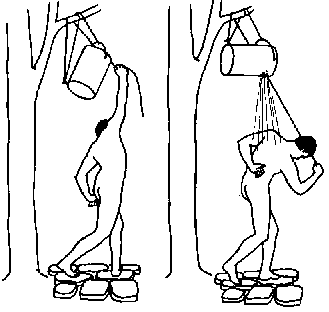
A village woman has much work to do both inside and outside her house. As you see the many jobs she has to do each day, you will want to help her plan ahead, manage her time and money, and find easier and better ways of doing her work. Every homemaker would like to do her work in a simple, easy, quick, and safe way if she knew how. She needs to learn how to do each job as efficiently and as well as she can. Improved work methods will help her save time and be less tired at the end of a day. Housekeeping and home management also help determine the kind of home life a family has. A well-kept, well-run house makes a more pleasant home and better living for all members of the family.
What are some of the important jobs in keeping a house and managing the affairs of the home ? They include:
� keeping the house and surroundings clean
� making beds or storing the sleeping equipment when it is not in use
� cooking and serving meals
� washing dishes and disposing of garbage
� keeping things easy to find and out of the way
� washing, ironing, sewing, and mending clothes
� taking care of children
� buying food, clothing, and other things for the house and family
� simple home repairs
� whatever else is needed to keep the family well and happy.
The average homemaker dislikes some of these jobs more than others. Some she finds hard to do. Others are easy. Finding what makes the women's work hard will help you suggest changes to make it easier. To decide which jobs and activities most need to be improved and simplified, help the homemaker look for:
� Jobs that give trouble. Maybe her wash place is so far from the house that she gets tired walking to and from it
� Jobs that cause other work to wait. Maybe the days she goes to market her evening meal is late.
� Jobs that always make her feel rushed. Does she feel in a hurry when she starts to cook or go to market?
� Jobs that are especially hard, dirty, unpleasant, or tiresome such as carrying water, washing clothes, cleaning the latrine, or caring for the animals.
� Jobs that are poorly done. The clothes may not be clean after they are washed, the floor may still be dirty after it is swept, the dishes may be greasy after they are washed.
� Poor use of energy. How does she lift or carry heavy loads? Does she stoop over a pan on the ground to wash clothes, stand at a table, or squat?
� Poor use of equipment. She may use a broom with a handle that is too short or she may try to dig in the soil when it is too hard.
To help the women with whom you work understand the need for good housekeeping, discuss with them what makes a house seem inviting and pleasant. Help them to see that it first must be clean and orderly.
Emphasize also that a pleasant and inviting home has some beauty both inside and outside. A house whitewashed or painted a pleasing color seems more attractive than a drab, unpainted one. Suitable colors on the inside walls and in furnishings such as seat covers and curtains, pretty pictures on the walls, fresh flowers in the house and yard-all these things add beauty to the house.
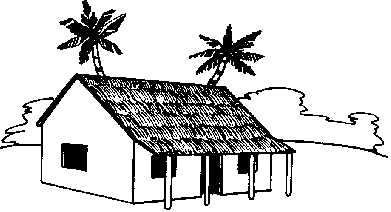
Anyone coming to the house usually comes into the living room first. Whatever is done to beautify the home is generally done here. The rest of the house may be neglected. The bedroom and kitchen are often disorderly and dirty and the backyard may be littered with trash and rubbish. The real test of a good housekeeper is the cleanliness and tidiness of her kitchen, the sleeping rooms, and backyard as well as the living room and front yard that company sees.
Clean surroundings are as important as a clean house. A clean, well-kept yard, both front and back, brightened with pretty flowers and shrubbery, and fenced to keep the animals out adds value and beauty to the home. A neat, clean porch provided with a comfortable chair or bench helps to welcome family and friends. No matter how fine or how small and humble a house is, keeping it and its surroundings clean and tidy will go far toward making it an attractive home.
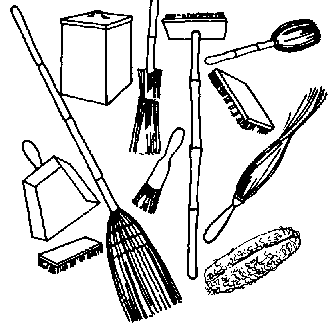
Why have a clean house ? A clean house:
� makes the homemaker proud of her home
� makes the family feel good
� helps keep the family healthy
� helps things last longer
� smells better
� sets a good example for children
� helps the neighbors have respect for the family
� is enjoyed by children and their friends.
What is a clean house ? A clean house has:
� floors with no dirt, garbage, grease, or trash on them
� walls and ceilings without cobwebs or dust
� furniture without dust, crumbs, or grease
� beds that are made up with clean bedding, or bedding or mats stored neatly
� clothes washed, ironed, and put away
� dishes washed and put away after each meal
� all food covered
� food wiped off table, chairs, and benches after each meal
� all kitchen equipment, pots, and pans without grease, food, or dust on them
� no bugs or flies inside the house
� no pigs, chickens, goats, sheep, or cows in the house
� no trash inside or around the house
� a neat yard, porch, and steps
� a clean toilet-whether it's inside the house or outdoors.
A house is easier to clean and safer:
� when things that should be put away are not left lying around
� when the house is kept in good repair
� when everyone does his part
� when a mat or scraper is kept near the door to wipe feet and shoes on
� when some cleaning is done every day
� when you have good cleaning tools or equipment. These include a broom, scrub mop, dry mop, bucket or tin pail, cloths or rags, soap, scouring powder, hot water, a box or basket for waste and dirt, and one to hold the cleaning things.
All parts of the house should have constant care and attention. Some cleaning jobs need to be done every day, some need to be done only once a week, and others need to be done only now and then. The following suggestions may help you teach good housekeeping practices.
Use a broom with a cloth tied around it or a long handled brush. Dust down the walls and remove cobwebs. If walls are painted or whitewashed, remove fingerprints, grease spots, or any other dirt or stain using a clean wet rag with a little soap. Now and then walls may need washing all over.
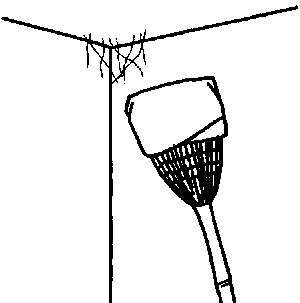
Cracks or holes in walls or damage caused by termites or mice should be repaired promptly. Keeping the walls of all rooms painted in light colors brightens them and makes them seem cleaner. Once or twice a year it may be necessary to repaint or whitewash walls to freshen them.
Floors need to be swept, dusted, or scrubbed every day, depending on the kind of material they are made of. Earth floors should be hard and must be kept dry. Be sure there is enough drainage around the house so water cannot seep in to make the floors wet or damp. It is important to keep earth floors free from cracks. Occasionally they need to be releveled and then plastered.
Concrete floors are hard to clean. They may need to be scrubbed or have grease spots and stains washed up every day. At least they should be swept every day. Once a week they will need a thorough scrubbing with a hard brush and soap and water.
Wood floors should be swept or dusted with a dry mop daily. Anything that is spilled should be wiped up immediately. In sweeping, be careful that the wind does not scatter the dust or trash again. Sweep the dust and dirt into a pile, take it up in a dustpan, and dispose of it immediately. Do not sweep trash from the house into the yard. Plain wood floors may need scrubbing now and then with a stiff brush, warm water, and soap or powder. Scrub only a small area at a time and rinse to get off all the soap. Dry the floor thoroughly with dry cloths or mop. Do not let water soak into wood. It makes it splinter.
Linoleum on the floor should be washed with a mop or cloth using warm water with powder or soap, and then rinsed and allowed to dry. How often linoleum floors are washed will depend on the use they have. Linoleum in the kitchen, for example, will need washing more often than in the bedroom.
If a house has glass windows, these need to be kept clean and shiny by washing and polishing. Using � cup of vinegar to 1 gallon of water is a good way to wash windows. Dry and polish them with clean cloth or paper. If there are screens, they need to be brushed or dusted often.
Bedrooms, or wherever members of the family sleep, are often the most neglected rooms in the house. For healthful sleep it is important that sleeping rooms be cleaned every day and kept neat and tidy. Children should be taught to take care of their own sleeping space. It takes only a few minutes each day to look after the beds and sleeping areas of the house. Here is a good routine to follow every day:
� Make the bed. Smooth the covers into place Plump the pillow and put it into place. Last, put on the bedspread if you use one.
� Smooth the top of the bed so there are no wrinkles or lumps. See that the spread hangs evenly and that the bed looks neat and tidy.
� If mats are used, roll or fold them neatly.
� Sweep the floor if it needs it.
� If there are floor mats, shake them outdoors and replace them on clean floors.
� Tidy any tables, dressers, or chests in the room.
� See that all clothing and belongings are put in their proper place.
� If kerosene lamps are used, clean and refill them if they need it.
� Leave the room clean, tidy, and inviting.
Once a week give the bedroom extra attention.
� Change bedding. Bedding used next to the body should be washed every week.
� Inspect the mattress and bed frame to be sure there are no bugs or insects. If any are found, immediately use insecticides or whatever remedy is available to get rid of them. If there are any rips or tears in the mattress, mend them.
� Give floors extra cleaning. Move furniture and clean underneath it.
� Dust all furniture.
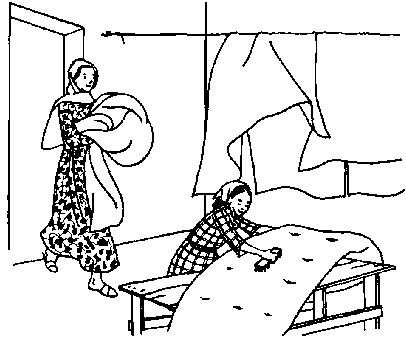
Now and then or every 3 or 4 weeks:
1. Put all bedding, including mattresses and sleeping pads, in the sun for several hours. This freshens them and makes them more sanitary.
2. Wash the bedspread if it needs it.
3. Wipe down the walls.
4. Wash the curtains and clean the windows.
These will include closets, cupboards, shelves, drawers, boxes, and other places where clothes and bedding are stored. Keep them neat and tidy at all times. Keep clothing either folded or hung carefully. Keep sheets, pillow cases, and unused other bedding clean, folded, and put away. All storage places for clothing and bedding must be kept clean and dry.
Every now and then, empty storage places and check for mold, moths, mice, and other vermin, etc. Clean closets and spray them with disinfectant. Air clothing and bedding before putting them back.
Tubs for bathing, wash basins, and shower stalls should be cleaned immediately after a person uses them. A thorough cleaning with scouring powder or fine sand is needed. Put wet towels out in the sun to dry.
Clean, dust, and tidy this room every day. Take out any mats or rugs and shake or dust them. Clean the floor with a dust mop or wet mop. Dust the furniture, hang up any clothing, put in fresh flowers. Tidy the room to make it look pleasing and inviting.
If meals are eaten in the living room, clear the table of all food and dishes as soon as the meal is over. Then wipe the table top with a clean, moist cloth.
Once a week give it extra cleaning. Clean spots from the walls, woodwork, and furniture. Give the floors extra attention. Move the furniture and clean underneath. Now and then wipe down the walls and wash the windows, curtains, slipcovers, etc.
Special attention needs to be given to the kitchen. Unsanitary conditions in the kitchen can lead to sickness and poor health.
After each meal:
1. Cover and put away any leftover food.
2. Wash the dishes, pots, and pans. When they are dry, put them away in closed cupboards or shelves.
3. Clean the stove, sink, and dishpans.
4. Sweep the floor, empty the garbage, and tidy the kitchen. Once week give the kitchen a thorough cleaning.
Wash and straighten the cupboards, shelves, tables, and stove. Scrub the floor and clean the garbage can.
Food tastes better and is safer when dishes are not greasy or do not have stale food sticking to them. Everybody enjoys food more from dishes that are clean and dry.

Not many people like to wash dishes, but they might not mind it if they used an orderly and labor -saving system. To wash dishes right:
1. Wash your hands first.
2. Get the dishes ready. Put away all usable food. Scrape food scraps and grease onto leaves or paper and put them in a garbage can. Stack the dishes on the dish-washing table.
3. Use two pans, one for washing and the other for rinsing, plenty of hot water (cold water does not get dishes clean), soap or powder, a pan or rack for draining, and a brush, dishmop, or clean cloth to wash with.
4. Wash with soap all the dishes from which you eat and drink and serve food. Wash them in water as hot as your hands can stand. Then put them in the rinse pan. Wash glasses and cups first, then knives, forks and spoons, then the dishes, and last of all the pots and pans. If sand is used to scrub pans, be careful not to scratch the metal or pottery.
5. Rinse the dishes by pouring boiling water over them. Use a wooden spoon, tongs, or a stick to lift the dishes out of the hot water. Drain them and let them dry in the air. Air drying, if the dishes are protected from flies and dirt, is better than drying them with a towel. If towels are used, be sure they are clean. Rinse the pots and pans and turn them upside down to dry.
6. Put the clean dishes, pots, and pans in a closed cupboard.
7. Wash and dry the dishpans, drain racks, and sink.
Doing the laundry for a family requires much energy and time. Not only is it a tiresome job, but where and how the washing is done greatly affects the health of the woman who does it as well as her whole family. Washing in rivers, streams, ponds, swamps, and ditches is unsafe because this kind of water may carry many kinds of disease germs. If safe water is available, use that. If not, it is a good idea to use boiled water. Hot water helps get clothes cleaner also.
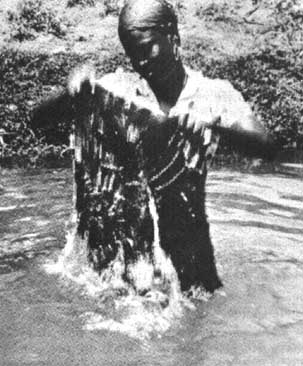
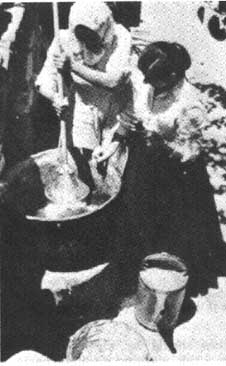
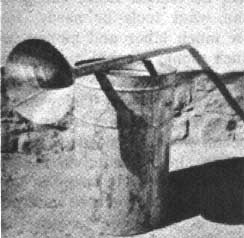

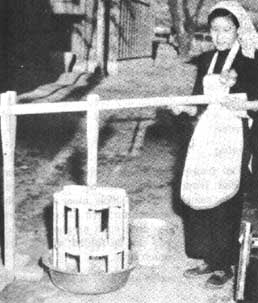
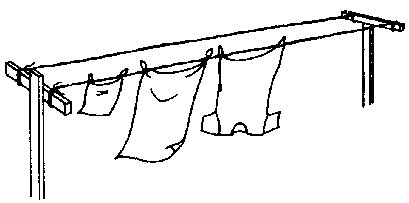
Clothes should be washed in a container such as a tub, washing machine, basin, or pail. A good method is to use two tubs on a firm bench, high enough so the woman can use a washboard or plunger without much stooping.
Most women use the kind of soap they find in the market. Some women save money by making their own soap. Get the dirt out by rubbing clothes on a washboard or with the hands or by using a plunger or washing machine, not by beating them on a rock or with a stick. Hot water removes dirt better than cold water.
Wash white clothes first, then colored clothes. Rinse the clothes until they are free of soap. Hang them up to dry. If you use a fence, wall, or clothesline to dry them on, be sure it is clean. A clothesline can be made of grass, rope, or wire.
The ironing board or table should be well padded. Ironing kills germs and makes storing clothes easier. Clothes look nicer when they are ironed. Some clothing such as cotton pants, slips, etc., and bedding such as sheets, pillowcases, and spreads can be folded without ironing. This saves much time.
These are an important part of having a clean house.
Give the yard and surroundings daily attention. Keep tin cans, trash, and rubbish picked up each day. Fill up or drain any pools of water that may have formed. Once a week give both the front and back yards and their surroundings a thorough cleaning. Cut the grass if it needs it. Scrub the inside walls, seat, and floor of the latrine with soap, water, and a disinfectant. Keeping the inside of the latrine painted or whitewashed is a good thing to do. Sprinkle lime in the latrine to stop odors and keep bugs away. If there is a back porch or steps to the house, scrub them.
Management in the home is as important as management on the farm. What do we mean by management ? For example, a farmer must not only do all the physical work of growing crops and livestock, but also think about what crops and livestock he should raise, the best time to plant, and what tools he needs. He must plan on how much labor and money he will need, how much money he will make, and how he can save.
So it is with running a house. The woman must think about what jobs she has to do, how and when to do them, what she needs to work with, how much time she needs to do housework, and how much time she can spend in the field or doing other work. She needs to think of how much money she can spend to run the home and whether she can economize on some things so she will have more money to spend on others.
For a village woman, management in the home means running a house, looking after a family, guiding and directing home and family affairs, and using what she has to get as much as possible of what she and her family want.
The things that people have to help them get what they want are called "resources". We all have resources that might be better managed. They are:
Time-Everyone has the same amount of time in a day, but each of us uses our time differently. Some people take twice as long to do a job as it would take another person to do exactly the same thing. How we manage our time affects the amount of work we can accomplish.
Energy-All of us are born with different amounts of physical energy. Our health, the way we feel, and our attitude toward work all affect the amount of energy we have and what we can accomplish.
Skill or know-how-Almost everyone has some skills. We all know how to do something. Some people have many more skills than others. Skills can be learned. They can be developed.
Knowledge-This is the information or understanding we have. We can improve our knowledge by study, by learning from others, and by experience.
Ability-This means how good we are at doing things. Nearly everyone has some ability. The ability to think through problems and make intelligent decisions is very important in good management. Ability can be developed through practice and experience.
Attitude-This is the way we look at things. Our attitudes are often determined by the knowledge we have and by our own personal feelings.
Material goods-These include the things we own such as land, our house, furniture, clothes, etc.
Money-This is the amount of money we have and do not owe to someone else.
Community facilities-Nearly every village or community has facilities that all of the people can use. These include health, agricultural and home economics services, schools, parks, and playgrounds. Some may have a community building or center.
Families can live better without more money if they use all of the resources they now have in better ways. How can they do this ?
Any homemaker, after thinking through all the jobs she has to do every day, can judge about how long it takes for each. If she plans to do a few of her weekly jobs each day, she can avoid having too much housework in one day. Then she will know how to plan for other work such as gardening or work in the fields. Here is an example of the way she might plan her weekly jobs. Each family will need to make its own plan.
1st day-Collect and sort clothes, bedding, and other things that need washing. Do any mending needed.
2nd day-Wash the clothes, and hang them to dry.
3rd day-Iron the clothes, fold them and put them away.
4th day-Give the bedrooms an extra cleaning.
5th day-Give the kitchen, including the cupboards, a thorough cleaning.
6th day-Give the living room and yard an extra cleaning.
Some women find pleasure in housework. Others find drudgery. Often drudgery comes from wasted time and energy. A homemaker must make every motion count. She must think about her work and plan how she can save time and energy. Time and energy can be used to save money and often spending a little money can save both time and energy.
Fit jobs together so each will take a minimum of time and labor. For example, when a woman is taking peelings to the pigs or to the compost heap, she can stop by the garden on the way back and gather vegetables. To keep the house clean and attractive, give the children the care they need, and have time for work outside the home requires careful planning and organization.
The first step in making housework easier is to arrange things in the houe to save steps and work.
� Keep all equipment and materials as near as possible to the places where they will be used. For example, keep fuel near the stove, water and food supplies near where food is being prepared, and cooking pots and pans near the working area where they can easily be reached without extra steps or stooping.
� Arrange cupboards so that it is easy to find things in them. Keep dishes and supplies within easy reach.
� Arrange tables, work counters, the stove, the sink, and the shelf or stand where water is kept, close to each other so that a meal can be prepared with as few steps as possible.
� Arrange and keep laundry equipment, tubs, washboards, etc., as near as possible to the place where the washing will be done.
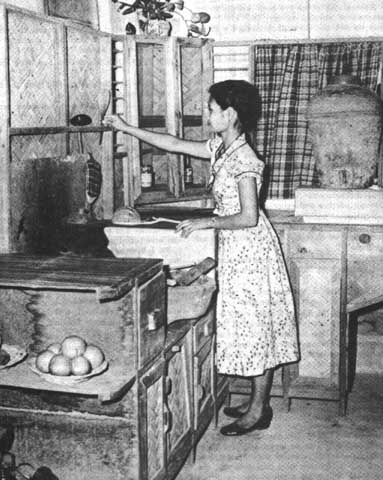
A woman should sit to work when she can-sitting takes less energy than standing. Equipment and materials should be close by so she does not have to jump up. Such jobs as preparing vegetables, cleaning fish, ironing, etc., can easily be done sitting down. A comfortable chair and a board on the lap makes it easier to work while sitting down.
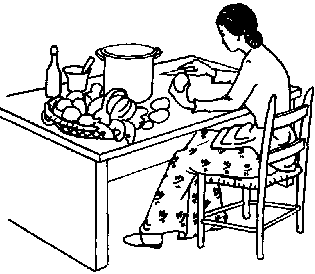
It is more convenient to stand when cooking, washing dishes, cleaning, etc. When you stand straight, you don't get too tired. Standing on a cement or hard floor puts a strain on the feet and may cause back pain. Standing on a small mat or rug will lessen fatigue.
Some women squat or sit on the ground to work. Because they are used to such a position, it may not be uncomfortable or tiring. However, standing and bending to the ground to work is hard on the back and very tiring. When lifting something from the ground or a low surface, squat, don't bend over to get the object. When you do this, as you stand up, your legs help do the lifting instead of making your back and arm muscles do it all.
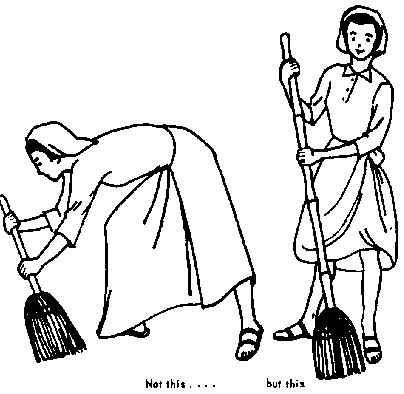
How high work surfaces need to be depends on the height of the woman who uses them. Kitchen tables, shelves, counter tops, the sink, and cook stove should. be made so that the homemaker does not have to bend or raise her arms too high while she works. A good work surface height for a woman 5 feet 5 inches tall would be about 34 inches. A woman this tall could also reach a shelf about 72 inches high without standing on her toes or stretching. Reaching for things on shelves that are too high adds to the strain of housework.
Work surfaces that are too high or too low bring on fatigue and require more energy than those of correct height. All stoves and cabinets should be built with toe space underneath so the woman can stand close enough to them to be comfortable while she is working.
Homemakers should do as little stooping as possible; it makes them tired. Stooping to get something from a bottom shelf takes 11 times as much energy as to get it from a shelf without stooping.
Teach women to plan their work to allow short rest periods in the morning and afternoon. They should plan their day so they do not do all the heavy jobs one after the other. Do a heavy job, then a light job.
There are other good work habits you should teach. For example, teach people to work where the light is good; working in dark rooms is tiring and hard to do.
Women should let their families help with all the housework. Let them help to plan and give them a choice of the jobs they do. Children, both boys and girls, should be taught how to work in the house. They should learn to keep their own belongings in order, hang up their clothes, put away playthings and books, make their own beds, and carry their own dishes to the dishwashing table after meals.
Good home management provides for the development for each family member. Every child deserves a chance to develop into the finest person possible. Wise home management can help to insure that chance. When children are taught how to do household jobs the right way, it makes them feel they are contributing and gives them pride in sharing and doing their work well.
Most village families feel that they have so little money there is no point in talking about how to use it. They think they buy only what is absolutely necessary and there is no money left over to buy things they would like to have. There is truth in this. Village families generally do have very little money. But no matter how little they have, you can help them use it better.
Here are some ways families can save and make better use of the money they have:
� Growing more food for home use, instead of buying it, helps them to have money for other things.
� Taking care of what they have saves money. For example, much food is destroyed by rats, mice, other vermin, insects, etc., because of poor storage. Food is often wasted in the garden or field be cause it is not taken care of. Poor laundry methods, such as beating clothes on a rock, cause clothes to wear out. There are many other wasteful practices around the average home that the family does not even recognize.
� Learning to sew and making their own clothes saves money.
� Better buying practices. Women often buy the cheapest goods on the market. This may be false economy. For example, a cheap, sleazy piece of dress material may fade and wear out in a short time. It will not be worth what it cost. Planning ahead to save a little extra money so they could buy a better quality that would last longer would be a better use of their money. Peddlers often go from door to door selling cheap goods. Women are often attracted by a gaudy color or the salesmanship of the peddler and buy something they do not need. Help them figure out how much they spend a week for food, fuel, soap, and other supplies and how they can buy more economically.
� Talking over money matters with the whole family. When members of a family talk about what they need, what they want, and how much money they have to spend, then decide together what they will buy, they make better use of the money. Every member of the family is happier because he feels he has had a share in deciding how the money will be used. Often, the homemaker wants something for the house, the farmer wants a new tool on the farm, and each child wants something. When a family plans together how to use their money, they develop responsibility and understanding of money matters on the part of each family member. This promotes unselfishness-thinking about other people's needs and wants.
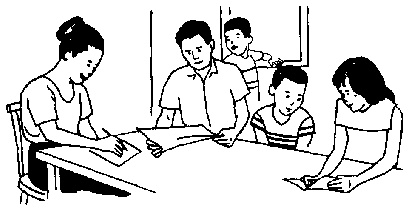
Homemakers in every country have ideas on economy. You could collect these ideas, pass them on to other homemakers, and help them to be economy-minded in little things as well as larger ones. For example, you might suggest saving boxes for storage, or making tin cans into something useful such as graters, measuring cups, etc. Remember, preventing waste is one of the best economy practices to emphasize with homemakers.
There are other money matters to consider. As economic and industrial changes come to your country, household activities will be affected. If, for example, wood is now used as fuel, it may become scarce. Oil may be more economical than wood. With the increased need for farmers to grow more food, cow dung may become more important as fertilizer than fuel. This can affect the cost of fuel for the family cooking. Roads and public buses may make it possible for family members to ride to work instead of walking. Bus fare takes money. Can you help families meet these changes through better management?
The government touches the economic interest of the family by laws it makes, such as tax laws regarding deeds, mortgages, and notes. There are inheritance laws and laws about wills. You should learn abut these so that you can help families understand them. They all affect the family and their business matters.
Remember as you work with families that good home management means that house and family activities are managed so that family members can grow, work, and develop as individuals with a sense of responsibility toward their family and community.
From the beginning of time, women have been conscious of how they look. Personal beauty is very important, especially to women and girls. The poorest woman or the ugliest little girl in the village wants to look nice and she knows how much pretty clothes can contribute to her appearance.
This is one reason you may find, as you start home economics work in a new village, that the only thing the women seem interested in learning is how to sew, knit, crochet, or embroider. This is directly related to their desire to look their best or have some touch of beauty in their home. It is a normal human desire.
We must never overlook the effect of clothes on personality and attitudes of people. When a person feels that he is well dressed and looks nice, he has more confidence in himself, is more "outgoing", and participates better. People who feel they are not well dressed and do not look nice tend to shy away from others. They appear timid and uninterested.
Women are conscious of style, kind of fabric, and color in their clothes, and they want "dress up" clothes for social occasions. Young girls want to learn to sew so they can have more clothes.
Creating a blouse or knitting a sweater for a child may provide the self expression women want. You may find a woman who already knows how to do fancy work, but does not know the first thing about making a baby dress or a shirt for her little boy or her husband.
Also, many women want to learn to sew for practical reasons, such as to save money. In most villages, incomes are low and hiring a tailor costs money. Women who learn to make clothes for their families have more money to spend for other family needs. Some women want to learn to sew for others and increase the family income.
Even though you may see other problems that seem more pressing or of greater importance, you may be justified in starting a home economics program by teaching women and girls to sew, or even to knit. This follows the basic extension principle of beginning where people are with what they feel they need. If, however, you never do more than teach them to sew, you fail to fully use your opportunity. Through their interest in sewing, you can teach much more than how to cut a garment and make seams. Sewing offers many opportunities to get women interested in other basic problems that they may not have recognized. You can go from sewing to teaching other badly needed topics.
Most countries have well-established habits of dress. These have come about over many years or even over centuries and are closely associated with tradition and well-fixed social values. Such values are not to be treated lightly. There may be good reasons for people's choice of clothing. For example, vivid colors such as bright red, green, or yellow may not be your idea of the most suitable color for field work in the hot sun. But, bright colors may satisfy an inner need of the person who wears them, and may be a relief from the drabness all around. Bright colors may give a lift to the wearer.
You should understand customs and traditions about the way people dress and respect them as you work with families on their clothing problems. This does not mean you should not try to bring about desirable changes in clothing. Often work clothes are not comfortable. You may help show both men and women that they can work better in different kinds of clothes. With many families the problem is simply having enough clothes to keep them comfortable in cold, heat, wind, or rain, or when they work.
Before you start a clothing program, there are a number of things you need to know and understand. Some of these are:
1. What kind of clothing each member of the family wears for work and for special occasions. Observe clothing wherever you see people: at home, in the field, in the market, at the festival, etc. It will help if you record your observations.
2. Who buys clothes for the family. The father? The mother? Both? Are clothes bought in the village market or in town? Does a salesman go from door to door selling ready -made garments or yard goods ?
3. How garments are made. How many women make clothes for their families? How many buy most of the clothes already made ? How many hire someone else, such as the tailor in the market, to make the family's clothes ?
4. How clothing is laundered. Is it washed by hand or on a board or is it beaten with a paddle or on rocks? Are clothes dried on a clothesline or on the grass ?
5. How clothing is cared for in the home. Do people hang garments on a nail or peg, or do they use clothes hangers? Do they keep clothes in a closet or covered with a curtain ? Do they store out-of-season clothes in a box or trunk ?
6. How much clothing needs repair. Do children's clothes have tears or holes in them? Are fasteners or buttons torn off? Do men's work clothes need patches, or are the collars turned on shirts ?
7. What fabrics, thread, buttons, needles, etc., are sold in the local market?
8. What sewing equipment the women have. Do they have needles, pins, shears, or scissors ? Do they have sewing machines? If so, how are they operated-by hand or by foot?
9. If patterns of any kind are available in the market or nearby town.
Do you, yourself, know the simple, basic skills you will need to teach women sewing? For example, do you know the basic stitches needed in sewing by hand-how to baste, make a running stitch, back stitch ? Do you know how to make different kinds of seams? Can you cut and put on a facing? Do you know how to measure to make a pattern or fit a garment? Can you put on a patch and darn a hole so that it looks neat? Do you know how to thread a sewing machine? Adjust the tension? Fill the bobbin ? Oil the machine ? Can you tell the lengthwise threads of a piece of material from the crosswise? You must be sure of your own skills before you start to teach sewing. If you are not sure, ask your supervisor for help and then practice until you know them well.
1. Lack of sewing equipment is probably the greatest problem. Women may not be able to buy sewing machines. They are expensive, especially those that are electric or operated by a foot pedal. In some areas, sewing machines are small and have a wheel with a crank that is turned by hand. Villagers sometimes join together and buy a sewing machine cooperatively. Then they work out a plan so that homemakers can take turns using it. When no sewing machines are available, you will need to plan a program based on hand sewing. Individual families often do not have needles, shears, or other small equipment. These, too, can be purchased cooperatively.
2. Lack of patterns. In many areas there are no readymade patterns of any kind available. Basic patterns can be made at home by taking body measurements and using these to draw a pattern. Some village workers teach women to rip apart an old garment, such as a blouse, shirt, or pants, and cut a pattern from it. Once you have a basic pattern, it can be pinned together on the person and made smaller or larger to fit the individual figure. However, often the lack of paper for homemade patterns is also a problem.
3. Village tailors sometimes are afraid that teaching village women to sew will threaten their business. They consider making clothes a man's job. They charge considerable amounts for their sewing and make their living in this way. However, their trade is usually not hurt when village women learn to sew.
An important part of learning to make a new garment is learning how to buy the material wisely. Local markets may be the only place the village family has to buy cloth to make clothes. You may find a great variety of fabrics in them. You may find, for example, that for the same price there may be some firmly woven pieces that will wear well and others that are loosely woven. You may find materials made not only of familiar fibers such as cotton, but also some of the manmade fibers like rayon, etc. The village woman may not know how to wash and iron these materials.
You may want to buy small pieces of material as samples so you can teach the women what to look for to get the most value for their money. First show how, for the same amount of money, a woman can buy a good quality fabric that will wear well and be attractive or one of poor quality that will fade or shrink. Show how some pull out of shape or wear out quickly and how to look for closely woven materials that are strong and will wear well. You can show them how to look for printed designs that are placed straight on the threads of the cloth. Teach them the difference between cottons and other fibers. Wash some of the samples to show those that fade and those that do not.
In other words, you can teach the village women to be better consumers through a sewing project.
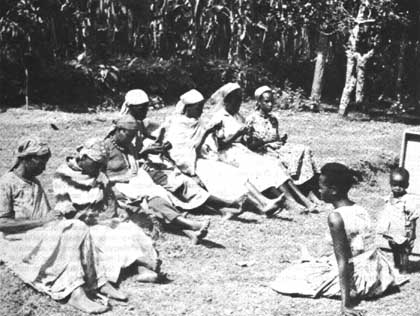
In many places, it will be wise to start sewing lessons by teaching the women to sew by hand. This will not eliminate those who do not have machines they can use. Any garment involves some hand sewing. By patching a garment, they can learn to baste and make small hemming stitches they will use often if they continue to sew. Beginning this way will give the women a chance to develop simple skills they will need later. Holding a small needle and guiding it through cloth may be hard for the women to learn if they have not done it before.
In a West African country where evenings get cool enough for babies to need wraps, the home economist began by teaching the women to make a baby's jacket. The women were able to buy the 3/4 yard of cotton flannel needed for this garment, needle, and thread. By making this garment, the women learned to baste and make running stitches, hemming stitches, and french seams. All work was done by hand.
A pattern for such a jacket is given below. It is simple to make. To use the diagram, enlarge the squares to 2 inches across and transfer the markings to your full-size pattern.
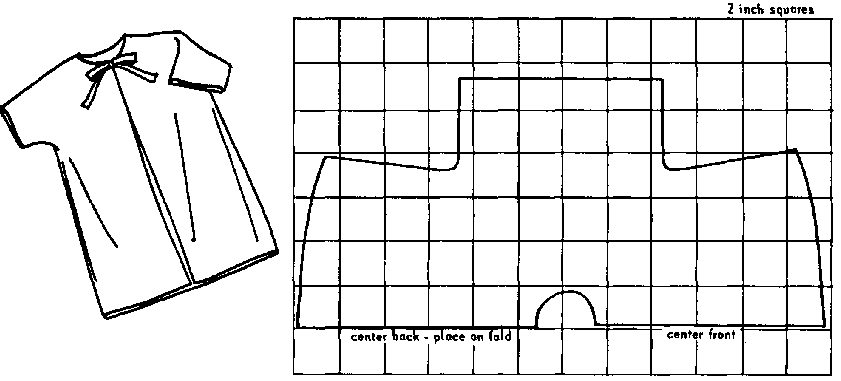
Place the pattern on a lengthwise fold of the material with the center back on the fold. The pattern allows for a 5/8-inch seam. Baste the underarm seam and try the garment on the baby. Adjust it as is needed. Sew the underarm seam with small running stitches. Make a french seam.
Baste the edges of the sleeves, bottom of the jacket, the center front opening, and around the neck. Then hem them with small stitches. Use a small hem. If embroidery thread is available, the edges can be blanket stitched over the hems for trimming.
Make ties of the same material and attach them to the front opening at the neck.
In another village the women began their sewing by making a blouse. They used a straight piece of cloth, folded it in the middle, cut a hole in the neck, and sewed up the sides, allowing for the armholes. The neck and armholes had to be faced and the bottom of the blouse hemmed. This simple blouse was quickly made and the women were pleased with their success.
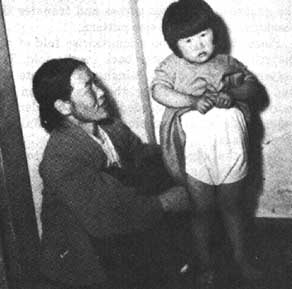
In Korea, a pattern has been developed for making a pair of panties for a little girl from 1/3 yard of 36-inch material. Here is how it's done:
Select a cotton material that is soft and can be washed easily.
1. Mark the material into three equal parts and cut it as indicated below:
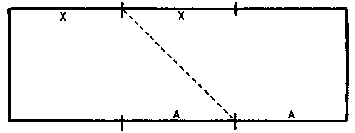
2. Stitch the two "A" parts together.
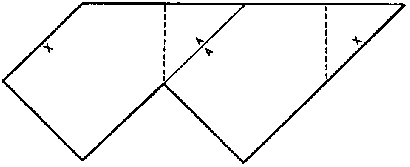
3. Fold as marked by dotted lines on the diagram.
4. Stitch the "X" seams together.
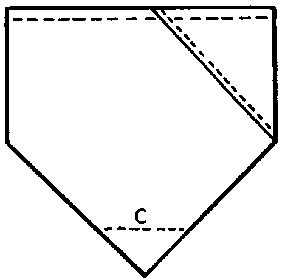
5. Stitch seam "C".
6. Spread the seam open. Fold the points back on the garment as shown below. Stitch near the edge to reinforce the crotch.
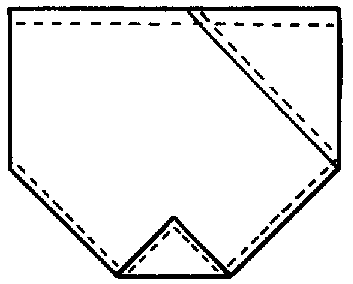
7. Hem the legs and top.
8. Insert elastic or a drawstring in the waistband.
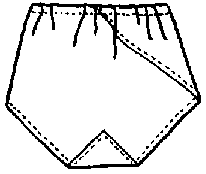
The easy pattern given here will make a simple, yet comfortable dress for a 4- or 5-year-old girl in a warm climate.
To use the diagram, enlarge the squares to 3 inches across and transfer the markings to your full-size pattern. The pattern allows for seams on center front, center back, sides, shoulders, and for the hem.
After cutting the front and back of the dress, lay the top of both pattern pieces on the cloth again to make facings for the top of the dress. Make the facing come 1 inch below the armhole. Place the pattern on the lengthwise thread of the material as you did in cutting the dress.
To Make Dress:
1. Sew the side seams.
2. Sew the back seam to within 5 inches of the neckline.
3. Sew the side seams of facings.
4. Lay the right side of the facings on the right side of the dress with armholes and neck matching.
5. Sew around the armholes, neck, and along the edges of the opening in the back of the dress.
6. Trim this seam and clip it to make the facings lie flat.
7. Turn the facings to the wrong side.
8. Sew the shoulder seams of the dress.
9. Sew the shoulder seams of the facings.
10. Make ties for fastening the dress.
11. Attach the ties to both sides of the back neck opening.
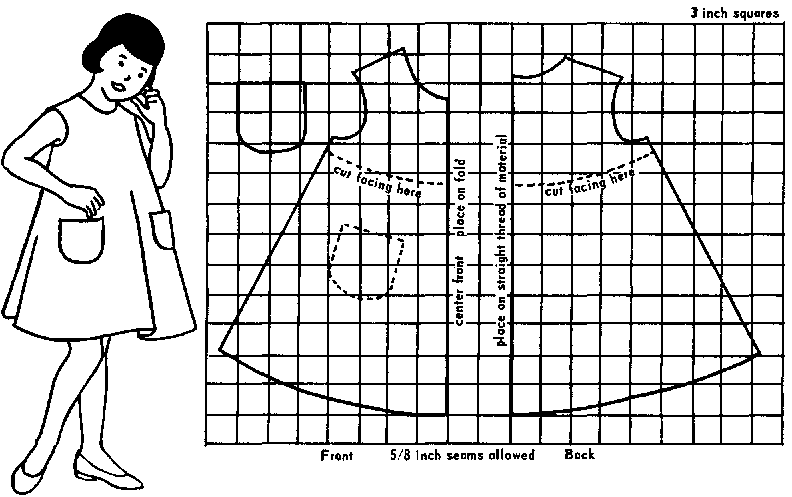
You can easily adapt this pattern. By straightening the side and cutting it off at the waist, you can add a gathered skirt. If this is done, extend the back opening to below the waist and substitute button holes or other fasteners for the ties on the original pattern.
In Burma, the women asked a home economist to help them make pants that would fit their small sons. She quickly found their chief problem. They were cutting the front and back the same length' allowing the boy no room to sit down.
A Nepalese home economist developed a pattern for boys' pants that is easy to follow. See How To Make Boys' Pants, an AID publication, for directions.
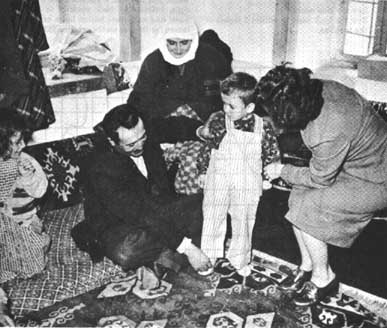
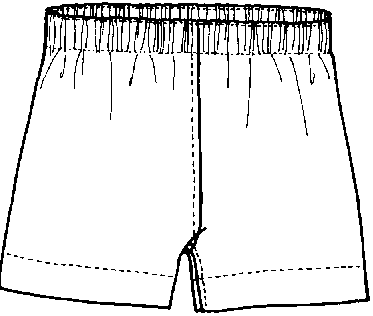
In many countries, patterns for women's underwear suited to their traditional outer garments have been developed. For instance, India has a long slip comfortable to wear under a sari.
Instructions for making a brassiere are often requested. A simple brassiere pattern designed in Turkey is given below.
Turkish village workers leave their basic training center with this pattern and many others in three different sizes. The middle size of each is made up into a garment. The women can try on the sample garment. If it fits, they use the middle size pattern. If it is too small, they use the larger. If it is too large, they turn to the smaller. With the aid of their village worker, they can make any additional adjustments needed.
How to make a brassiere
Enlarge the pattern as directed. Place the brassiere pattern on the material with the line marked "lengthwise thread of material" carefully on the straight lengthwise threads. This will make the center back seam on the bias. If the garment is to fit, this is important. See the illustration below:
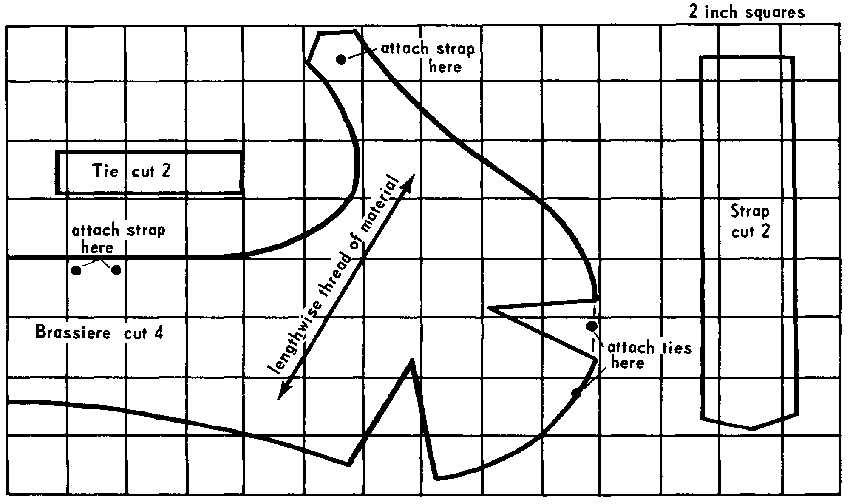
The pattern allows for seams of � inch. The brassiere is made double so all seams are on the inside.
Cut out the main part of the brassiere four times. This will give a left and a right side for the outside and the same for the lining. Cut out the other two pieces twice. This brassiere ties in the front with two ties.
Sew the center back seam. Press it open.
Sew the dart seams. Press them open.
Repeat these steps for the lining.
Fold the strap lengthwise through the center with the right sides together. Sew � inch from the edge. Turn the strap right side out. Baste along the edges to make the straps flat. Pin one end of each strap to the outside of the brassiere at the place marked on the pattern. Baste.
Put the lining over the outside of the brassiere with the seams on the outside. Match the seams. Baste all the way around the outside. Sew � inch from the edge all the way around except for about 5 inches on the bottom. Remove the basting and turn the brassiere right side out through the 5-inch open space. Press and baste around the edge. Make two ties and attach them to the front opening. Try it on and adjust the straps to the proper length.
Aprons are easy to make and help to keep a dress clean. It is easier to wash an apron than a dress. An apron will also help hold a free-flowing garment in place so that it is safer working over an open fire.
A home economist in India developed the sari apron which follows the graceful folds of the sari. Aprons could also be designed to blend with the type of dress worn in other countries.
In Korea, the basket apron is well liked by rural women. It serves to protect the dress from soil when worn open. When the drawstring around the edge is drawn up, it makes a basket to carry fruit or vegetables.
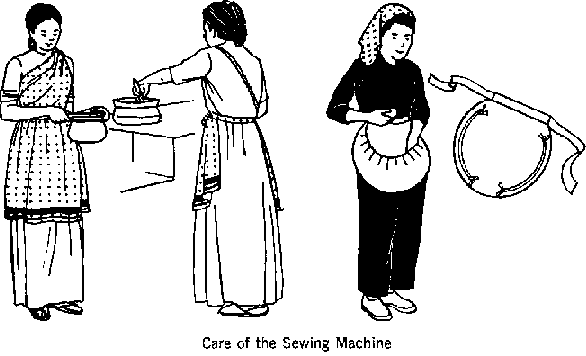
The design of sewing machines and their parts varies greatly between brands.
To get the best result from a sewing machine, it must be given proper care. This consists mainly of cleaning and oiling it, and keeping it covered when it is not being used. How often it needs oiling depends on how much it is used.
Before cleaning the machine, remove the needle to avoid the danger of sewing into your finger while you are cleaning it. Then remove the thread, the bobbin, the case (if this is removable), the thread plate, and the face plate.
For ordinary cleaning, carefully wiping the parts is enough. Put a drop of oil in every hole, wipe off the excess oil, and stitch on a piece of flannel or other absorbent material to soak up extra oil. Only after this should you sew on the machine. Otherwise your new cloth will be spoiled with oil.
Before starting to sew, make a trial stitch on a double thickness of the material. Judge the sample on the following points:
1. Is the stitch the right length for the material used ? Coarse material requires a long stitch, and finer material, a short stitch.
2. Is the thread the right type for the material? For fine material, use fine thread. On coarser material, it is better to use coarse thread.
3. Is the needle the correct size? Fine material requires thin needles. If you use a thick needle for stitching fine material, it will leave large holes. These will spoil the appearance of the garment.
4. Do the stitches look the same on the right and the wrong side of the cloth? If your machine is stitching correctly, the upper side and the lower side of the stitching will both look alike. The upper and lower threads will pull evenly when you draw them away from you under the presser foot of the machine. If loops of thread form on the underside of the stitching, either your machine is not threaded correctly or the upper tension is too loose. Adjust the machine until your test swatch looks right. Then start sewing on the garment.
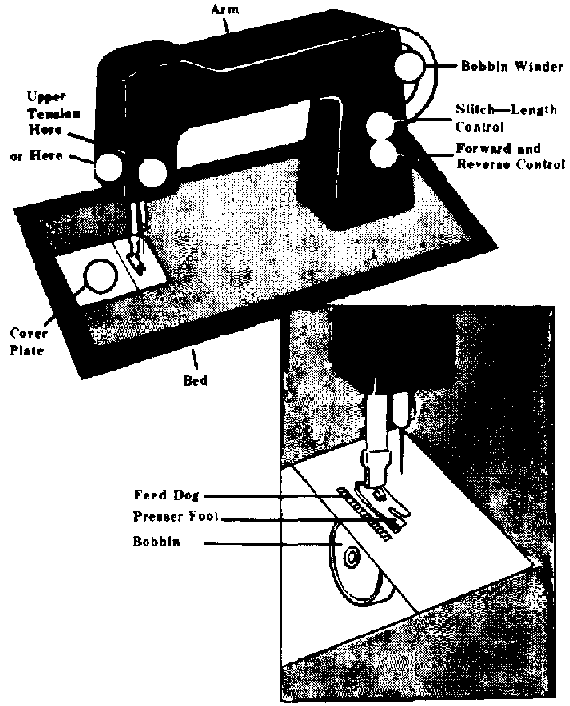
While women are sewing, you have many chances to teach related topics such as personal cleanliness, sanitation, and care of clothing.
� Sanitation is a natural companion for a sewing project. Everyone needs clean hands when they sew if they are to end up with a clean garment. The habit of washing hands before sewing can easily be expanded to include washing hands before handling food, eating, and handling the baby.
A village worker in Nigeria always starts a sewing class by having everyone wash her hands. The women in the compounds where she works got so used to this that they always set a calabash and a jug of water out when she came. She also helped them to see that a clean place was needed to work. Soon they learned to clean up the compound to be ready for a sewing lesson.
� Personal cleanliness. If you are teaching the women to make dresses for their babies, bathe the baby before the dress is tried on because "a clean new dress goes on a clean baby." The same idea can be carried over with adults. A new dress makes any of us want to look our best. This means we want clean, neatly combed hair and a clean body. There will be many places to teach personal care and cleanliness in connection with sewing.
� How to wash, iron, and press garments to keep them looking new and fresh fits into sewing classes. Demonstrations and discussions on how to launder clothing and improve laundry practices can easily be worked in with sewing. Many women do not know that frequent washing, properly done, makes clothes last longer because it removes perspiration and different kinds of stains that injure the material.
Many women do not have an ironing board and some may not even have a table they can use. You can show how a plain plank can be padded and covered for pressing and ironing. Many women do not realize how frequent pressing improves the looks of a garment.
� Mending and repair of clothing may be a starting place for a clothing program because it is thrifty and requires no cash outlay. In many villages, it is easy to find children with torn or worn garments. To the great surprise of one village worker, the first thing the women asked her was how to mend. She taught them how to sew a patch on a child's dress so it was not noticeable. She also showed them how to add gay and interesting patches on the outside of garments as a sort of decoration, and how to darn worn places.
� Where and how clothes are kept when they are not being worn has much to do with how they look and how long they last. Often garments are just hung on a nail or peg in the wall. This can cause holes or a bulge where the nail or peg touches the garment. Women and girls can learn to make clothes hangers of bamboo, tree branches, or other available material. Use a hook of wire or a cord made of twisted grass to hang them by. Painting hangers in gay colors adds to their attractiveness. Making clothes hangers is a good project for a girl's club.
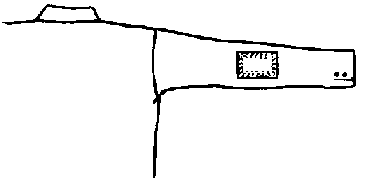
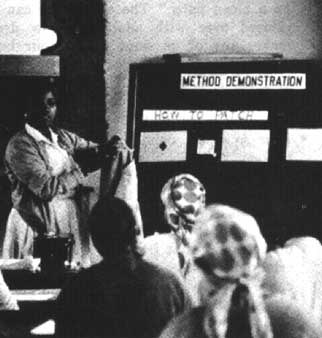
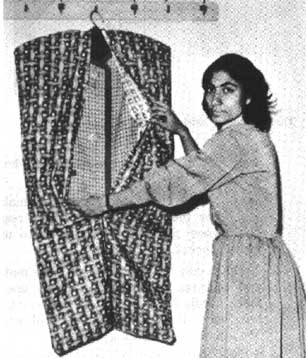
Clothes closets protect clothes from dust and dirt and are easy to make out of wood crates or boxes covered with a curtain of inexpensive material.
� Mildew injures clothes and makes a stain that is hard to get out. It is caused by molds that grow in damp, warm, and poorly aired places. Teach women the importance of airing clothes in the sun and storing them so air can circulate well around garments and shoes. Demonstrate how to remove mildew stains by mixing lemon juice and salt, spreading it over the stains, and then putting the garment in the sun to bleach.
� Moths and other insects are very destructive to clothing, especially woolen clothes. They eat holes and cause clothes to wear out much sooner. Before woolens are stored, they should be washed, sunned, and sprayed with a good insecticide.
While women are sewing by hand, talk about some of the above problems. Some village workers who find women prefer sewing to any other subject have the first hour of a meeting or class on some other needed subject that the women are not particularly enthusiastic about, such as nutrition, gardening, or housecleaning. Then they let them sew the second hour.
One village worker planned a short demonstration on food preparation or nutrition about midway through the sewing class. She specialized in showing how to improve the babies' food. Soon the women were talking about wanting more help with feeding their babies. Other village workers have tried having a week of sewing and the next week lessons on another subject. In Vietnam, the village worker began to take small squares of cotton, thread, and needles with her to pass out to the women. While the women practiced new stitches she had taught them, she talked with them about care of their babies.
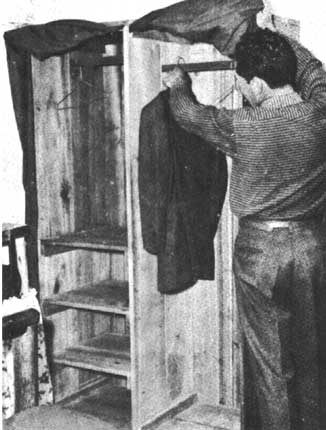
You have learned to know the people of the village and how they live. You have already helped some of them with simple problems. You have given some demonstrations and talked over village problems with the people. Now you begin to think what your program will be. Planning ahead to know what to do, when to do it, and how it should be done is essential in any kind of work.
You may ask, "Why do I need a planned program ?"
A planned program is the picture or "map" of your work. If you start walking down a road, you need to know where you are going and how you will get there. There may be other roads branching off. You need to know which one to follow. A planned program is your guide to help you and the people you work with get where you want to go.
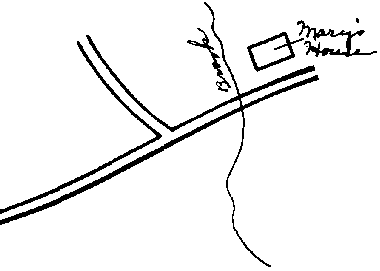
The first requirement in bringing about change is for two or more people to agree there is a problem and that something should be done about it. If these people live in the village, they are "insiders". Sometimes the people who agree there is a problem are from the state or national government or from a health agency. Then they are considered "outsiders".
Three kinds of people help to solve every problem. Starters are the people (insiders or outsiders) who first see a problem and feel that something should be done about it. They are willing to start something. Approvers are the known leaders, those whose approval is essential to successful action. When these people say an idea is good and that something should be done, the people of the village tend to accept their opinion. There may be one or several approvers. They may be outsiders such as public officials, or even more important, insiders such as village chiefs. Spreaders are the people who take the idea to all the people of the village. They sell the idea and help people see the problem and what they can do about it. These are village people (insiders).
Spreaders may use several methods to get many people to know about the problem. They pass on information. They get the people to talk about problems and the ways to solve them. If there has been an emergency, they remind the villagers that they can keep it from happening again. They help arrange for demonstrations that show what to do about the problem. They may help plan a tour to a village that has solved a similar problem. If people complain and argue about new ideas, the spreaders help them to understand and want to help.
People can do all of this talking and planning and still not solve the problem. This can happen even if everyone agrees that something should be done. The people must decide that they will do something about the problem. It is a promise that they make to themselves.
The people must participate in each step. They need to decide just what they want to accomplish, what their targets are. What, exactly, do they want to have when they finish the project (a good, deep well, for example) ? What should this include (a suitable location, the right kind of drilling or digging, a tight safe top, a way to get water to the surface, etc.) ? How will it change the lives of the people, (safe, clean water, easier to get to the surface, enough water to last all year, etc.) ?
When the people have agreed on their goals, they must decide how they are going to reach them. Sometimes it is harder for people to agree on how to do something than to decide to do it. Sometimes each person thinks his way is better. The leaders may need help in deciding what will happen if they do it one way and what will happen if they do it another way. Which will be better for the people? Does one cost more than the other? They must decide which is the better way for their village at this time.
Next the village leaders must make a plan. This plan will have many parts. They will need a time schedule. What should be done first, and what comes next ? How much time do they need for each job so that each will be done at the right time?
The planning group must know what the situation is now, and what, if anything, has happened in the village in the past. Did the people try to do this in the past and fail? Are they against the idea now? Are they afraid to try again? Is the need greater now than it was before ?
The planners must find out what is needed to do the job, who can do it, how much it will cost, and many other things. They must find the time, the people, the money, the equipment, and anything else that is needed. The village people must always know what ii happening and be asked to help in every way they can. They need to understand, agree, and want to help.
Village people often look to and need someone to be responsible for and lead a project. They may form an organization. They might turn to the local government. These people will need your advice and help on their project.
Finally, the people must start the work. For some jobs workers will need special skills and equipment. Other jobs can be done by village people. There will be many things to do. People will be needed to help plan and make arrangements, and sometimes to explain. People, work animals, and equipment will be needed to do the work, and money will be needed to pay for it. Everybody must feel that he has a chance to help. Help group leaders find the best place for each person to work on the task he knows the most about. Keep working until the job is done and the problem is solved.
Planning never ends. Each time a project or part of the program is completed, look back over what has been done just to be sure that things are going as they should. This is called evaluation. How well did we do? Did the plans work? Why did we succeed or Why did we fail? What should we be doing now? What do we do next? If we made mistakes, can we keep from making them again ?
If you wait until the job is done to ask these questions, it may be too late to change. At the end, ask yourself all of these questions again. Did you really get the job done? The last question is: "What do we do next to make our village better?" Each time a plan succeeds, you are ready to move on to something else.
The same program will not fit all the people in the village. Village people are not all alike. They differ in age, schooling, the way they earn a living, the amount of money they have, whether they own or rent their land, their religion, the size of their family, the groups to which they belong, the people they choose as neighbors and friends, and maybe even in their nationality.
All people have goals, hopes, standards, and values. People want to be happy. They want good health. They want to feel that they are successful. They like to be recognized and appreciated. They want to rear their children to be successful at getting along with people and in earning a living.
Yet people differ in their kinds of goals and standards. The young do not have the same goals or ideas as older people. Those who live in small villages have different ideas from those who live in large villages or near cities.
Include different kinds of projects in the village program. Not all people in the village will want or need the same kind of help. Some people may want a village school. Others may think a well is the most important need. Still others may want a health center more than anything else. Many women will want to know how to feed a growing, hungry family to keep them healthy. Young mothers will want information on caring for babies.
People visit with and help one another. They go to the same meetings, exhibitions, festivals, market days, and other community events. They meet along the road. They generally do what their friends do. You should not ask them to do something that will bring disapproval or ridicule from their friends and neighbors.
People want to belong to their own natural community made up of people who associate together and share the same customs and traditions. It is where they feel they belong. A natural group or community may have a lot of influence.
A village may have several natural communities. The people in one end of the village may not associate with the people in the other end or even know them very well. Young people are not always at ease with older folks nor are they attracted to the same kind of programs. The 15- to 16-year-olds do not mix well with the 10- to 11-year-olds.
Learn these natural communities. You will find it easier and better to work with the people in them as a group. They will be likely to need and want the same things.
Help the leaders of different groups to plan, work for, and get what they need. And help them get the most out of what they already have. Sometimes it may take a long time, but you can help them see how to work on one step at a time.
Encourage various groups in the village to work together on their common problems such as better schools, improved roads, more health services, a sanitary water supply, and better houses.
For example, as you have been getting acquainted in village X, you have seen much evidence of poor health. The people have talked about:
� How tired they are all the time
� The number of people who are sick
� Babies that die soon after they are weaned.
You have observed or learned from the people that:
� Fifteen young children in the village died last year.
� Many children are thin and small and many have big bellies.
� The people live mostly on rice.
� Few families have chickens, pigs, rabbits, or goats for food.
� There is a year-round growing season, but few families grow vegetables.
� The only milk they have is what they buy.
� There is some fruit in the market, but it is expensive.
You have talked with leaders in the village about the problem of illness, fatigue, and deaths of young children. They show interest in doing something about it. You ask a group of the leaders and a few parents to meet to discuss the problem and ways to solve it.
In your meetings, you lead the people to discuss why this problem exists.
What do these things mean? Young children are not getting enough of the right kinds of food after they are weaned. Some people do not know that they need different kinds of foods. In some families, the women know how to cook just a few things. Many do not know how to prepare food for young children. Most families don't know how to raise vegetables.
You and these leaders decide that there are not enough of the foods needed for good health, and the villagers do not know about these foods. What are the obstacles, habits, and attitudes that now keep people from growing green and yellow vegetables? For example:
� no knowledge, information, or experience
� no suitable seed
� trouble with insects
� not enough water
� do not realize value to health
� no real interest.
You discuss what could be done. Could the village have more milk, meat, and eggs if the people knew how important these are?
Set up some long-range goals. It may take 5 years to reach all of them. Some of the goals might be for all families in the village to:
� grow enough vegetables and fruits for home use.
� keep goats for milk.
� raise chickens or rabbits.
� grow more and better feed for animals.
Also set up some goals for this year. These might be for:
� every family to grow some leafy green and yellow vegetables.
� every family to understand how good food improves health.
� women and girls to learn how to prepare foods for young children. Decide what must be done to accomplish the goals for this year.
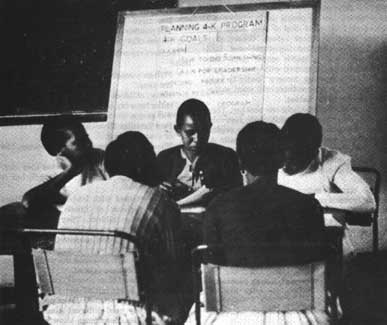
Goals: To have every family in village grow some green leafy and yellow vegetables. To have every family in village understand value of these vegetables in the diet and how to grow them.
|
What to do |
Who will do it |
|
� Be sure seed, fertilizer, and insecticide are available in the village. |
Village worker |
|
� Talk with village leaders about the need for families to grow and eat green leafy and yellow vegetables. |
Village worker |
|
� Invite everybody to general meeting. |
Village leaders |
|
(a) Exhibit green leafy and yellow vegetables suitable for the area. |
(Write down names so each person will know just what his responsibility is.) |
|
(b) Discuss the value of these vegetables in diets and how to save money by growing them. |
Village worker with help of local leaders (names) |
|
(c) Demonstrate the preparation of one vegetable. |
Village worker |
|
(d) At the meeting, ask who will agree to grow at least one yellow and one leafy green vegetable this year. |
Village worker and garden leaders |
|
� Plan and carry out a result demonstration on growing green leafy and yellow vegetables. |
Selected family in village |
|
� Select the demonstration family and plan each step of the demonstration with them. |
Village worker and garden leader |
|
� Conduct method demonstrations for the people of the village in the demonstration garden at appropriate times on: |
Village worker and demonstration family |
|
(a) How to prepare the land and plant seeds. |
|
|
(b) How to cultivate, spray, and control insects. |
|
|
(c) How to harvest vegetables. |
|
|
� Hold a general meeting at demonstration garden for people to see results. |
Village worker and demonstration family |
|
� Exhibit some of the vegetables. |
All people who have grown some in the demonstration |
|
� Have a series of demonstrations showing how to prepare different vegetables for both children and adults. |
Village worker and garden leader |
|
� Make posters to remind people of what vegetables can do for them. |
Village worker or garden leader |
|
� Give a series of radio talks about the importance of eating green and yellow vegetables, how to raise them and how to prepare them. |
Village worker; family who conducted the result demonstration |
How to do it
Plan with village leaders how you will interest the people in raising and eating green leafy and yellow vegetables.
Select a family that has been a good cooperator to carry out a result demonstration. Plan carefully with this family.
Plan the steps of all method demonstrations to be held in the demonstration garden. Involve the demonstration family in helping with the demonstrations on planting, cultivating, etc.
Complete all steps in the result demonstration and plan for the general meeting to see the results.
Keep a record of what you did and of the result. Did you make any mistakes ? How many people grew green leafy and yellow vegetables ?
Study your record to see if you can do a better job next time.
When to do it
Start now. It will take time to make the plans, demonstrate and grow the crop.
Who will be helped by the plan
Everybody in the village who raises the vegetables and eats them.
How to measure the value of what you have done
How many families grew enough green leafy and yellow vegetables to make a contribution to their diet?
How much seed was used ? What was the average cost per family? How much fertilizer was used? How much did it cost? How much would it cost to buy these vegetables in the market ?
How many families are likely to continue raising these vegetables?
Goals to have:
Every family grow some green leafy and yellow vegetables.
Every family understand the value of these vegetables and how to prepare them.
|
What is to be taught |
How |
Who |
When |
Where |
How to measure or evaluate results |
|
1. Why we need to eat green leafy and yellow vegetables |
Illustrated lecture |
Village worker |
February and March |
Meeting hall |
Number attending meeting and interest shown |
|
Exhibit |
Village worker |
Store window |
Comments on exhibits |
||
|
Talk to individuals |
Leader |
In homes, on streets, in markets |
Number of individuals talked to |
||
|
2. Kind of seeds Where to get them How to prepare seedbeds |
Method demonstration and discussion |
Village worker with assistance of leader |
March |
In the garden of family willing to serve as demonstrator |
Number attending demonstration Questions asked Interest shown |
|
3. How to cultivate and control insects |
Method demonstration |
Garden leader |
First of May |
In garden |
Number attending demonstration Number who have planted green and yellow vegetables recommended |
|
4. How and when to gather vegetables and how to cook them to save food value |
Method demonstration, discussion |
Village worker and garden leader |
June |
At home of demonstrator |
Number attending |
|
Exhibit |
Village worker Leader Demonstrator |
Last of June |
In market |
||
|
5. Review what has been learned-Evaluation and planning for next year |
Group meeting with discussion |
Village worker Agriculturalist Leader |
July |
Meeting hall |
How many families participated-Average no. of vegetables planted per family - How many cooked and ate vegetables? How many will agree to plant these kinds of vegetables next year? How many people benefited ? |
Anyone in the village or community may possibly be a leader. A person is a leader when his ideas or actions influence others or he helps to get things done that the people want. In every village there are people with some knowledge and experience. When other people in the group use these abilities, the people who have them are put in a leadership position.
In this book's chapter on "Food and Nutrition," you will find the story of Samuel and Mary. Samuel and Mary are leaders. In the story on page 32, Samuel suggested they have another meeting. When Samuel made this suggestion, he was using initiative. He wanted something done. He wanted to learn more. Mary said she wanted her children to grow up well and strong. Like Samuel, Mary was thinking. She was expressing her interest in the health of her children. By speaking out and showing her own interest, she was influencing the thinking of the others in the group. Later Samuel asked, "If our children are not healthy, why is this?" Here again, Samuel's question no doubt made others in the group wonder why their own children were not healthy.
Miss Ramero asked if someone would come early the next Saturday to get chairs and have the meeting room ready. Samuel volunteered to do this. Miss Ramero also asked who would go around the village to get more people to come to the meeting. Mary said she would. In these very simple ways, Mary and Samuel were influencing other people's thinking. They were getting them interested in finding out more about their own children's health. They were accepting responsibility. They agreed to have the meeting place ready and get more people to come to the next meeting. They were beginning to show leadership possibilities. With encouragement and help from the village worker, Samuel and Mary developed into useful leaders in their village.
As another example, let us take Mrs. Hudan, a member of the homemakers' club in the village. She grows beautiful tomatoes, but no one else in the village has much success with tomatoes. The other women in the club want to learn how Mrs. Hudan grows tomatoes. She was asked to tell the club what she did. She was timid at first. It was hard for her to talk to the group, but she explained as best she could. They then asked if she would show and teach them how to grow tomatoes. The village worker helped Mrs. Hudan demonstrate each step. She was later invited to nearby villages to tell about her way of growing tomatoes. The village worker taught Mrs. Hudan more about tomatoes and helped her prepare for each demonstration.
Mrs. Hudan had experience, knowledge, and ability in growing tomatoes. Her club and the clubs in other villages used these abilities. As the village worker trained and helped her, she gained more confidence in herself. People began coming to see her tomatoes and ask her questions about gardening. Soon she was trying out new vegetables and talking to the club about the need for good gardens. Mrs. Hudan developed into a garden leader in the village.
One basic purpose of extension education is to develop people. The extension way of working with people not only gives them information and shows them how to do things, it also gives them responsibilities and chances to use their talents and abilities in ways that help them grow in what they can do. Extension and community development work help people become leaders and more useful and influential citizens.
Local leaders can help you in many ways as you work in the village. You are just one person. You cannot reach everybody. You cannot do all the work that needs to be done. You need people in the village who have the respect of the other villagers and are willing to give some time and effort to help you in your work. Leaders can help other villagers understand the work you are doing. They can help you teach.
Involve the local leaders in planning. With their knowledge of the problems and the way people feel and think, they will make a valuable contribution. Every village is a better community when local leaders help to plan and work.
Often you will find young people who are interested in helping and want to learn. Give special attention to them. It is good for boys and girls to be given leadership responsibilities in their club or in school. Soon they will be men and women and called upon to accept larger responsibilities.
People trust local leaders and may work with them more quickly than they will with you. Local leaders understand village problems and know what has happened before you came. Every group has leaders. Even among animals and birds, leadership is recognized. In some way, an elephant becomes a leader of the herd or a certain wolf rises to leadership within the pack. Notice a flock of birds or wild geese flying in formation. One bird will be the leader. Leadership from the group is both natural and needed.
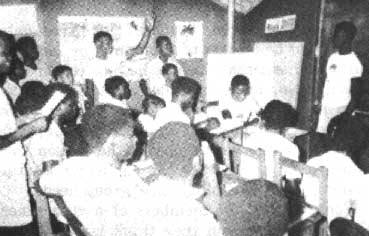
Local leaders fall into two main groups:
(1) Official Leaders-generally thought of as the formal leaders. These include such people as:
� The village chief or headman
� Political appointees
� Governmental officials
� School teachers
� Religious leaders
� Heads of organizations.
Most of these leaders are paid for the work they do. They have authority. Often they are influential and can really help you in your work. Many times programs fail because these formal leaders were not consulted in the beginning. When you discuss any project or program with them and get their interest and support, you are more likely to succeed. Consult these formal leaders often and ask their help.
(2) Natural Leaders-informal or volunteer leaders. They have no official authority and they do not receive money for their work. They come from the people and often have more real influence than the official leaders. The natural leader is one people like and respect, in whom they have confidence, and to whom they turn when they need help. Natural leaders sometimes do not know they are leaders. They are just willing to help whenever they can. A natural leader is not always the best farmer or the homemaker with the finest house.
It is important that informal leaders come from different social groupings in the village. A landlord's wife is not necessarily the best leader for a tenant's wife. A merchant or a shopkeeper could do much to get acceptance of the program. A young mother may be a better leader for other young mothers than an older woman. She would take a more active interest in a program for children.
The first step in finding leaders is to believe in the people of the village and their capacity to become leaders. It is important to recognize that village people have the ability to make wise decisions based on the information they have and the situation they are in. Whether or not they are poor or have little education is no measure of their ability to learn.
Ask several villagers questions such as:
"Who would be good to help plan and arrange a meeting for the women of the village ?"
"Who would be good to help plan and set up a demonstration garden?"
"If you were thinking of buying a piece of land or opening up a little shop, who would you go to for advice?"
The names you hear most often in answer to questions such as these are likely to be the people of influence and the natural leaders in the village. Persons that others turn to for help and advice or speak of with real affection usually have the respect and confidence of their neighbors and are potential leaders.
The main requirements for a good leader are:
� Wholesome influence, setting a good example for others
� Desire to learn
� Willingness to work
� Being glad to help people, to lend a hand
� Being fair, honest, and dependable
� Liking people and believing in them, having friends among different groups, rich and poor, young and old
� Being humble, never bossy or arrogant
� Having the respect and confidence of people
� Being interested in trying new things, wanting change
� Being interested in and willing to discuss important village problems.
You may not find obvious enthusiasm or people expressing a desire to help others. On the other hand, any evidence of interest, friendliness, willingness to work, or hearing a person's name used often by neighbors may be your key to a potential leader.
Discovering leaders who might be against your work can be as important as finding favorable leaders. If you know unfavorable ones, give them special attention to try to win their support and change their efforts from working against you to working with you.
Leaders can't be "leaders" in name only. They must be leaders of something or for some purpose. Leadership means having responsibilities and this means a leader must be depended upon for certain specific kinds of jobs or work. One good way to select a leader for a specific job is to let the group choose the person they think would be best for the particular kind of leadership responsibility their group needs.
For example, the members of a club generally elect the person they think is best suited to be president of the club. The members of a committee often select the person they wish to serve as chairman. A group of women may select one member they think would do the best job as a clothing leader.
A second way to select leaders is to appoint them. You, the president of the club, or another official may appoint or ask a person to be a leader for a specific job.
A third way is to let people volunteer. If the best person is too shy to volunteer, you may need to appoint her if the group does not choose her. All of these ways are good. It is probably wise to use each way sometimes.
There are many, many ways leaders can help you and the program. Ask them for special kinds of help or give them specific jobs to do. The following are examples of the help leaders can give:
1. Bring people to meetings.
2. Arrange for and find meetings places.
3. Help you reach more people by showing and telling others.
4. Help people in the village know you and gain confidence in you.
5. Give general information about the program and help interpret it to the people.
6. Help identify problems in the village and decide the best ways to solve these problems.
7. Help plan and organize programs and village activities.
8. Give simple demonstrations.
9. Conduct meetings.
10. Lead youth groups and various individual projects.
11. Interest others in becoming leaders.
12. Help neighbors learn skills.
13. Share information with neighbors.
14. Serve as officer in an organization or chairman of a committee.
Different kinds of leadership ability are needed to carry out the different jobs outlined above. Some people have one kind and some another. The different types are:
� Special know-how leadership-having some special skill, know-how, or interest.
� Teaching leadership-having ability to show or teach others what they themselves learn.
� Organizational leadership-having ability to lead and guide an organized group.
� Opinion, advisory, and influence leadership - having the confidence and respect of others so their opinion and advice is asked for and their approval is wanted on important matters.
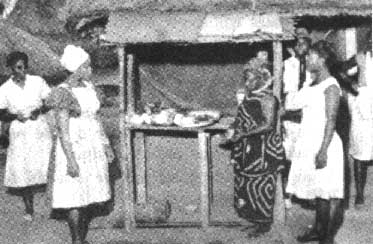
Leaders grow in many ways as they are trained and given chances to help with your program. They grow or develop in understanding, in the things they can do, in how much they can do, in doing what they undertake better, and in their attitude and interest towards their own homes and the problems in the village.
The ladder below shows how a person may start by accepting small simple responsibilities and move up to larger and more responsible jobs until he becomes president of his group or a member of the village council.
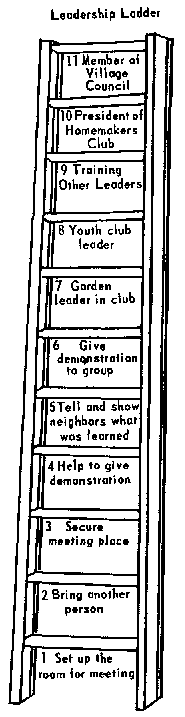
The first thing a leader does must be simple enough to be a success. A little success goes a long way toward bringing more success. Leadership is growth. It is gradual and continuous. It develops step-by-step. The important thing is to begin involving people in small ways that start them up the ladder of greater participation and leadership.
People agree to take leadership jobs for different reasons. Some want to help other people. Some feel they have a responsibility. Some feel it is a good way for them to learn. Many people who like to work with boys and girls will agree to be a youth club leader when they would not lead an adult group. For whatever reason they become leaders, if they are to be successful and remain interested, they must be trained and they must be recognized and thanked.
A leader cannot do what she does not know how to do. It is a mistake to ask or expect a leader to do something without preparing or training her for it. In fairness to her, you should prepare her for even the simplest job she agrees to do, such as getting a room ready for a meeting. She needs to be shown and told how the chairs and tables should be arranged, the room cleaned, etc.
Leader training is continuous and will cover different things depending on each leader's needs. Training for specific jobs should include:
1. Subject matter or what to teach-for example, how to grow tomatoes or feed a baby.
2. How to teach-how to give a demonstration, make and use visuals, lead a discussion, make a home visit, preside at meetings, and appear before groups.
3. How to explain and get people to understand what extension and other village programs are.
4. How to work with people-both adults and boys and girls.
Carefully teach leaders each fob step-by-step. Have them practice until you are sure they can do the job. This helps the leaders succeed in what they do and helps to make the program successful. Leaders themselves and their neighbors will know whether or not they do a good job. If they are ashamed, they will not want to try again.
You can train leaders by:
� Individual visits to the leader's home to discuss and teach her how to do the particular job she is asked to do.
� Leader training meetings or schools for groups of leaders.
� Providing chances for leaders to observe other leaders in action.
� Involving leaders in planning and helping with leader training meetings.
� Preparing guides for them to use in teaching (see example at end of this chapter, page 201).
All these ways are needed. Work out a training plan to prepare every leader for his or her job. Let leaders help plan their training.
Training in leadership development is far more than just how to do a job or how to be good at something. Training should include discussion of questions such as:
What are the characteristics of a good leader ?
What is the meaning of "responsibility" for the leader ?
How should a leader work with people?
How does a leader use initiative without being "bossy".
How does she interest people in trying new methods and ideas?
How can she overcome resistance to new ideas and programs ?
What are the characteristics of a good program ?
Good training avoids difficulties. Local leaders may give wrong information to others if they themselves lack knowledge and know-how. They may want to do all the work themselves and not share their duties if they do not understand the value of sharing. Other people in the village can become jealous if you do not teach leaders how to work with people without becoming "bossy". Giving many people the opportunity to work as leaders can help overcome jealousy and the feeling that you have favorites. Make it easy for the leader to learn. Make it easy for her to lead by giving her good training.
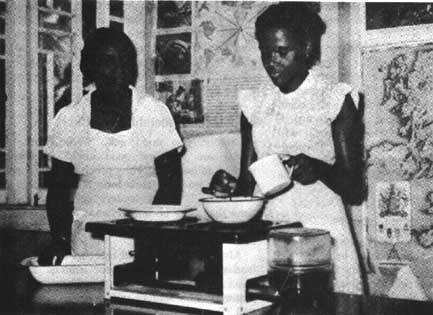
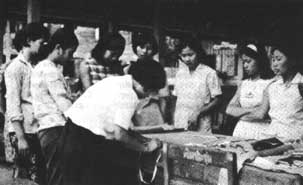
Community or extension advisory councils are used by many village workers. Organizing various kinds of leaders into an advisory council is an excellent way for them to learn to work together and to develop leadership. Such a group can help develop and carry out a program in the village. An advisory council will give you many training opportunities. Through training, you help to develop the attitudes of leaders and how they think about their village and its problems.
Leaders must feel their work is appreciated. We all like recognition and good leaders need to be given some special attention. One of the best kinds of recognition is encouragement, praise for doing a good job, and a heartfelt "thank-you." This can come, not only from you, but also from one of the village officials at a public meeting.
Special attention and training can be given by taking leaders on tours or visits to other villages, government stations, public health centers, libraries, schools, etc. If the village has a newspaper of any kind or a board where news items are posted, you can publicize some special work a leader has done. Tell public officials about their work. Give them a chance to meet interesting visitors who come to the village. Sometimes a certificate or ribbon or even a small gift is given to leaders in appreciation for their services.
Making leaders feel they have an important part in planning and carrying out a program in the village is one of the finest kinds of recognition you can give them. Ask often for their advice. Treat each leader as an important person by remembering the small thoughtful things that make a person feel she or he is appreciated. You can write a personal letter at the end of the season to thank each leader and congratulate her for her assistance and the good results it has brought. Always give leaders the credit for what they do. You stay in the background.
Finally, you must ask, "What kind of a leader am I ? How good am I in training leaders to help me? How much time do I spend with the leaders? How long does a leader stay a leader? If many leaders say after a short time that they no longer want to help, what is wrong? Have I been a good leader for other leaders ?"
Always keep in mind that, as a professional leader, you are a leader of leaders. To train others for leadership, be a good example of it yourself. The leaders will want to become like you. We teach others to lead by being good leaders.
The boss drives his men; the leader coaches them.
The boss depends upon authority; the leader on good will.
The boss inspires fear; the leader inspires enthusiasm.
The boss says "I"; the leader says "We".
The boss assigns the tasks; the leader sets the pace.
The boss says "Get here on time"; the leader gets there ahead of time.
The boss fixes the blame for the breakdown; the leader fixes the breakdown.
The boss knows how it is done; the leader shows how.
The boss makes work a drudgery; the leader makes it a game.
The boss says "Go"; the leader says "Let's go."
Prepare for meeting-Ahead of time
1. Notify people of the day, time, and place where the demonstration will be given.
2. Talk with your village worker and health officials to learn all you can about:
� Where people in the village get water for drinking.
� What kinds of sickness in the village may come from unsafe water.
� What makes water safe.
� What should safe water be used for.
Day of demonstration
1. Get ready what you need for the demonstration.
� Container for water before boiling
� Clean cloth and clean vessel for straining water
� Pot for boiling water
� Clean covered vessel for storing water
� Wood or other fuel for fire
2. Practice your demonstration.
3. Check the meeting place to see if there are enough seats, light, and ventilation for people to be comfortable.
4. Arrange chairs and your demonstration equipment.
Conduct meeting and give demonstration
1. Opening the meeting:
� Welcome the people.
� Explain your job as leader.
� Explain where your information comes from.
2. Discuss the importance of using safe water in the home.
Talk, ask questions, and get people to talk about:
� What is meant by safe water.
� Where people in the village get their water for household use.
� What diseases or illness may come from using unsafe water-especially for babies and young children.
� Explain how water can be made safe by boiling.
Discuss the need to use safe water for:
� Drinking
� Mixing powdered milk
� Bathing baby
� Washing dishes, etc.
Wash your hands with soap. Explain that this is always necessary before working with drinking water.
3. Give the demonstration.
|
Important steps |
Points to emphasize |
|
Into clean utensil. |
|
|
(a) Strain the water. |
Use a clean cloth. |
|
Straining will not make water safer but will remove dirt and make it look-cleaner. May need to strain several times. |
|
|
(b) Boil the water. |
Boil it for 10 minutes to make it safe. Wait until the water starts to boil to begin counting time. |
|
(c) Cool the water. |
Let the water cool in the pot used for boiling or other clean containers. Cover it with a clean cloth. |
|
(d) Prepare the container to store water in. |
Wash it in hot soapy water. Rinse it with safe water. |
|
(e) Pour water slowly into container. |
Pouring water from one container to another adds air and makes boiled water taste better. |
|
(f ) Cover and store water for using. |
4. Summarize:
� Go over the important points again.
� Ask for questions.
� Find out how many will agree to start boiling water.
� Plan for your next meeting.
As a teacher, your main job is to help people learn and put what they learn into practice. The old saying, "If the learner hasn't learned, the teacher hasn't taught," calls attention to the importance of good teaching. A good teacher finds ways to give information and new ideas so people will want to learn and will get satisfaction from learning.
Most teaching methods are one of three types-individual, group, or mass methods. How effective you are in getting people to accept new ideas and make needed changes will depend in large measure on the teaching methods you use and the way you use them. You should know and use many different methods. Studies have shown that when several different methods are used more people are convinced to change. Choose the ones you use to suit the people, what they want to learn, their ages, their education, and the customs in their village.
No matter which methods you use, certain steps in planning and organizing your teaching will increase learning. To be a successful teacher of adults, you will need to plan activities to call the thing to be learned to the attention of the people. By keeping their attention on the problem and using different methods of teaching, you develop their interest and arouse their desire to learn. As they are given more information and learn the skills needed to solve a particular problem, they become convinced they should make the suggested changes and improvements, and they act.
STEP I. Getting the attention of the learner.
Village families are not always aware of some of their most pressing problems or how these problems can be solved. For example, in some villages the food grains grown for home use are generally stored in sacks and kept in the house. Much of it is destroyed by rats and mice, so the families do not have enough to last until the next harvest. Begin your teaching by getting attention to this problem. Help them realize their grain is being wasted by rats and mice and that they can save their grain if they store it in a better way. To do this, visit homes to talk about the problem, put up posters, and set up an exhibit.

STEP II. Getting the learner's interest.
You notice that people are looking at the posters and exhibits. They start asking questions. You tell them about families in another village who had the same problem and what they did to solve it. They are beginning to show interest.
STEP III. Arousing the learner's desire for information.
As you visit homes and meet with people, they want to know more about keeping their grain away from the rats and mice. You show them a film on how to store grain at home to protect it from rodents and insects. You show them metal cans and tell them about making ratproof storage bins. They ask about the cost of materials. They want to know how they can kill rats, mice, and insects. You have made them want to learn. They are saying they would like to do something to keep their grain from being wasted. They now have a desire to try a different storage method if it will help them to have more grain.
STEP IV. Convincing the learners to act.
The people are sure that much of their grain is being wasted, but they aren't quite ready to spend the money to buy materials for better storage. Have them put some grain in a pan beside where the grain is stored. If they do not use any from the pan for the family, they can see how quickly it disappears. The rats and mice eat it. Now they are convinced that much of their grain is being wasted. They are ready to try a different method of storage.
STEP V. Teaching the learners what to do.
Before people can act they must know what to do and how to do it. They must learn the skills needed to make the improvement. You now give them more information and show them how to make ratproof storage bins, control insects in grains, and keep down rodents. You tell them where they can get the materials. You give them more information on costs. You get them to agree to try one of the recommended storage methods. You have made it easy for them to act.
STEP VI. Making certain the learners receive satisfaction from their action.
As you visit families to check on their progress in improving storage methods and controlling insects and rodents, you find they are pleased because their grain does not seem to disappear as fast as before. They realize they will have more grain and not need to buy so much. You know they are receiving satisfaction through this improved storage.
If learning of any kind is to occur, the learner must go through these six steps. Remember them in your teaching!
You will probably start your work in a village with individuals because you will still be getting acquainted. You will be talking with individual women in their homes, on the road, in the market, or wherever you meet them. As you talk with a woman, you will often see a chance to show her how to do something in a better way than she is now doing it. You want to help her. You will be demonstrating as you show and tell her why the new way is better than the old way.
Visiting a woman in her home or where she is working in the field is one of the most effective methods of teaching if it is done well. It is effective because you are helping the woman in the natural setting of her activities. You can help her apply her new knowledge at once to do some everyday activity in a better way. You can correct mistakes at once. It is a flattering method because it shows the village woman that you thought enough of her to visit her in her home or where she worked.
To be effective, a home visit must be planned. A home visit is not just casually calling on a family. You go for a purpose. Don't go unless you have a reason.
There are many reasons for making home visits. Your first visits will be to get information and to get acquainted. Others will be to give information or in answer to a request for help. Still others may be to ask a woman to serve as a leader or help with a meeting, or to follow up on a new practice you have taught. There are many other reasons for making a home visit. The important thing it to know the purpose for each visit.
You must prepare for home visits just as you would get ready to teach a class. Prepare for the purpose you have selected and also prepare for emergencies. It often helps to have extras to show a woman. For example, one village worker carries a basket in which she has several things to show the women. In this way, she gets attention and rouses their interest. If she is teaching the women to make loose comfortable clothing for the baby, she may have a baby's shirt in her basket. If she is teaching the youth club girls how to make a blouse, she will carry a sample blouse to show the mothers. She may take a small sample shelf homemakers can add to their kitchen walls or an improved cooking utensil they can buy in the market. She tries to have something new and different from time to time to show the women. In this way she continues to hold their interest and they begin to want some of the things she shows them.
Make the visit pleasant. Remember that you are a guest. Be friendly and sympathetic. Always find something to praise. Every family has some pride. Start the conversation about the family and its activities. Call the members of the family by name. Be a good listener and close observer. Be interested in what the family members have to say. Try to get the confidence of the family, then be sure that you always respect their confidence in you. Keep everything you learn about the family confidential. Remember your reason for being there. Before you leave, be sure that you and the family understand each other and that you all understand any plans you have made for the future. Writing down such action is a good way to help you and the family remember. Be sure you show your appreciation for the opportunity to visit the home and know the family.
It is generally not wise to make written notes while you are at the home, unless it is something that you and the family have agreed together to do. Stop along the road and write down the things you want to remember from the visit. A family record like that shown can be most helpful. Think about the visit while you remember the details clearly. How do you feel about it ? Were you able to do what you planned ? What did you accomplish ? How do you think the people feel about your visit? Were they really enthusiastic or just courteous? What would you do differently if you could do it again ? What did you learn that will help you when you visit another family ? When you ask yourself these questions, you are evaluating your visit.
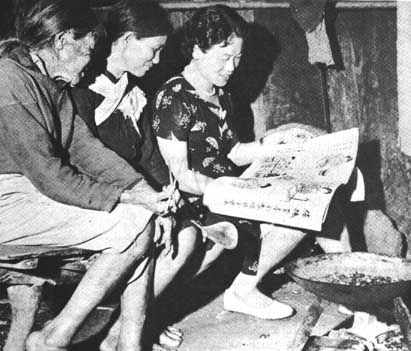
The last part of the visit is the follow-up. If you promised to send any materials or information, do it promptly. If there is to be a meeting in the area, send the family an invitation. If you promised to make another visit, do so at the time you and the family planned.
FARM AND HOME VISIT RECORD
Name___ Address___ Date___
Family Members ___ Ages___
I. The Visit:
1. What I planned to do.___
2. What I accomplished.___
3. What the family agreed to do.___
4. What I promised to do for follow-up. ___
II. The Situation:
Special Problems___
Special Interests___
III. Materials or information promised:
___
IV. Proposed date of next visit:
___
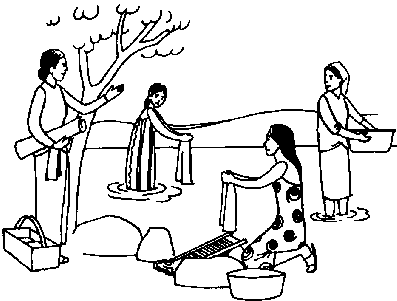
Visits with women in the market, in the field where they are working, at the well when they are getting water, or along a stream where they may be washing clothes will be similar to a home visit. In these places, however, there will usually be more than one woman and the visit will not be as intimate as when you go to a home and talk with one homemaker alone. This kind of visit can be very effective for getting information, talking about a coming meeting, and discussing problems.
You will learn very quickly where you can find groups of women in or near a village. You can then plan to use visits at this location for particular purposes. Because the women will often be occupied, you may need to make such visits brief, although at times the women may welcome an interesting interruption.
Plan for such visits, carry them out, record, and follow up just as you do for home visits.
Sometimes the village people will come to you for information or help. If you have an office or demonstration room, they can come there. If not, they may come to your home. These visits are called office calls.
Office calls are important. The woman who seeks you out and asks for help is usually ready to learn. The people will not come if they do not believe you can help them. Show them you are glad they came and that you want to help them.
As soon as you can, set a time and place where the people can come to you. Let them know when you will be there. For example, you could plan to stay in the office or in your home one morning or afternoon a week for people to visit you. Encourage them to come to you with their problems. If you have an office or demonstration room where women can come, you can use posters and exhibits to give additional information.
Make your visitors welcome. Be friendly. Answer all questions courteously, no matter how unrelated they may seem or how busy you are. When people come to see you, take time to give them the information they ask for.
After the visitor leaves your office or demonstration room, record her name, the purpose of her visit, the help you gave, any follow-up you promised, and other information you find helpful. Just as in the home visit, you must not repeat confidential information about the family.
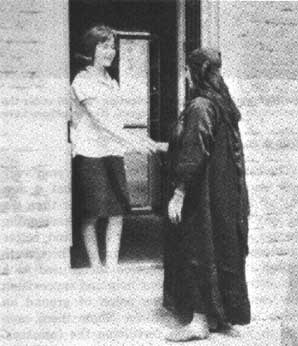
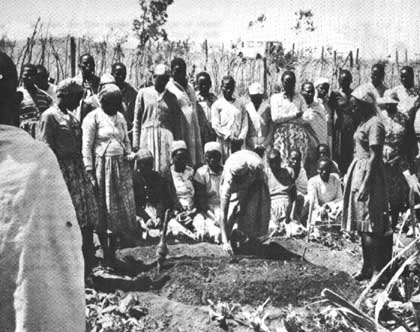
The result demonstration is one of your very best teaching methods. It proves that a new way of doing something can be better than the old way. For example, you are recommending the use of fertilizer to grow more and better tomatoes. Select one family and get their cooperation in growing tomatoes to be used as a demonstration. With your help and supervision they could mark off one patch of ground on which to try the fertilizer. Show them each step in planting and fertilizing the tomatoes. On another piece of ground nearby, exactly the same size, they could use the old method. They and their neighbors could watch the growth of the tomatoes in both. They could see how many more tomatoes came from the patch that was fertilized. They would believe what they saw. Next season many people would use the new method.
This is called a "result demonstration" because everybody can see the result of it. It takes time and the steps must be followed carefully. Somebody must write down what is done from day to day, exactly how many tomatoes came from each patch, how much they weighed, and whether the tomatoes in one patch were better than those in the other. Result demonstrations can be used to teach many kinds of improvements. An improved kitchen or smokeless stove makes an effective result demonstration.
Sometimes there is no way to show the old and new ways side by side. Then you must help the people remember how it was before. This would be true of mosquito control after the mosquitoes are gone.
A result demonstration not only teaches the individual family, but others as well. You work with one family, planning and helping them to carry out the demonstration. But you try to have as many people as possible see the result and learn from it. You may want to take groups of people to see it. You can use the results for exhibits, posters, and other teaching methods.
Personal letters are of two types. One is the letter you write in answer to a letter you receive. Letters of this type will usually be to answer a request for information. Answer these requests at once. Give correct and full information. Make your letter neat and attractive. Your letter is a part of you. Make it picture you as a friendly, reliable person who gives sound information.
You may write a second kind of letter to a few selected individuals. You may send these letters to say you appreciate a person's leadership or to ask a natural leader to help with some project. It may be satisfying to the village chief to know you seek his cooperation or to a homemaker to have you especially invite her to a meeting.
A woman likes to receive a letter written to her personally. Even in a society where few adults read, the woman who receives your letter will find someone to read it to her. A letter sent home with a schoolchild to a parent who doesn't read can be very effective. The child takes pleasure in reading the letter to the parent.
Personal letters can be costly in time and money. Probably you will limit yourself to sending only a few. Find out, if you can, if your letters are received and understood.
Individual methods are effective, and people like the personal attention. As a result they may encourage you to continue them when you could use other methods. As soon as you feel you can gather people together, you should do as much teaching as possible to groups. Keep in mind that your objective is to teach many people.
This is one of the best extension methods. Along with farm and home visits and result demonstrations, it will be one you can depend on to bring results. A method demonstration is showing how to do something. Don't just tell anyone how to do something when you can show her how. If you think over your program you will see many places to demonstrate.
You will use this system over and over. You can show a woman in her home how to do some simple housekeeping skill or you can stand before a large group and demonstrate how to prepare a meal. You are demonstrating in both cases. You are showing how to do something. At the same time, you are telling why you do it. Try to show how so clearly that anyone watching you can do it also.
If your program is aimed at improving diets in the village, demonstrate how to plant a garden to raise much needed food, how to cultivate to keep the weeds down, how to spray to control insects, how to select the best vegetables for family use, and how to prepare the vegetables. In a program on smokeless stoves, your demonstrations could include how to select the place for the new stove, how to build a smokeless stove, how to use the new stove, and how to care for the stove.
Method demonstrations have many advantages. People can see, hear, discuss, and take part in a method demonstration. This makes them learn more completely than if they just sit and listen to a lecture.
Demonstrations can be given anyplace that is convenient and comfortable. This may be a public meeting place, a school, a home, the market place, in a field, or under a tree. Select a place suited to the subject being taught. If you are teaching how to plant a garden, give the demonstration in a garden. If you are showing how to whitewash a wall, the best place will be a family's house or a room in a home or some other building. A food preparation demonstration can be given anyplace you can put a clean table and people can see. This may be in a home, at a clinic, at a dispensary, or even in the market.
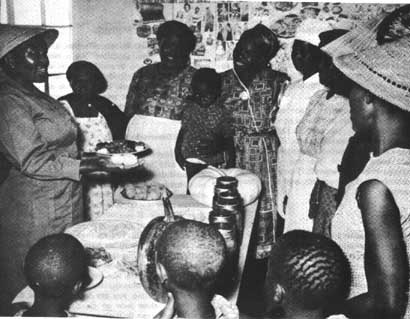
Select the right demonstration. It is important that you select a practice that will be good for the people in the area. The demonstration you choose should:
� Teach a sound practice-something you know is right.
� Have a wide application-be usable to many people in many ways.
� Be timely-for example, treating seed for disease is useful only when it is done just before planting time.
� Be given with available equipment-don't demonstrate how to can fruits when people have no jars or cans. Don't show how to use a sprayer if the farmers can't get one. Don't use kinds of pots and pans in a cooking demonstration that the women don't use at home.
A simple demonstration that shows a small improvement over the method now being used may be of greater value than a long demonstration of a more difficult practice that people may be afraid of.
Plan carefully. Good demonstrations don't just happen, they are carefully planned.
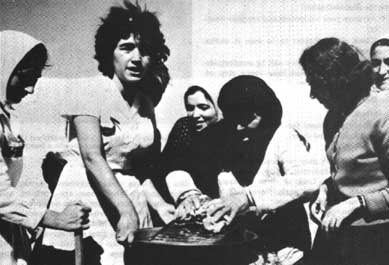
Before you give a demonstration:
1. Think about your total program and what skills you will need to teach as a part of it. For example, plan weeks ahead to demonstrate using vegetables from the garden.
2. Plan when and where you will give your demonstration.
3. Plan publicity to reach the people you want to attend your demonstration.
� Make posters.
� Talk with key people.
� Ask village leaders to tell others.
� Use the wall newspaper or bulletin board if there is either.
4. Plan your demonstration.
� Outline it step-by-step. This is your framework.
� List the key points-These are the things that must be done at each step if that step is to be successful. For example, in cooking cereal:
Step
Add cereal to water.
Key Points
Water must be boiling. Stir continuously.
� Assemble your equipment.
� Practice.
Practice is very important if you are to give a successful demonstration. Even the most experienced demonstrator practices before appearing in front of an audience. Practice exactly the way you plan to give your demonstration.
Before the audience comes on the day you give the demonstration:
� Arrange your equipment and supplies neatly.
� Check all equipment to be sure it works properly.
� Be sure your audience will be comfortable and able to see and hear every step of your demonstration.
The Demonstration
1. Introduction.
Explain the need for this demonstration. Keep it short and clear.
2. Demonstrate.
Make it look easy so people will want to try it. Be enthusiastic. Be yourself. Talk to your audience. Look at them as much as you can while you work. Never talk with your back to your audience.
Be sure the people understand you. Speak loud and clear so everybody can hear. If you use new words, explain what they mean. Follow your outline.
3. Encourage questions.
Answer them sincerely and tactfully. Ask some of your audience to help you as often as you can. This gives them a chance to take part. Ask some to demonstrate back to you some of the steps that may be difficult. This helps them learn. Repeat a step if people don't seem to understand.
4. Summarize.
Review the important steps and key points briefly at the end of your demonstration. Tell the people where they can get materials and equipment if anything is new.
Hand out any materials. Make clear what you will do next and what you expect from the people. If this demonstration is one of a series, tell them when and where the next one will be given.
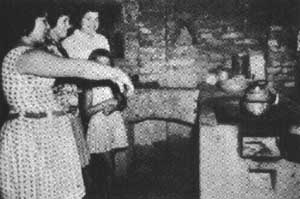
A tour is a planned trip by a group to see results or situations related to specific problems. You can use tours to show villagers a new practice in use. For example, four or five families may have planted gardens the way you recommended. When these are growing well and show the advantages of the new practice, a tour to show these gardens to many people will help spread the use of the practice. A kitchen tour may show new smokeless stoves in use, or a rice-growing tour may visit a number of fields where a new variety of rice is being grown.
People like tours. They like to see what someone else is doing. Tours are the natural companions of result demonstrations. Often a group tours completed result demonstrations. For example, they may visit a crop at harvest time so that people can see the extra yield due to use of an improved practice.
Like all other methods, a tour must be well planned to bring results. Decide on the purpose of the tour and plan it as a part of your year's work. Select the places to be visited, plan your route, and work out a time schedule. Decide where the group will assemble and publicize the time and date. Help each family that will be visited prepare to tell about their project.
When your group has assembled, explain the purpose of this tour, what they are to see, the places they will visit, and the importance of keeping together. At each stop, the host family should first be introduced. They then guide the group around and explain what they have done. There should be time for questions and answers.
At the end of the tour, review what was seen and how it was done. Then give the people a chance to talk about how they may apply what they have observed and to ask questions.
You can hold many kinds of meetings in a village. Some things can best be taught in small groups and others are good for large meetings.
A general meeting is good for teaching something of importance to many people. You can teach subject matter and answer questions. The people can take part in a general meeting, too.
Lecturing is one of the commonest methods used for teaching in a meeting and, alone, it is one of the poorest. When you lecture, you hope people learn from just hearing you say something. If you can also give them a chance to see and take part, you make learning much easier. Visual aids also make meetings more interesting. These will be discussed more fully later.
A good meeting is carefully planned. Outline your talk if you plan to give a lecture. Then think how you can emphasize each point visually.
For example:
� Show actual objects whenever possible. If you are talking about how much rice rodents eat, show bags with holes chewed in them.
� Draw simple sketches on chalkboard. You might compare the number of bags of rice the farmer harvests, the number he and his family eat, and the number the rats and insects destroy.
� Use flip charts. You may prepare flip charts ahead of time to illustrate important points about the loss of rice to rodents and insects and turn the pages as you talk.
� Make a series of posters. Each poster should illustrate only one point so it will be simple and easy to understand.
� Use flashcards to tell a story.
� Use a flannelgraph. With this you can combine pictures or drawings to emphasize points you want to make as you talk.
� Show pictures or a filmstrip of how some body else has already used the practice and succeeded.
You will think of other ways to illustrate your teaching. Remember it takes time to prepare these materials. They must be carefully planned to fit what you want the people to remember. You may find people in the village who can help you make visual aids. They will be pleased to have a part in your meeting and in turn make their neighbors more interested in the project.
Involve the people. This will make meetings more interesting. Here are some ways to have people participate:
� Have a farmer or village woman report on a successful project.
� Have a group act out some activity.
� Use songs to reinforce teaching. In Sierra Leone, women put the key points of a meeting to music. They all sing them together. This helps make learning easy.
Use discussion. People like to talk. First the group may listen to you discuss something new. Then they may talk about it, giving their ideas. In a group discussion, each person listens to the ideas of others even if he does not like them. He has a chance to say what he thinks, too. You may lead the discussion at first. After the people have some practice, let some of them take turns leading discussions.
To plan and lead a good discussion, prepare for it. Study the problem you are going to talk about. Think about it and about the people. Get all the reference material you can find. Have pictures, charts, and other aids.
Make the group comfortable. People think better if they are comfortable. Find a good meeting place. Set a time that suits people and start and end the meeting on time. Know the names of the people who come.
Seat the group in a circle. Be sure that each person can see the faces of the others. Keep the meeting friendly. Give everybody a chance to talk.
Let the people tell what the problem is. If they do not agree about the problem, try to ask the kinds of questions that will help them understand and agree. Your job is to find out what they think, not tell them what you think.
Discourage speechmaking. There may be a person in the group who wants to talk all of the time. This may spoil the meeting for the other people and keep them from talking. One way to stop him is to say, "Let's hear what somebody else thinks about the idea."
Help all to take part. Sometimes the best thinking is done by people who are too shy to talk. Ask questions that will get them to talk. Show that you think their answers are good. Never laugh at anybody's ideas. Group discussion is a big conversation. The leader keeps it moving but does not drive it.
Guide the discussion to group action. Help the people decide what they want to do and plan how they will do it. This may be the hardest part. It is easier to talk about the problem than to decide what to do about it. It is easier to talk than to do what is needed.
Help the group find technical information and help. Sometimes the problem will be so big that the villagers will need help from outside. You may have to help them understand that they need this kind of help. Then they will be willing to ask for it. It is important that they get the habit of learning all about a problem before deciding what they will try to do. At times, you will need to help them think back over what they have said so they do not forget anything important.
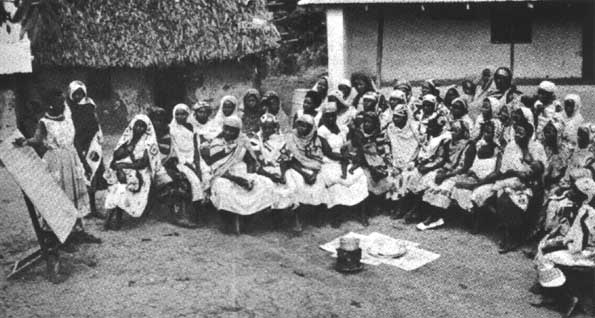
Someone has said, "There is no greater force than woman's force, one it has been organized." Women's organizations of many kinds exist around the world. In most countries rural women as well as city women have organized groups.
There are many kinds of organizations to which both men and women belong. Farm organizations, for example, often include both men and women. In some areas, women are members of village councils, extension advisory committees, and other community organizations. Generally, both boys and girls belong to youth clubs where they work together on different kinds of projects.
Rural homemakers' clubs are developing rapidly in many areas. Women want to learn how to have better homes and a better living. These homemakers' clubs not only provide a systematic way of teaching women, they can be very influential in getting things done. The cooperative spirit developed through club work provides an excellent opportunity to teach that "we", the women of the village, are responsible citizens, and, working as a group and with our husbands, can provide for many of our own needs and desires.
When a group of people form themselves into an organization, it means they are beginning to recognize the value of working together to get what they want. An organized group of responsible citizens can stir a whole village to action.
Village people like to sing and dance. In every village there will be somebody who can sing and make up words to go with the music. Ask these people to make up songs about the subjects you want to make popular. The words to a song may be a story of what happens when people do what is right and what is wrong. They may sing the story to a tune they already know. It is easy for villagers to learn the words even if they cannot read.
The lesson is learned best if the song is about just one thing. You may need to explain what the song is about before it is sung. If there are questions or if the people want to talk about it after the song, give them plenty of time. They will want to talk about the meaning of the song.
This is a way to show that working and learning can be fun. Songs might be sung about:
The village that didn't have a well.
The sick children who became healthy when they got enough good food.
The village boy who went to school.
The house with a new window.
Drama is not as common in the village as song, but it does entertain and teach. You can include several people in a drama, maybe even some from another village. Most people like to act. They like to play the part of someone else.
It may not be easy to find people who can write the drama. The village teacher may be able to help or he may know people in the village who can do it. Sometimes you can find copies of one-act plays that you can change to fit what you want to teach.
Any open space with a little raised ground or platform is a good place to use for a drama. The village carpenter can make a simple stage. Or you may use school benches to hold up a stage.
Have the drama at a time when village people can come. If you let everybody know about it, you should have a large crowd. Talk about the reason for the program before the drama begins and between the acts. At the end of the show, answer questions and explain anything that the people did not understand. Let them talk about it. Thank the people who took part in the show.
Role playing is an informal play. Group members imagine a situation. Then they act out what people would do in the situation. This might be used to show how different people feel about a problem and what they are likely to think should be done.
Too much advance coaching or rehearsing is likely to deaden the performance. The role players might meet once to figure out what points they should try to put across. They decide which characters will best dramatize the issue, assign the parts, try a quick test-run to get the feel of it, and let it go at that. Audiences like spontaneity and the players' imaginations will work better if given a free reign. By semi-experiencing a situation, the actors understand and feel it more completely. So do the people who watch.
Role playing should never go on for a long time, and it should be followed by a group discussion of how people felt and acted, why, and what the issues really were. Never use it in controversial issues where feelings might be hurt.
Puppetry is especially suited to villagers. It amuses all people. It is an inexpensive art that can be easily learned. Even crudely made puppets, when played with a lively sense of drama, can keep the audience interested. Puppets can teach homemaking, health, agriculture, or literacy.
There are several kinds of puppets. The glove or hand puppet is the simplest to make and the easiest to use. It is like a three-fingered glove. The first finger is inserted inside the head to move it. The middle finger and thumb fit into the arms of the puppet and move them.
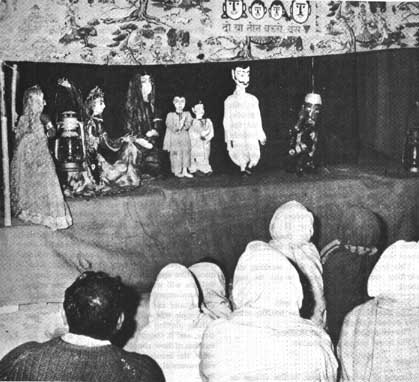
The puppet's dress covers your hand and forearm. One person can operate two puppets at a time, one on each hand.
For an effective puppet play, choose the lesson you want to teach. Write down the most important things you want people to remember. Do not try to teach too many things in one show.
Use a story to illustrate the points you selected. The story must have dramatic value. The lesson you want to teach should be the most dramatic part of the show-victory, loss, joy, and sorrow.
Choose characters that stand out. Then emphasize their main characteristics. The bad must be very bad. The good must be very good.
Have no silent pauses. Keep the dialogue clean-cut and lively. Have short speeches and short scenes with lots of action. The amount of action will depend on the skill with which you handle the puppets.
Even if the play is a tragedy, bring in some wit and humor at fitting moments. Music, songs, or short poems can be repeated at intervals to drive the lesson home and to help the audience remember it. Use everyday people and familiar situations in the play.
Take the audience into your confidence. Do not try to preach. They will not listen. They have come to be entertained.
Mass teaching methods reach many people. In using individual or group methods, you have personal contact with the people you are teaching. In mass methods, you do not have this direct contact, but these methods can make your other work more effective.
Use mass methods to:
� Repeat your message to those you have contacted personally.
� Interest people in a new way of doing something or a new program.
� Tell the public about your program. Many people can get to know you through mass methods.
A leaflet can help you teach a special skill or kind of knowledge. It may be a single sheet of paper, printed and folded. It usually tells about just one job or one small problem. You may use leaflets that somebody else has written or you may write your own. They should be very simple, with short sentences and short paragraphs. Use drawings and pictures that are easy to understand. Be very sure that your instructions are exactly right before you give them to the villagers. Practice writing your leaflets so they can be used in literacy programs where people are just learning to read. Men and women will be more interested in learning to read something they want to know than in reading books that were written for children.
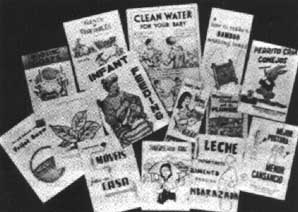
A circular letter is duplicated so copies may be sent to many people who want the same information. For example, you may want to tell them about something new that will help to control mosquitoes. You want them to know about this very soon, so you send each family a copy of the letter. Even if some of them cannot read the letter, they will find somebody to read it to them. The best circular letters are short, simple, and written about just one thing or idea. Be sure that what you have written is easy to understand. If you do not have a machine to make copies of your letter, ask the village teacher to help you. He might let students copy your letter and give copies to the villagers.
Newspapers can be a great help in getting information to people. You can write about the demonstrations you want people to see or about new ideas that village people are trying. You can tell about meetings that you and village leaders are planning. Many of your stories will tell how to do something. Talk about what some local villager did and how he succeeded.
In every village there are places where people meet their friends and talk. These are good places to put wall newspapers. The people who can read will read to others. Then they will talk about the idea or the plan for the meeting. When they go home, they will tell their families and neighbors. Your idea spreads through the village very fast. When the people come to the meeting, they have thought about your idea and are ready to listen. They are also ready to talk. Sometimes village workers work together to write a wall newspaper. Be sure that you put it where many people will see it and where it is safe from wind and rain.
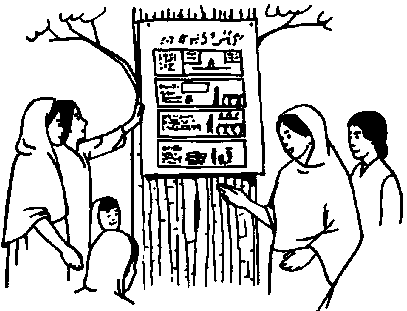
Bulletin boards can be mounted in your office, in the demonstration room, beside the well, near the market, or any place where women gather. Outdoor bulletin boards should be protected with a small roof or some kind of cover.
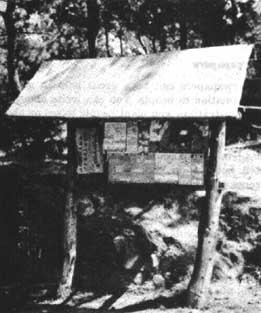
In many villages people meet to listen to the radio. If you have a radio, have it where the people can come and listen each day. They may meet at the same time each day. After the program is finished, they will probably talk about what they heard. They often learn about somebody outside the village who can help them or of something another village did well. Sometimes you yourself may be invited to be on a radio program. This will please the people of your village.
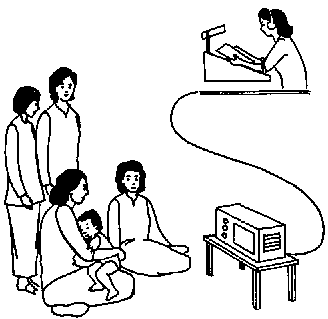
In some countries, television is becoming a mass teaching method that can reach into I many villages. People meet to watch television as they do to hear radio programs. Then they discuss the program. The audience has the ad vantage of being able to see as well as hear. If the program is well presented, they can under stand quickly and will be interested in trying the new idea.
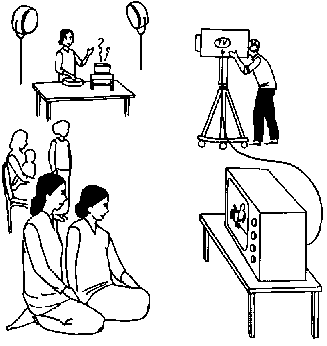
Everybody likes to go to fairs, exhibitions, and festivals. Although the people may think of them as entertainment, you will find many ways to teach at the same time. This is a good place for an exhibit which will attract people as they walk by.
A fair or exhibition is also a good place for demonstrations. Villagers who are skillful might demonstrate for you. Their neighbors will be more impressed by their demonstrations than by yours if they do them well. It is possible that the results of some result demonstrations could be brought for exhibit. Anything that people may "try out" for themselves will be of great interest.
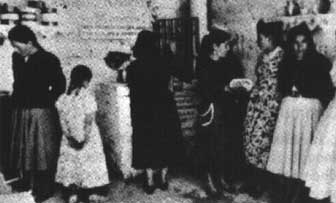
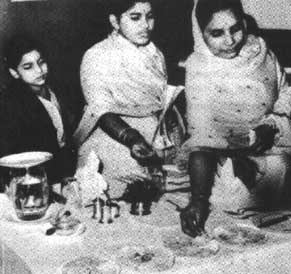
Many problems are village-wide and cannot be solved by individual families working alone, for example, mosquito control, village water supply, etc. Everybody in the village must help, so a campaign is needed. In a campaign, you use every teaching method you can to arouse interest, involve everybody, and get action.
An educational campaign is an attempt to get many people to use one or more recommended practices that will help solve a particular problem. However, not all problems are adapted to the use of a campaign. A problem selected for a campaign must be one that many people recognize as important.
A campaign should deal with only one problem at a time. It is best to emphasize one important practice that will do a lot to solve the problem. The practice selected should be one the people will accept. A well-planned campaign does not try to teach more than people can learn at one time.
A campaign is an intense effort for a limited time. To have a successful campaign you must:
1. Plan your campaign carefully with village leaders.
� Decide what you wish to accomplish. Set the goals so everybody can understand.
� Decide how to involve the people.
� Plan the activities and methods you will use, such as demonstrations, tours, radios, home visits, a fair, exhibits, etc.
� Plan who is to do each method.
� Plan a schedule of events.
� Set a starting and ending date.
� Plan for any materials and supplies needed.
� Choose a recognized problem that is important to a large number of people.
� Offer a solution the people can and will accept.
� Emphasize one idea at a time.
2. Begin the campaign on the date set. Open the campaign with some kind of dramatic meeting to explain the problem and the goals. Make it fun for everyone as well as a learning experience. The program might also include other activities to attract interest and attention such as:
� A parade of young people with campaign banners.
� A film or filmstrip. Often the Ministry of Health or Agriculture has films suitable for this kind of meeting.
� Some songs about the subject of the campaign.
� A skit on what to do.
3. Carry out all activities as planned. Keep the interest and attention of the village focused on your campaign. Demonstrate the practices you are recommending, for example:
� Burying night soil in pits and dusting the pits.
� Whitewashing walls of houses. This demonstration might be followed by a contest on whitewashing houses.
� Building latrines.
Make follow-up visits to encourage families and publicize individual success stories.
4. End the campaign dramatically. Set a definite time to end the campaign. Feature the final day so the people can share the satisfaction of completing the project. This is a good time to report results to the people. This day, like the starting day, is a time to invite an important person. Dinners, picnics, or rallies will encourage all the people who took part in the campaign to come and rejoice in its success. This is an occasion to recognize community leaders for their work.
5. Evaluate your results. Ask yourself these questions:
� What changes did you expect in knowledge, attitudes, and skills?
� What evidence do you have that the changes were made?
� Who is carrying out the practices recommended in the campaign?
Use several ways to collect information from the people, such as personal interviews on farm and home visits, a show of hands at meetings, and questionnaires. Try to find out not only the number of families who adopted the recommended practices, but which campaign methods worked best. Ask the leaders and members of the campaign committee for their opinions on the effectiveness of the campaign and for suggestions on how to improve future campaigns. This will help you to avoid making the same mistakes in future campaigns.
The following campaigns have been successful in various countries:
|
Better Rice |
Healthy Chicks |
|
Clean Up |
Grow More |
|
Malaria Control |
Vegetables |
|
Improved Kitchen |
Healthy Baby |
|
Floors |
Improved Stoves |
In many rural villages, finding a place large enough for people to meet is often a problem. The school is sometimes used as a village hall or general meeting place. But the school building is occupied for much of the year, and generally there is no other suitable place. It is better to have a special place where village groups know they can come any time to meet together.
The step-by-step development of a community center in one village shows how to begin where the people are and lead them forward to new concepts.
In this small rural community, incomes were low and living conditions were about the same as in other communities in the area. The local village home economics worker had been working in the community for about a year and she knew every home. She had taught the women individually in their own kitchens and in groups under the trees. She had organized a girls' club which now met regularly and had secured the interest and cooperation of the people.
As the women continued to come together to learn, they became interested in organizing a club. This was a new experience for them. Meetings were held in the yards, for hardly a home was large enough for an inside meeting, and there were no chairs to sit on. The school could not often be used for daytime meetings because there was no space when school was in session. They began to wonder if they could get a place where they might meet together regularly more easily.
They asked the advice and help of their husbands and the local agriculturist and held a joint meeting in the school building to see what could be done. Some of the group knew of two or three houses in which no one was living. One of the larger vacant houses had one rather large room and two smaller rooms. The owner agreed that the community could use the building for 5 years, rent free, in exchange for making needed repairs The house needed much work before it could be used.
The committee that had contacted the owner suggested raising money to buy some of the material needed to fix the house. The women's club sponsored a festival. Other committees, including the boys and girls, helped plan and arrange for the festival. It was quite a success. With the money they raised and the labor they donated, the villagers put the house in a usable condition.
The women's club thought it would be helpful if the house served not only as a village center or village hall but also as a demonstration The women and girls made much of the furniture. The men and boys helped with the car-house with furnishings suitable for their own homes and within their own means. The men also liked this idea. Accordingly, every piece of furniture was made by the people themselves. pentry and borrowed a fence-making machine from a nearby large plantation owner to make the wire fence around the yard. The men improved the road to the center.
When the center was finished, the kitchen demonstrated a well-built stove, simple homemade cupboards, shelves, and work space. The light, airy bedroom showed a homemade bed and a mattress of corn shucks, a baby bed, a simple wardrobe, and a dressing table made of wooden boxes. The living room furniture included a homemade sofa with corn shuck mattress which could be used for both sitting and sleeping, a simple homemade chair, wall shelves, and a table with bamboo legs. All the furniture was painted and made attractive. The furnishings were of durable and inexpensive materials, but they were colorful.
A sanitary toilet, protected water supply, clean and attractive yard with grass and flowers, and a vegetable garden in which plants and seedlings were grown for distribution to the people were important parts of the total demonstration.
The center became a busy place. In addition to the women's and girls' clubs, other village organizations held their meetings in it. Demonstrations were given and classes conducted for women and girls, farmers, and school boys and girls. Because of the great need for furniture in village homes, popular classes in carpentry taught young and old to make the furniture they admired in the center. Baby beds, dressing tables, and good corn shuck mattresses were made by the dozen.
Homemakers would drop by to use the community sewing machine which the women's club had raised money to buy. A farmer would come to help his wife or son or daughter with a piece of furniture they were making. A club boy or girl might come by late in the afternoon to get some plants to set out in his home garden.
A pre-school program was begun at the center From 30 to 40 children came each morning for about 2 hours. They were given milk provided by the Ministry of Health. They were taught simple health practices and how to do for themselves and play together. Often the local doctor or public health nurse gave examinations.
The mothers volunteered their services each morning to help the home economics worker prepare the food and care for the children. In this way, they learned food preparation, sanitation, better care for their children, and the values and satisfaction of participating in a community enterprise. It was easy to get their cooperation and help in work which benefited their children. It was the first community work for most of them.
When the village workers were making individual farm and home visits, the center was kept open by a club member. The women's club took responsibility for upkeep of the center and equipment and asked help from the other village people. This center provided not only a place where group activities could be conducted, but also a chance to develop community interest and a feeling of belonging. It also demonstrated how people could work together to do things for the benefit of all, that no one person or family was able to do alone.
This established meeting place, where the people of the village knew they were welcome to come to work, learn, plan, and carry out their plans, became an important addition to the village.
Some people will come to a meeting just to hear you talk. Many others will stay at home unless you do something to make the meeting more interesting. Those who do come will learn more easily and remember more if you have something for them to see as you talk. There are many kinds of visual aids for you to use. You can make many of them yourself. There are posters, photographs, pictures, flannel-graphs, flip charts, flashcards, bulletin boards, filmstrips, and slides. You may think of others. Remember that a poor visual aid is worse than none at all. It must be large enough for the audience to see it well.
Village people can help you do these, and it will please them to be asked. If you have a chalkboard or blackboard, you can write on it as you and your audience talk about their problems. This is a way to help everybody remember the important points as you talk. All of these things help people to understand and remember what you want them to learn.
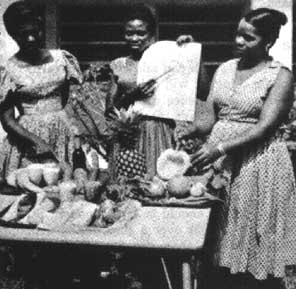
Use real objects in your teaching whenever possible. If you are talking about foods needed for health, show the real foods. Women will remember better if you hold up a bunch of spinach than if you use a picture of greens. If you are discussing tomato diseases, show diseased tomatoes and good tomatoes.
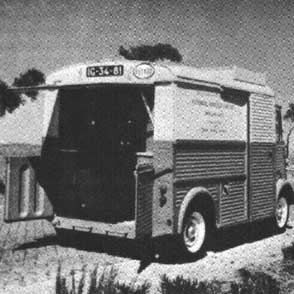
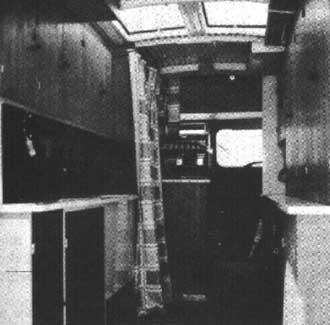
These are usually real objects treated and mounted in a special way to keep them. For example, weeds, insects, seeds, and diseased plants or leaves may be mounted on cardboard, kept in jars, etc., so you can show them to people. Showing villagers the life cycle of boll worms may help them recognize the pest.
Models are small replicas of real objects. You may want to use a model when the real object would be too large to move about. For example, you might use a model of an improved stove or a house to show how a recommended change would look.
Photographs can show the people you work with taking part in extension activities. Good photographs of village activities can be a real aid to teaching. Photographs can show how something was before a result demonstration was carried on. If a picture is taken before and then after improvements are made to a house in the village, people can compare them.
Each photograph should illustrate one point only. It should be large enough for a group to see when you hold it up in front of them. Photographs can also be used on a bulletin board or in an exhibit.
A blackboard or chalkboard is an effective visual aid when it is used properly. It is not expensive. It has a surface on which you may write with chalk. Green or black paint makes the best surface on which to write with white or colored chalk.
You can make a chalkboard from a piece of plywood 30 by 40 inches. In an emergency you can use cardboard or carton material. Paint this board with special chalkboard paint. You can make this chalkboard paint by using 1 to 1� parts of kerosene, 1 part of varnish, and 1 part of lamp black. Stir in enough powdered pumice to make the painted surface slightly gritty.
If you want to carry the board from one place to another, make it in two pieces and put hinges in the middle. Fasten a small piece of wood to the inside of the fold. Slide it across the open board to keep it open.
Use a chalkboard to:
� Summarize.
� Draw pictures or diagrams.
� Write out directions.
� Develop a lecture point-by-point to help answer questions.
Plan ahead how you will use the chalkboard. If you plan to make a drawing or diagram, practice so you can do it quickly in front of your audience. Keep drawings or diagrams simple.
Stand so your audience can see what you have put on the blackboard. Do not talk as you write because your back will be to the audience. After you write, turn around and go on with the discussion. Don't crowd words on the board. They are too hard to read.
A flannelgraph can add color and variety to your teaching. It will help you most when people in your audience cannot read. It is also a big help to village people who help you as leaders and teach other people. This can be important if you have information that must go to many people very rapidly.
To make a good flannelgraph, you need a piece of cotton flannel with thick nap. A piece 30 to 40 inches should be large enough. Stretch the flannel tightly over a smooth board that is slightly smaller than the flannel. Fasten the edges of the flannel to the back side of the board.
Other materials may be used in place of flannel. Burlap, a wool blanket, a thick towel, wool rugs, or almost any cloth covered with small fibers that stick out will work very well.
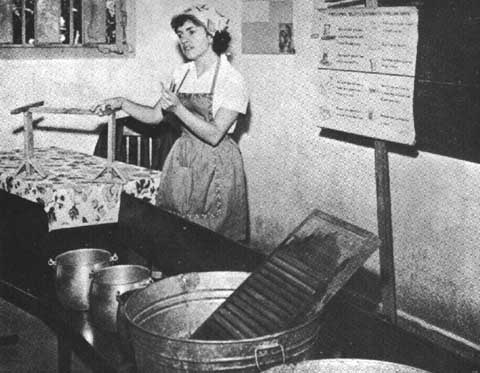
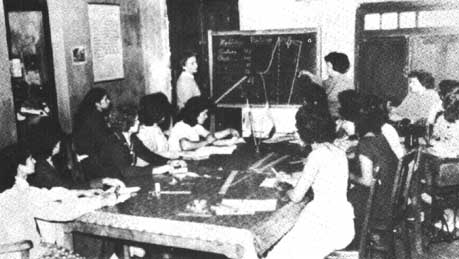
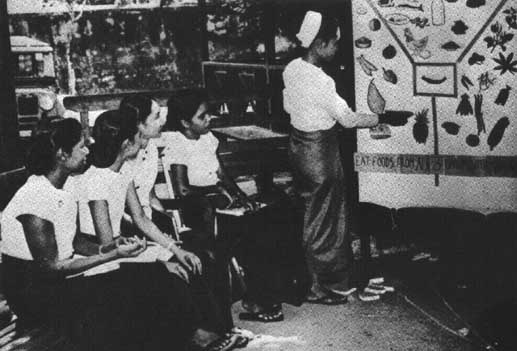
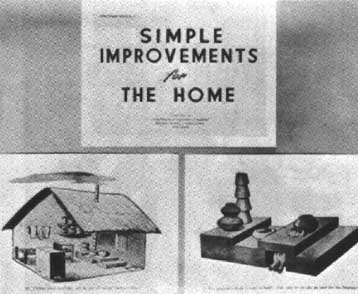
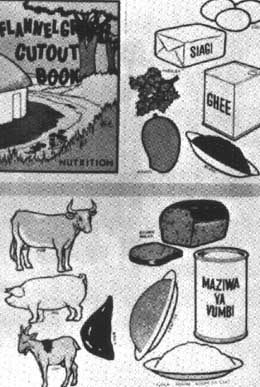
Pieces of flannel, felt, or sandpaper will stick on the flannel. Just press the pieces against the flannel on the board. They will stay until you take them away. If you paste scraps of flannel or sandpaper to the backs of photographs, other pictures, or papers, they will stick to the flannel on the board. Flannelgraph pieces will stay on better if the board is tipped back slightly.
To prepare a flannelgraph story, place the title of your story in large letters at the top of the flannelgraph. For example, CHILDREN NEED A GOOD DIET TO BE HEALTHY. Then prepare your story in drawings, photographs, or printed pictures. Cut these from their paper background and paste pieces of flannel or sandpaper on their backs. Medium or coarse grain sandpaper is better than the fine grain. Keep the story simple. The pictures should be big and bold. Arrange the pieces in the order you will place them on the board. Number them on the back. Each picture and the words you use with it should tell one step of your story. The flannelgraph is good for a "build-up" story. You can keep your audience wondering how the story will end until you put the last piece on the flannel.
Flashcards can be a series of pictures that tell a story. They help if some people in your audience cannot read. Your story might be that "Babies Need Safe Water to Drink." Or it could explain the steps of mosquito control or show how to clean dishes. Almost any simple lesson can be taught with flashcards. If most of the people can read, you may want a few words on each card along with the picture.
Flashcards should be used in small groups, not more than 30 people. The cards should be large enough for everybody to see. For 30 people they should be 22 by 28 inches in size. Use simple line drawings, cartoons, or photographs illustrating local situations on the cards. They should apply to the village in which you are working. The pictures should be in black and white, or have plenty of color if you can get it.
Keep the number of flashcards for one story down to 10 or 12. If there are too many cards the story is long and the people become tired. Study your talk and pick out the main ideas that you want the villagers to remember. Make one picture for each idea that you want to stand out.
You must know your story very well and know just what you want to say with each card. Use simple words that the village people know best. Use the names of village people when you can. Hold the cards against your body, not up in the air. Turn your body from one side to the other, so everybody can see. As you tell your story, point to important objects in the picture. Be sure your hand does not cover the card. Enjoy telling your story. You will if you know it well.
Stack the cards in order. As you finish with each card, slip it behind the others. They will then be in order for the next time. As you become skilled in telling your story, let the people have a part in it. If somebody is good at telling it, let him take the cards and use them with other groups.
A flip chart is a stack of large sheets of plain paper fastened together at the top. Write on them with a crayon before your meeting. Be sure you write large enough for the audience to see. Use each page to tell one part of your story. As you finish with a page, turn or flip it over so the next page may be seen. At the end of your story, turn the pages back and the chart is ready to use again.
You may also use the flip chart as you would a chalkboard Write on it with crayon or charcoal as you talk to your audience. If there is a wall to fasten them on, you can tear the sheets from the flip chart so the audience can see all of them at one time. In this way, the flip chart is better than a chalkboard, which must be erased when it is full. At the close of the meeting, you can pick up the sheets in order and have them to read later.
People who will not attend any kind of meeting will go to see films. For this reason, films are a good way to get people interested. Good films help you give facts in an interesting way and show new ways to do things in a short time. Because everybody can understand something from the pictures, they help teach people who cannot read. You will want to make a short talk before showing the picture. Explain the reason for the meeting and the picture. After the picture, give the people a chance to ask questions and talk about the picture. The most effective films are those that show problems, customs, and ways of living that are familiar to the people who see them.
A filmstrip is a series of still pictures on one roll of film. They may tell a story or they may explain the steps of an improved practice. To show filmstrips you must have a filmstrip projector. Some projectors do not need electricity.
This is a good way to teach because the machines are simple to operate. You can hold a picture on the screen as long as you need to talk about it. Filmstrips have another advantage. You can show a complete process, like growing rice, in one short meeting.
If you have a camera, you can take pictures of good ways to do things right in your own village and have them made into a filmstrip. This is not expensive. The people like these pictures very much because they or their neighbors may be in them and they show familiar scenes. They can take part in the discussion about them.
Some filmstrip projectors have an attachment for showing slides. There are also special slide projectors that are easy to operate. You can use slides almost as you do filmstrips. The difference is that slides are single pictures, usually in color. Each slide is mounted in a cardboard frame. The newest automatic cameras now available in many places make taking good color pictures almost a certainty. However, color film is expensive, so you need to practice until you know what makes a good picture for a slide talk.
Exhibits can be used many places. Large ones can be set up at the agricultural fair. You can put a small exhibit in your office or demonstration room. Look for other places in the village where you can set up an exhibit.
Often a storekeeper is glad to have an exhibit in his window. It attracts attention to his store. In one country, a village worker was loaned a window in a building on a main street. She kept an interesting exhibit in it all the time, changing it frequently. Another was given a corner in the Farmer's Cooperative building. The agricultural officer helped her build a permanent display frame. She used this way to tell the farmers about the women's program.
You can use an exhibit to:
1. Get attention. It must seem to say "Stop! Look!"
2. Arouse curiosity and hold attention.
3. Create a desire to know more about the subject.
4. Convince the people that something can be done.
5. Tell a simple story at a glance.
To have a good exhibit you will need to decide:
1. Who is your audience? Who do you want to reach with your exhibit?
2. Why are you exhibiting? What is your goal ?
3. What will you exhibit? What subject?
4. Where will you show the exhibit?
5. How will you make the exhibit ? What will be its design and what will you use?
A good exhibit has one central idea. It may tell a story. But it should be simple, attractive, uncluttered, and easy to understand.
A poster will help get people interested so they will come to your meeting, but it cannot teach very much by itself. It will help remind people when the meeting will be held and where to come. A poster is also good to remind people to carry out a recommended practice such as using well water, not river water.
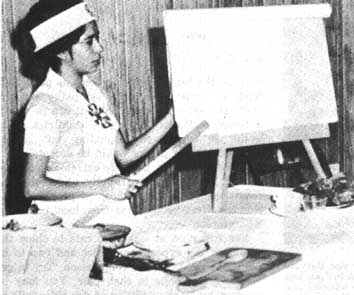

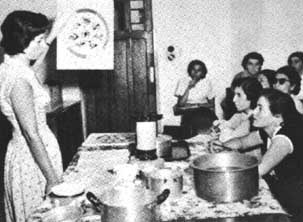
A poster should be read at a glance. Your poster should have just one idea: for example, to kill flies. Use just a few simple words so people will get the idea quickly. Make it big so it is easy to see. The words and pictures should not be crowded together. Place it where it will be seen by the intended audience.
Animals can be used effectively to teach nutrition. When people can see the effects of certain foods on the growth and development of animals, they will be impressed.
The animals used in teaching must not cost much, be easy to care for and handle, and come from healthy stock. Small rapid-growing animals are best as they respond quickly to changes in diet.
The animals should be attractive enough to have popular appeal. They should not, however, be the types commonly kept as pets. This tends to arouse too much sympathy for the badly fed ones. Different animals are prized in different cultures. In some countries, rats would be considered disgusting but guinea pigs, rabbits, or chicks would be acceptable. If rats are acceptable, they are extremely suitable as they are small, grow rapidly, and their food requirements resemble those of people. White rats can often be obtained from local biological laboratories.
You will need at least two rats to show the results of the experimental diet and two to be fed the normal diet for comparison. Try to get a male and female in each pair. You may be recommending the addition of dry skim milk to the diet of small children. Feed one pair of rats the regular food a child receives. The other two can be fed the same diet with the milk added. Soon the people will see a difference in their development.
You can make rat cages of wire screening. One village worker carried two guinea pigs with her from village to village and took them to meetings where people could see the difference in their growth.
A museum can provide a permanent place for you to keep your teaching aids and reference materials. Village people can come to look whenever it is convenient for them. A school, an agricultural extension office, a health center, or a church may be able to provide a room for this purpose. At first, you may need only enough wall space for a few display shelves.
In some countries, museums like this are called "collections". They may contain models, preserved specimens, living plants or animals, graphs, charts, photographs, and other visual aids.
U. S. Measure
|
Weight-Avoirdupois |
|||
|
1 ounce |
= 28.3495 grams |
||
|
16 ounces |
= 1 pound |
= 453.59 grams |
|
|
2,000 pounds |
= 1 ton |
= 907.18 kilograms |
|
|
Liquid Measure |
|||
|
1 fluid ounce |
= 29.573 milliliters |
||
|
8 fluid ounces |
= 1 cup |
= 0.2366 liter |
|
|
2 cups |
= 1 pint |
= 0.4732 liter |
|
|
2 pints |
= 1 quart |
= 0.9463 liter |
|
|
4 quarts |
= 1 gallon |
= 3.7853 liters |
|
|
British Imperial gallon (4 Imperial quarts) |
= 4.546 liters |
||
|
Dry Measure |
|||
|
1 pint |
= 33.60 cu. in. |
= 0.5505 liter |
|
|
2 pints |
= 1 quart |
= 1.1012 liters |
|
|
8 quarts |
= 1 peck |
= 8.8096 liters |
|
|
4 pecks |
= 1 bushel |
= 35.2383 liters |
|
|
1 British dry quart |
= 1.032 U.S. dry quarts |
||
|
Cubic Measure |
|||
|
1 cubic inch |
= 16.387 cubic centimeters |
||
|
1,728 cubic in. |
= 1 cu. Ft |
= 0.0283 cubic meter |
|
|
16 cubic feet |
= 1 cord foot (for measuring firewood) |
||
|
8 cord feet |
= 1 cord |
= 3.625 cubic meters |
|
|
Linear Measure |
|||
|
1 inch |
= 2.54 centimeters |
||
|
12 inches |
= 1 foot |
= 0.3048 meter |
|
|
3 feet |
= 1 yard |
= 0.9144 meter |
|
|
5,280 feet |
= 1 mile |
= 1,609.3 meters |
|
|
Square Measure |
|||
|
1 square inch |
= 6.452 square centimeters |
||
|
144 square inches |
= 1 square ft. |
= 929 square centimeters |
|
|
9 square feet |
= 1 sq. yard |
= 0.8361 square meter |
|
|
43,560 sq. ft. |
= 1 acre |
= 0.4047 hectare |
|
|
640 acres |
= 1 sq. mile |
= 259 hectares |
= 2.59 square kilometers |
The Metric System
|
Weight |
|||
|
10 grams |
= 0.8527 ounce |
||
|
1 kilogram |
= 2.2046 pounds |
||
|
1 metric ton |
= 2,204.6 pounds |
||
|
Capacity Measure |
|||
|
1 centiliter |
= .338 fluid ounce |
||
|
1 liter |
= 1.0567 liquid quarts or 0.9081 dry quart |
||
|
1 decaliter |
= 2.64 gallons or 0.284 bushel |
||
|
1 kiloliter |
= 264.18 gallons or 35.316 cubic feet |
||
|
Volume Measure |
|||
|
1 cubic centimeter |
= 1 milliliter |
= .06102 cubic inch |
|
|
1 cubic meter |
= 36.314 cubic feet |
||
|
(the unit is called a stere in measuring firewood) |
|||
|
Linear Measure |
|||
|
1 centimeter |
= 0.3937 inch |
||
|
1 meter |
= 39.37 inches |
= 3.28 feet |
|
|
1 kilometer |
= 0.621 mile |
||
|
Square Measure |
|||
|
1 square centimeter |
= 0.16499 square inch |
||
|
1 square meter |
= 1 centiare |
= 1,549.9 sq. in. or 1.196 sq. yds. |
|
|
1 sq. hectometer |
= 1 hectare |
= 2.471 acres |
|
|
1 sq. kilometer |
= 100 hectares |
= 0.386 square mile |
|
OFFICE OF INTERNATIONAL EXTENSION
Federal Extension Service
U.S. Department of Agriculture Washington, D. C. 20250, U.S.A.
Extension Development Around the World-Guidelines for Building Extension Organizations and Programs
Rural Youth Clubs Around the World-A Handbook for Developing Programs
Guide for Village Workers-Extension Methods, ESC-562
Issued by Government of India, Ministry of Food and Agriculture and the Community Projects Administration, in cooperation with Indian Council of Agricultural Research, New Delhi. Reprinted by Federal Extension Service.
Method Series
Seeing Is BELIEVING-How to Conduct a Result Demonstration
Showing How-The Demonstration Teaching Method
Farm and Home Visits
Educational Tours
Educational Campaigns
Result Demonstrations - Guide and Checklist, FES ER&T-154 (9-61)
Role Playing-A Teaching Method
Clean House Series, Packet C
Posture in Housework, PA-186
How to Teach Sewing Machine Use and Care PA-701
Using Visuals in Agricultural Extension Programs, ESC-561
Published by International Cooperation Administration; reprinted by Federal Extension Service.
Make Those Ideas Stick With the Flannelgraph
Published by the Scientific Service, Inter-American Institute of Agricultural Sciences, GAS, as part of the Agricultural and Home Economics Information Services to the US/AID Operations Missions in Latin America. Reprinted by Federal Extension Service.
Home Improvement Series
Soak Pit with Dishwashing Table, No. 1
How to Make a Baby's Play Pen, No. 2
Make a Calabash Washstand, No. 3
Making a Cotton Mattress, No. 4
Low Cost Beds Made at Home, No. 5
Sanitation Series
Drink Safe Water, No. 1
How to Wash Your Clothes, No. 2
Personal Cleanliness, No. 3
Wash Dishes Right, No. 4
Get Rid of Household Pests, No. 5
Dispose of Wastes, No. 6
Storing Food at Home, No. 7
Prepare and Serve Meals, No. 8
Care for Your Baby, No. 9
Make Your Own Soap, No. 10
Home Curing Fish-A Guide for Extension and Village Workers in Many Countries
Sun Dry Your Fruits and Vegetables
Home Canning of Vegetables by Salting or Brining, FES ER&T-95 (4-58)
Information adapted from Farmers Bulletin 1932 by Mrs. Nazifa Dajani, Hashemite Kingdom of Jordan. Reprinted by Federal Extension Service.
Simple Home Mechanics, FES ER&T-234 (1263)
Published by the University of Puerto Rico. Reprinted by Federal Extension Service.
Housing and Home Improvement in the Caribbean
Elsa Haglund, FAO Home Economist. Reprinted by Federal Extension Service.
Extension Teaching Methods, Circular 495
Experience with Human Factors in Agricultural Areas of the World
Six Keys to Evaluating Extension Work, PA-371
Conserving the Nutritive Values in Foods, Home and Garden Bulletin 90
Composition of Foods Used in Far Eastern Countries, Agriculture Handbook 34
Storing Perishable Foods in the Home, Home and Garden Bulletin 78
Some Fruits and Nuts from the Tropics, Miscellaneous Publication 801
Vegetable Gardening in the Tropics, Circular 32
A Family Chicken Flock for Appalachia, Leaflet 541
Raising Livestock on Small Farms, Farmers Bulletin 2224
Raising Rabbits, Farmers Bulletin 2131
A Dairy Goat for Home Milk Production, Leaflet 538
TECHNICAL ASSISTANCE BUREAU
Office of Agriculture and Fisheries
U.S. Agency for International Development Washington, D.C. 20523, U.S.A.
Child Nutrition in Developing Countries
Derrick B. Jelliffe, M.D., Department of Pediatrics and Child Care, Makerere Medical School, Kampala, Uganda
Food for Peace Around the World-Manual for Leaders in Community Feeding Programs
Village Technology Handbook
How to Make Boys' Pants
Jessie M. Taylor, Home Economics Extension Advisor, US/AID Mission to Nepal, and Sybil Bates, Home Economics Extension Advisor, US/AID Mission to Brazil
Handbook of Tropical and Sub-Tropical Horticulture
Ernest Mortensen and Ervin T. Bullard
Some Points for Consideration of Technicians Working with Villagers
Arthur F. Roper
Teaching Guide in Poultry Management
Oleen Hess, Vocational Educationist (Agriculture), AID, and Roque C. Pacariem, Supervisor of Agricultural Education, Bureau of Public Schools, Manila, Philippines
SOCIAL AND REHABILITATION SERVICE
Children's Bureau
U.S. Department of Health, Education, and Welfare
Washington, D.C. 20201, U.S.A.
Prenatal Care, Publication No. 4
Infant Care, Publication No. 8
Your Child from 1 to 6, Publication No. 30
Health Education of the Tropical Mother in Feeding Her Young Child
Derrick B. Jelliffe, M.D., Department of Pediatrics and Child Care, and F. John Bennette, Senior Lecturer, Department of Preventive Medicine, Makerere Medical School, Kampala, Uganda. Reprinted by Children's Bureau.
NUTRITION PROGRAM
National Center for Chronic Disease Control
Health Services and Mental Health Administration
Public Health Service
U.S. Department of Health, Education, and Welfare
9000 Rockville Pike
Bethesda, Maryland 20014, U.S.A.
Food Composition Table for Use in Africa
THE INSTITUTE OF NUTRITION OF CENTRAL AMERICA AND PANAMA
Apartado Postal No. 11-88
Guatemala City, Guatemala
Food Composition Table for Use in Latin America
FOOD AND AGRICULTURE ORGANIZATION OF THE UNITED NATIONS
Publications may be obtained from the local sales agents or Distribution and Sales Section, FAO, Via delle Terme di Caracalla, 00100, Rome Italy.
Child Care-A Hand book for Village Workers and Leaders
M. E. Keister, Research Associate, Institute of Child and Family Development, University of North Carolina, Greensboro, N.C., U.S.A.; formerly Home Economics Officer, FAO
Visual Aids in Nutrition Education-A Guide to Their Preparation and Use
Alan C. Holmes, FAO Consultant
Our Foods-A Handbook for Educationists in West Africa, H. and M. Dupin
Human Nutrition in Tropical Africa
Michael Latham, Professor of International Nutrition, Cornell University, Ithaca, N.Y., U.S.A.; formerly Medical Officer 1/c, Nutrition Unit, Ministry of Health, Dar-es-Salaam, Tanzania
Poultry Keeping in Tropical Areas
Werner Thomann, Poultry Production Specialist, Animal Production and Health Division
World Food Problems
Protein at the Heart of the World Food Problem, No. 5
Rice-Grain of Life, No. 6
The State of World Fisheries, No. 7
Freedom From Hunger
Nutrition and Working Efficiency, No. 5
Education and Training in Nutrition, No. 6
World Food Program Studies
Food Aid and Education, No. 6
FAO Nutritional Studies
Rice and Rice Diets, No. 1
Maize and Maize Diets-A Nutritional Survey, No. 9
Calorie Requirements, No. 15
Legumes in Human Nutrition, No. 19
W. R Aykroyo and Joyce Doughty, Department of Human Nutrition, London School of Hygiene and Tropical Medicine, Great Britain
Learning Better Nutrition-A Second Study of Approaches and Techniques, No. 20
J. A. S. Ritchie, Department of Human Nutrition, London School of Hygiene and Tropical Medicine, Great Britain
FAO Nutrition Meetings Report Series
Calcium Requirements, No. 30
Protein Requirements, No. 37
Requirements of Vitamin A, Thiamine, Riboflavin, and Niacin, No. 41
Miscellaneous
Encouraging the Use of Protein-Rich Foods
John Fridthjof, Food Promotion Expert, Nutrition Division
RED CROSS
Copies of Red Cross publications may be obtained by requesting them through your local Red Cross.
Home Nursing Textbook
Nursing Services, American National Red Cross
First Aid Textbook
American National Red Cross
U.S. GOVERNMENT PRINTING OFFICE: 1971 0-388-108
GPO 884-447
Since 1961 when the Peace Corps was created, more than 80,000 U.S. citizens have served as Volunteers in developing countries, living and working among the people of the Third World as colleagues and coworkers. Today 6000 PCVs are involved in programs designed to help strengthen local capacity to address such fundamental concerns as food production, water supply, energy development, nutrition and health education and reforestation.
Loret Miller Ruppe, Director
Everett Alvarez, Jr. Deputy Director
Richard B. Abell, Director, Office of Programming and Training Coordination
Peace Corps overseas offices:
BELIZE
P.O. Box 487
Belize City
BENIN
BP 971
Cotonou
BOTSWANA
P.O. Box 93
Gaborone
CAMEROON
BP 817
Yaounde
CENTRAL AFRICAN REPUBLIC
8P 1080
Bangui
CHILE
Casilla 2.7-D
Santiago
COSTA RICA
Apartado Postal 1266
San Jose
DOMINICAN REPUBLIC
Apartado Postal 1414
Santo Domingo
EASTERN CARRIBBEAN
Including: Antigua Barbados, Grenada, Montserrat, St.. Kitts-Nevis, St .Lucia, St . Vincent, Dominica
"Erin Court"
Bishops Court Hill
P.O. Box 696-C
Bridgetown, Barbados
ECUADOR
Casilla 635-A
Quito
FIJI
P.O. Box 1094
Suva
GABON
8P 2098
Libreville
GAMBIA, The
P.O. Box 582
Banjul
GHANA
P.O. Box 57 96
Accra (North)
GUATEMALA
6a Avenida 1-46
Zona 2
Guatemala
HONDURAS
Apartado Postal C-51
Tegucigalpa
JAMAICA
9 Musgrove Avenue
Kingston 10
KENYA
P.O. Box 30518
Nairobi
LESOTHO
P.O. Box 554
Maseru
LIBERIA
Box 707
Monrovia
MALAWI
Box 208
Lilongwe
MALAYSIA
177 Jalan Raja Muda
Kuala Lumpur
MALI
BP 85
Bamako
MAURITANIA
BP 222
Nouakehott
MICRONESIA
P.O. Box 336
Saipan, Mariana
Islands
MOROCCO
1, Rue Benzerte
Rabat
NEPAL
P.O. Box 613
Kathmandu
NIGER
BP 10537
Niamey
OMAN
P.O. Box 966
Muscat
PAPUA NEW GUINEA
c/o American Embassy
Port Moresby
PARAGUAY
c/o American Embassy
Asuncion
PHILIPPINES
P.O. Box 7013
Manila
RWANDA
c/o American Embassy
Kigali
SENEGAL
BP 2 54
Dakar
SEYCHELLES
Box 564
Victoria
SIERRA LEONE
Private Mail Bag
Freetown
SOLOMON ISLANDS
P.O. Box 547
Honiara
SWAZILAND
P.O. Box 362
Mbabane
TANZANIA
Box 9123
Dar as Salaam
THAILAND
42 Sol Somprasong 2
Petchburi Road
Bangkok 4
TOGO
BP 3194
Lome
TONGA
BP 147
Nuku'Alofa
TUNISIA
8, Ave. Louis
Braille
Tunis
UPPER VOLTA
BP 537-Samandin
Ouagadougou
WESTERN SAMOA
P.O. Box 880
Apia
YEMEN
P.O. Box 1151
Sana'a
ZAIRE
BP 697
Kinshasa